

Can we connect 2 wifi connections simultanously to increase speed from Dell inspirion 1420 laptop? 12.04 - How to control Brightness. Bumblebee. Disable the Optimus discrete graphics GPU in Ubuntu using bbswitch. I’ve recently made the mistake of purchasing the Asus K56VM laptop.
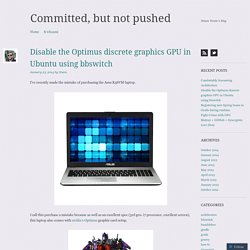
I call this purchase a mistake because as well as an excellent spec (3rd gen. i7 processor, excellent screen), this laptop also comes with nvidia’s Optimus graphic card setup. In case you’re not familiar with the Optimus setup, it basically means that your laptop contains 2 graphic cards – 1 that’s built in to the Intel processor, and 1 discrete standalone. Given the proper drivers, and taking into account workload and power consumption, your OS can seamlessly toggle between the 2 cards. If you use Windows as your OS, everything works nice and dandy; If you use a Linux-based OS, you’re in for a world of pain: Both GPUs are on and active.The HDMI output is “hardwired” to the discrete GPU.The VGA output is “hardwired” to the internal GPU.Only the VGA output works by default.You can work with only one output at a time.You can only toggle between outputs using an external project such as Bumblebee.
Installing bbswitch. Bumblebee. Turn Off Discrete nVidia Optimus Graphics Card in Ubuntu. This tutorial is going to show you how to turn on/off the discrete nVidia graphics card on nVidia Optimus Ubuntu laptop.
For now, nVidia Optimus doesn’t support Linux system. If you have two graphics card, an integrated Intel graphics card and a discrete NVIDIA card, you can use bumblebee to make this Nvidia Optimus enabled laptop work in GNU/Linux system. Or, here’s the way to turn off discrete nVidia graphics card: 1. Install bbswitch bbswitch is a kernel module for toggling the power on nVidia Optimus video cards. Open terminal from the dash home, install bbswitch with 3 commands:
What are things to do after installing Ubuntu 13.10? Ubuntu 13.10 (code-named "Saucy Salamander") was launched on 17 October 2013, with all the latest goodies inside.
Once you download and install it on your computer, what are the things to do next? In other words, what are the essential or useful apps to install? In this article, I will share my experience with the latest Saucy Salamander (more specifically Kubuntu 64-bit) installed on my laptop. Linux FAQs on Raspberry Pi. What Are the Linux Skills/tools/tricks Required to Become a Hacker? Enable USB Support for Virtualbox in Ubuntu 14.04 Host. Do you have USB issues with Virtualbox in your Ubuntu host?
Well, this quick tutorial will show you how to get USB work in Virtualbox guest easily in three steps! 1. First of first, you must install Virtualbox using the .deb package from the official link below: Virtualbox for Linux Download page If you’ve installed an old version from Software Center, please remove it and re-install the latest version from the above link. After you properly installed Virtualbox in Ubuntu, do: 2. Sudo usermod -a -G vboxusers USERNAME Replace USERNAME with your current login user name. 3. Log out current Ubuntu (host) session, and log back. Change and Monitor CPU Frequency Scaling in Ubuntu 11.04 with Indicator-cpufreq. Indicator-CPUfreq is a modification of previous CPU speed switching applet comes with Ubuntu 10.10 and older.
The applet written by Артём Попов can be used in Ubuntu 11.04 to change and monitor CPU speed due to Gnome panel will be going away. The applet provides 4 modes: Conservative, Ondemand, Performance, and Powersave. It is useful especially for Ubuntu Laptop to delay the use of battery while working outside. Install To install the applet, open up a terminal window from Applications -> Accessories menu and install from Artem’s PPA: sudo add-apt-repository ppa:artfwo/ppa sudo apt-get update sudo apt-get install indicator-cpufreq Alternatively, click following link to choose the latest indicator-cpufreq and download an appropriate package in its drop-down menu.
Indicator-CPUfreq in launchpad.net After installation, press Alt+F2 and type “indicator-cpufreq” to launch the applet, you can also make it launch at every log-in by adding it to System>Preferences>Startup Applications. 10 Awesome Indicator Applets for Ubuntu’s Unity Desktop. If you’ve used Ubuntu a while, you might remember GNOME applets – icons that sat on your panel and gave you access to controls and information.
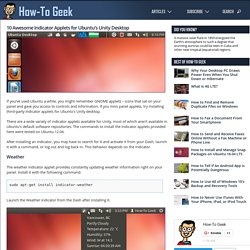
If you miss panel applets, try installing third-party indicator applets for Ubuntu’s Unity desktop. There are a wide variety of indicator applets available for Unity, most of which aren’t available in Ubuntu’s default software repositories. The commands to install the indicator applets provided here were tested on Ubuntu 12.04. After installing an indicator, you may have to search for it and activate it from your Dash, launch it with a command, or log out and log back in. Getting Started with Gentoo Linux – Gentoo Linux. Install and usage · Bumblebee-Project/Bumblebee Wiki. Here you will find instructions in many ways to install, test and use Bumblebee.
Install The best and recommended way to install Bumblebee is through your distribution repositories. If not such packages exist, then you can still install Bumblebee manually from source. Install from packages ArchLinux AUR Package: ArchWiki: Chakra Chakra Wiki: Debian Debian Wiki: