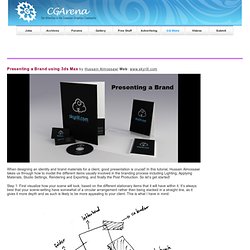

Le Blog des Tutos Vray et 3dsMax en français par mattguetta. Presenting a Brand using 3ds Max. When designing an identity and brand materials for a client, good presentation is crucial!

In this tutorial, Hussain Almossawi takes us through how to model the different items usually involved in the branding process including Lighting, Applying Materials, Studio Settings, Rendering and Exporting, and finally the Post Production. So let’s get started! Step 1: First visualize how your scene will look, based on the different stationary items that it will have within it. It’s always best that your scene-setting have somewhat of a circular arrangement rather then being stacked in a straight line, as it gives it more depth and as such is likely to be more appealing to your client. This is what I have in mind: Step 2: We will start by creating each stationary item and positioning them one by one. Step 3: Rotate it 90 degrees so it’s standing. The importance of true high dynamic range in HDRI maps. The dynamic range of a HDRI map is usually expressed in number of EV's or F-stops.

EV stands for exposure value, and 1EV corresponds to one full stop of light on a camera. For example going from 1/400s exposure time to 1/200s, is going up one full stop, or 1EV. The number of EV's is not directly related to the number of pictures that are used to create the HDRI map. Many cameras can also expose the image with 1/2 stops, or even 1/3 stops. So if you take 12 different exposures but with 1/3 stop interval, you capture in fact only 4 full stops or 4 EV's! All this confusion results in many websites putting up random numbers next to their HDRI's as they please.
As a guideline, you can use these values to make sure if the claimed numbers are correct or not: Sunny exterior scene You're looking for 10 to 13 EV's. 13 EV's means for example going from 1/4000s to 1s of exposure time. So people claiming 25EV's or more are simply crazy, or not getting it right. Vray for 3d Studio Max Tutorials. So we loaded a hdri map in the vray reflection environment slot.

Hit render and look at the result. The reflections look very strong! Actually the material didn't become more reflective, it just got a complete environment to reflect in so the reflections are simply more prominent now! The material has a medium grey reflection color, which means about 50% reflection strength, this is actually a lot. Next to the reflection color is a small checkbox: "Fresnel reflections". Here's a tutorial for more info about fresnel and other material properties. The Fresnel option depends on the Index Of Refraction of the material. For now, unpress it and change the Fresnel IOR to 1.3. Render again, and notice the reflections now: in the center of the object the reflections are less strong, while the sides of the object still reflect a lot. When you enter 1.0, all reflections will be gone... Experiment yourself with reflection color, fresnel IOR and diffuse color to see the effects on the material.
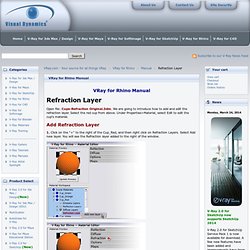
Refraction Layer - VRay for Rhino Manual. VRay for Rhino Manual Refraction Layer Open file: Cups-Refraction Original.3dm.

We are going to introduce how to add and edit the refraction layer. Select the red cup from above. Under Properties>Material, select Edit to edit the cup's material. Add Refraction Layer 1. Controlling the amount of transparency 2. 3. The color of refractive materials When you want to apply color to a refractive material, the best way to do this is through the Fog Color, which is located to the lower right of the Refraction dialog box. 4.
The first image below is what you will get. Fog Settings Explained The appearance of Fog depends on three parameters; Fog color, Fog Multiplier, and object size. Fresnel IOR: 1.55 Refract IOR: 1.55 IOR: 1.55 Fog Color: R244, G250, B230.