
Allegorithmic releases free parquet-creation tool. Wednesday, April 25th, 2012 | Posted by Jim Thacker How to use Allegorithmic’s free MakeIt A Parquet tool to create a parquet floor via the Substance system included in Maya 2012.

A 3ds Max 2012 version of the tutorial is available here on Allegorithmic’s website. Allegorithmic has released MakeIt A Parquet, its automated tool for generating realistically randomised parquet floors, as a free download. MakeIt A Parquet is based on the Substance procedural texture system built into 3ds Max and Maya from the 2011 Subscription Advantage Packs onwards, and can accept any type of wood grain as a source.
The tool also forms part of Allegorithmic’s Smart Texturing Toolkit for Arch&Design product bundle. Download MakeIt A Parquet Note: we’re not sure how new this one actually is, but what the heck. Tags: 3ds max, Allegorithmic, free, MakeIt A Parquet, Maya, Smart Texturing Toolkit for Arch&Design, Substance. QUIDAM-MAX-UNITY Part 1. Google Traduction. Ben Mathis. Download PDF Normal Map Workflow This tutorial will explain my workflow when making a normal map for a character.

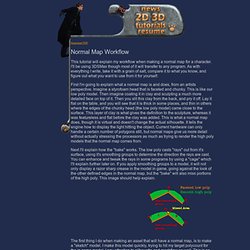
I'll be using 3DSMax though most of it will transfer to any program. As with everything I write, take it with a grain of salt, compare it to what you know, and figure out what you want to use from it for yourself. First I'm going to explain what a normal map is and does, from an artists perspective. Next I'll explain how the "bake" works. The first thing I do when making an asset that will have a normal map, is to make a "sketch" model.
Layers are extremely important when creating normal maps in max. I keep my sketch model on a layer called "low". Now comes time to tighten up your sketch model to match up with the high poly.
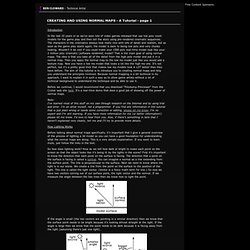
Web page. Tutorial - Tips & Tricks for Normal Mapping. Normal Mapping Tutorial by Ben Cloward - page 1. Introduction In the last 10 years or so we’ve seen lots of video games released that use low poly count models for the game play and then tell the story using pre-rendered cinematic sequences.

The characters in the cinematics always look really nice with lots of detail and realism, but as soon as the game play starts again, the model is back to being low poly and very chunky looking. Wouldn’t it be cool if you could make your 1500 poly real-time model look like your 2 million poly cinematic (software rendered) model? That is the main goal of using normal maps. The idea is that you take all of the detail from the high poly model and put it in a normal map. Before we continue, I would recommend that you download “Polybump Previewer” from the Crytek web site here. Note: I’ve learned most of this stuff on my own through research on the Internet and by using trial and error. How Lighting Works So how does lighting work? That’s pretty much all there is to it. Brightness = N dot L Back Next. How to Bake a Flawless Normal Map in 3ds Max.