

ReplicatorG is a simple, open source 3D printing program - ReplicatorG. Makerbot/ReplicatorG. Downloads - replicatorg - ReplicatorG is a GCode controller for RepRap compatible machines. ReplicatorG. Installing and Using ReplicatorG To take your MakerBot experience to the next level, you’ll need to download and install some software.
You can choose between MakerWare and ReplicatorG. This page helps you get started with ReplicatorG. ReplicatorG translates designs from Thingiverse, 3D design software, and all around the internet into the kinds of instructions that MakerBots understand. How to Use ReplicatorG - ReplicatorG. About Print-O-Matic. About Print-O-Matic Print-O-Matic is a streamlined interface for Skeinforge, integrated into recent versions of ReplicatorG.
It offers a limited number of configuration options and relies on the currently selected profile for the others. Replicator Windows Driver Installation. If you’re using your MakerBot Replicator on Windows, you’ll need to install a driver.
The “installer” version of ReplicatorG will try to do that automatically, and you’ll only need these directions if it fails, or if you’re doing a manual installation. To get started, plug in The Replicator and turn it on. Intro to Skeinforge. Intro to Skeinforge Skeinforge is one of the slicing engines you can use in MakerWare and ReplicatorG.
It takes the settings you enter in the Make dialog (in MakerWare) or Print-O-Matic (in ReplicatorG) and uses them to turn your 3D model into a toolpath for your MakerBot. This toolpath is generated as GCode, which is then converted to .x3g or .s3g before it's sent to your bot. You can set things like layer height and extrusion temperature through MakerWare or ReplicatorG, but Skeinforge has a lot more settings behind the scenes, and you can edit these manually by opening up the Skeinforge interface. Skeinforge is pretty complicated, and it can be very confusing, but getting familiar with even a few of the settings can let you do all kinds of cool things with your prints. Skeinforge - Wiki.
From DEMOZENDIUM Skeinforge is a tool chain composed of Python scripts that converts your 3D model into G-Code instructions for RepRap.
Updating Skeinforge manual Skeinforge Manual Update advice from Enrique for updating pages and setting up a new structure. Tutorials Allan Ecker aka The Masked Retriever BotHacker Keep it Cool! C Blair 3D Model to G-Code File for Rapman Cliff Biffle, Nick Ames & Rick Pollack Compendium of calibration information: How to Calibrate and Tune Skeinforge for your MakerBot Daniel K. Skeinforge for RapMan Dave Durant Keith Fixing CupCake Build Problems.
Dualstrusion. First, you'll need to find a dual extrusion model to print.
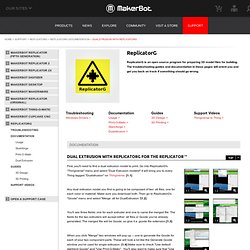
Go into ReplicatorG's "Thingiverse" menu and select "Dual Extrusion models! " It will bring you to every Thing tagged "Dualstrusion" on Thingiverse. 1.1 Any dual extrusion model you find is going to be composed of two .stl files, one for each color or material. Make sure you download both. Then go to ReplicatorG's "Gcode" menu and select "Merge .stl for DualExtrusion. "1.2 You'll see three fields: one for each extruder and one to name the merged file. When you click "Merge" two windows will pop up -- one to generate the Gcode for each of your two component parts. After you're sure that this looks good, click "Generate Gcode" in both windows. ReplicatorG will generate the two different sets of Gcode and then put them together. 1.5 When it's done, you'll find yourself looking at that .gcode file you came up with a name for earlier.
SF Profile for Support using Alternate Extruder by fros1y. A few notes: I've used the alteration support_start and support_end gcode files in order to switch the extruder.
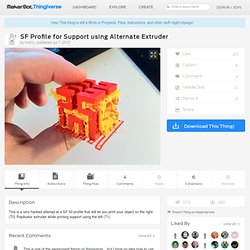
For some reason, however, T0 and T1 commands in these files don't work on the Replicator (FW v. 5.5) the way I expected. Dualstrusion uses "M108 T0" / "M108 T1" to change toolheads -- which seems really odd to me -- so I've adopted that approach. M108's that get issued out of these support_start and support_end files, however, don't make it intact into the ultimate gcode -- so I use T0 and T1 at the support_start and support_end stage, and then use the replace.csv support to create the right M108s... ugh. Also, the Dimension plugin seems to break all of this, as it does not have any understanding of these being two different E values to keep track of.
I'd love some feedback!