
SharePoint 2010: Color Coded Calendars! An expanded version of this article, along with many other customization examples and how-tos can be found in my book, SharePoint 2007 and 2010 Customization for the Site Owner.
Updated 9/6/11 Service Pack 1 broke my color coded calendar code! For details see here. The code below has been updated to work with both the pre-SP 1 and SP 1 installations. Updated 2/20/11 As I’m working on my customization book I am revisiting every one of my past “quick tips”. This update also solves most of the issues found in the comments at the end of this article, especially the “more items” problem. Back in 2008 I wrote a little blog article on adding color to SharePoint 2007 calendar events. Several things have changed between SharePoint 2007 and 2010 to prevent the old example from working. PlanetWilson SharePoint Blog: Version 2 of the Colour (color) Calendar Released.
PlanetWilson SharePoint Blog: SharePoint 2010 Colour (color) Calendar. Search results. Exploring a SharePoint Site. Exploring a SharePoint Site This video explores the makeup of a SharePoint site.
The Quick Launch, Ribbon and Content Area of the site pages are discussed. Also, the navigation scheme of the sites is explored. Changing the Theme of a Site. Changing the Theme of a Site A Site's Theme provides the look and feel of a site.

The colors, fonts, images can all be changed by applying a new Theme to a site. Themes are packages of styles and images that can be applied to a site. Creating a subsite. Creating a web page. Adding a video to a web page. Linking to other site content. Working with tables on web pages. Working with images on web pages. Checking out a web page for editing. Editing a web page. Setting titles and descriptions of lists. Creating a new view for a list. Deleting a list. Adding a column to a list. Configuring visible views for a list. Enable creating folders in a list. Enable management of content types for lists.
Working with SharePoint Calendars. Setting library title and description. Set validation settings for a library. Enabling content types for a library. Opening documents in the browser. Creating a Slide library. How do I delete a document library in SharePoint? The following article explains how to delete a document library in SharePoint.
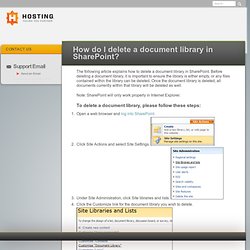
Before deleting a document library, it is important to ensure the library is either empty, or any files contained within the library can be deleted. Once the document library is deleted, all documents currently within that library will be deleted as well. Note: SharePoint will only work properly in Internet Explorer. Open a web browser and log into SharePoint.Click Site Actions and select Site Settings. Under Site Administration, click Site libraries and lists. Click OK to confirm. Creating a Discussion Board. Creating an Asset library. Creating a Document library. Creating a Picture library. Adding a library to the Quick Launch. Upload a document to a library.
Upload multiple documents to a library using drag and drop. Email a link to a document or a library. Upload multiple documents to a library by browsing to the documents. Check Out, Check In process in Document Libraries. Check Out, Check In process in Document Libraries When managing documents in document libraries, it is a best practice to utilize the Check out / Check in procedures for documents.
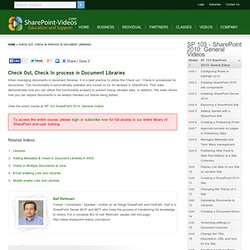
This functionality is automatically available and turned on for All libraries in SharePoint. This video demonstrates how you can utilize this functionality properly to prevent losing valuable data. In addition, this video shows how you can require documents to be always checked out before being edited. SharePoint 2010 Document Management - Part 4. You may also be interested in: O'Reilly - SharePoint 2010 at Work Editor's note: Contributor Jasper Oosterveld is a SharePoint Consultant at Wortell.
Follow him @SharePTJasper Introduction The advantage of working with a SharePoint document library is the ability to store and edit documents within the library. You have the option to create a new Office document and save it directly to the library! During the creation of the library there is an option to choose the desired template: I will just leave this at Microsoft Word for now. Overlaying multiple calendars. Subscribing to RSS feeds of lists. Restoring items from the Recycle Bin. Editing an item in a list.
Creating a Custom list. Creating a Custom list SharePoint lists can hold rows of items and their associated properties (metadata).
Deleting items from a list. Creating a list Item. Creating a Links list. Working with Quick Launch menu. Blog Site template. Use Word 2010 to post to a SharePoint blog. SharePoint 2010: Wiki Content vs. Web Part pages. SharePoint 2010 Lesson 4 - Introduction to Web Parts.mp4. Sharepointpittsburgh's Channel. SharePoint 2010 Base CSS Classes.
This will be the first of many SharePoint 2010 posts.
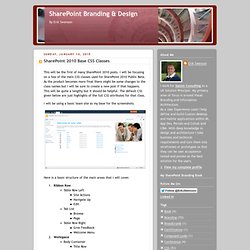
I will be focusing on a few of the main CSS classes used for SharePoint 2010 Public Beta. As the product becomes more final there might be some changes to the class names but I will be sure to create a new post if that happens. This will be quite a lengthy but it should be helpful. The default CSS given below are just highlights of the full CSS attributes for that class. I will be using a basic team site as my base for the screenshots. Here is a basic structure of the main areas that I will cover. Ribbon Row: Class/ID = “body #s4-ribbonrow” Default CSS: min-height:43px; background-color:#21374c; Comments: This is the container for all of the items in the top ribbon Table Row Left: Class/ID = “ms-cui-TabRowLeft” Default CSS: float:left; margin-top:20px; Comments: This is the container Site Actions, Navigate Up and Edit Here is what the “fgimg.png” image looks like: Workspace: Class/ID = “body #s4-workspace” Default CSS: overflow:visible !