
Learn To Use A Sewing Machine: Machine Basics. Don't let broken needles or skipped stitches ruin your sewing!
Learn how to fix common sewing machine problems in this free Craftsy class presented by Baby Lock. Whether you need to solve common sewing machine problems or want to brush up on the anatomy of your machine, Amy Alan covers all the bases in Sew Ready: Machine Basics. In this free Craftsy class presented by Baby Lock, you'll learn how to thread, clean and use your machine. Lesson plan Lesson 1. Find out more about how Craftsy classes work, and differences between free and paid classes.
Lesson 2. Meet Amy and learn the basics of your machine. Lesson 3. Get to know different feet and how to use them. Lesson 4. Troubleshoot common problems with ease! Lesson 5. Sewing Machine Feet From A to Z: Online Sewing Class. Class Description Designer, patternmaker and sewing instructor Steffani Lincecum teaches you how to identify and use 11 of the most common sewing feet.
Start with zipper and buttonhole feet, then learn how to use blind-hem and rolled-hem feet to finish your work like a pro. Finish with a tour of popular optional feet that help you achieve perfect topstitching, gathers, couching, free-motion stitching and more. Whether you're new to sewing or a longtime sewist, you're sure to learn some tips to improve the speed and accuracy of your sewing projects by starting off with the right foot in this free mini-class. Lesson Plan Lesson 1. Perfect Machine Tension Every Time. Good tension produces a smooth stitch without puckers.
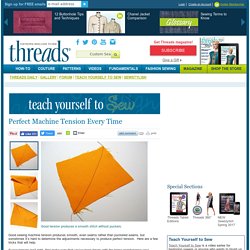
If the top and bottom threads break in exactly the same location, your tension is perfect. The threads may break in more than one place, but the top and bottom threads will both break at that location. Perfect tension causes both threads to break at exactly the same location If only one of the threads breaks, often in more than one location, that thread is too tight. Either slightly loosen that thread, or slightly tighen the other thread. Incorrect tension causes only one thread to break, usually in more than one location. Sewing Machine Tension Problems. Quilting Tension Problems: Troubleshooting Tips for Your Machine Have you ever been in the stitching groove, just to see loops or puckers pop up out of nowhere?
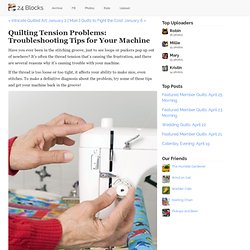
It’s often the thread tension that’s causing the frustration, and there are several reasons why it’s causing trouble with your machine. If the thread is too loose or too tight, it affects your ability to make nice, even stitches. To make a definitive diagnosis about the problem, try some of these tips and get your machine back in the groove! Also, don’t perform troubleshooting tests on your actual quilting projects! Rethread the machineThis is the quilter’s equivalent of restarting the computer when it’s not working right – seems easy enough, and it just might solve the tension issue.
Serger Basics. Sewing first vs. serging first There is some argument about this in the DiY community, and really, I think it depends mostly on what you're sewing, and personal preference.
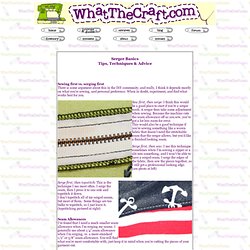
When in doubt, experiment, and find what works best for you. Sew first, then serge: I think this would be a good place to start if you're a serger noob. A serger does take some adjustment when sewing. Because the machine cuts the seam allowance off as you sew, you've got a lot less room for error. This would also be a good technique if you're sewing something like a woven fabric that doesn't need the stretchable seam that the serger allows, but you'd like a finished looking seam. Serge first, then sew: I use this technique sometimes when I'm sewing a zipper or a slit into something, and I won't be able to have a serged seam.
Serge first, then topstitch: This is the technique I use most often. Seam Allowances I've found that I need a much smaller seam allowance when I'm serging my seams. Old Sewing Machine Maintenance. According to the old Singer parts lists, that big spokey wheel on the end of your vintage Singer is the balance wheel.
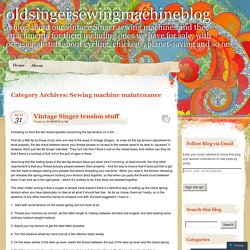
According to most folks who use a vintage Singer it’s the handwheel, so it’s the handwheel as far as we’re concerned here, and we’ll be looking at its removal and replacement, with a bit of a detour on the way. But why, pray, would anyone want to take the thing off? Well, you could be taking a machine apart because it’s in a disgusting state and cleaning it will be so much easier if you take off some of its bits. Or maybe you want to change the handwheel for a different one? You’re bored and it might be more interesting than cleaning the oven? “The clutch?” Well, the clutch is what lives behind that big chromed knob in the middle of your handwheel, and without the clutch your machine would be nowhere near as user-friendly as it is. That upping-and-downing is the motion, which you stop by unscrewing the stop motion clamp screw when you want to wind a bobbin.