
My Raspberry Pi Robot Called Charlotte. Xtion Pro Live Sensor for vision. Pictures of the build process. Current progress on Charlotte’s HUD. Vector graphics are done with openCV. Raspberry Pi mounted inside the body of the robot. PrimeSense Vision using the Raspberry Pi. Dorhout R&D LLC - Prospero: Robot Farmer. ArduSpider: Sara (My daughter´s robot) (I´d specially like the last part...)Hi All, this project could be a bit out of scope here but this is also a recycling project.

I used an old Ardupilot board and 3 old servos to construct this robot... And there is also a nice story behind this project:Some weeks ago, my daughter (4 years old) said me: "...dady, you are always playing with your flying robots, when are you going to construct a robot for me? "You can imagine my face, so I started this mini project for her... I used a very simple and minimalistic hexapod setup (only three servos for six legs). Specs:Size of body : 12.5cm x 6.5cmweight : 110 gramsMain board : Ardupilot (Atmega328)Battery : 2S460 with external 5V regulatorServos : 2x mini servos (HS81), 1x 6-9gram servoIR sensor: GP2Y0A21YK The body of the robot is constructed with a carbon & 1.5mm balsa sandwich. Happy new year to all!
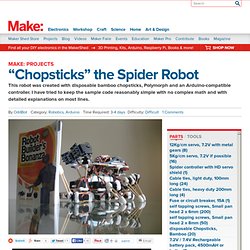
ArduSpider. "Chopsticks" the Spider Robot. Make: Projects This robot was created with disposable bamboo chopsticks, Polymorph and an Arduino-compatible controller.

I have tried to keep the sample code reasonably simple with no complex math and with detailed explanations on most lines. Multi-limbed robots such as hexapods can be very complex and expensive. This is a relatively cheap and simple 8-legged robot made with chopsticks, Polymorph and an Arduino-compatible controller. Most of the servos cost under $8 if you shop around. The construction is pretty easy but takes time as you often have to hold parts in position and wait for the Polymorph to cool. This project will show you how to make an 8-legged spider robot.
I used two pan/tilt kits fitted with IR compound eyes for close-range object tracking. "Chopsticks" the Spider Robot. Make: Projects This robot was created with disposable bamboo chopsticks, Polymorph and an Arduino-compatible controller.
I have tried to keep the sample code reasonably simple with no complex math and with detailed explanations on most lines. Mole's ModHex by moleofproduction. Print the base, a set of servo skirts, and whatever servo arms, limbs, and couplings fit your configuration.

If the skirts don't fit your servos, or the couplings don't fit your bearings, it's easy to make a new set in Sketchup. I'll upload my .skp after I've cleaned it up a bit. To make a 3-servo Hexapod like mine, you need: 1x modhex1.stl, Base 2x modhex2.stl, Left servo arm 2x modhex3.stl, Right servo arm 1x modhex4.stl, Middle servo skirt 2x modhex5.stl, Rear servo skirts 2x modhex6.stl & 2x modhex7.stl, Forward and rear legs 1x modhex8.stl & 2x modhex9.stl, Middle legs 1x modhex11.stl, forward bearing bracket 1x modhex13.stl, Middle servo arm 4x modhex14.stl & 2x modhex10.stl, Limb coupling. Sample Project: Simple Hexapod Walker. SpiderBot (Hexapod) by mind. After your modifications you need to mirror the lower and upper legs as well as the servo casing ;) This design is made for ~4.9mm (i used wood) for all parts except the ~1.8mm thick upper leg counterpart (with servo-horn embedding).

Cut List: 3 right upper and lower leg parts 3 light upper and lower leg parts 1 upper body part 1 lower body part 3 right servo casings 4 left servo casings 1 head You should lazzzor-cut it in combined mode (raster&vector) to get nice embeddings for the servo-horns and nuts. (The embeddings should be solid filled with a color and have no hairlines) I used M2 hex-head screw (12mm) as back axis for the servos. I have added some photos to see how it’s assembled. How to build a wireless hexapod robot. Here's a video of it in action.

Facebook page so you can keep up to date on v2 Have you completed this instructable? Send me pictures and I'll add it on this page! When completed, you will have a walking robot that is about 2 feet wide and stands as much as a foot tall. It has lots of room for added features and improvements so feel free to use it for your own robotics experiments or share your improvements with others. Build time is about 3-5 hours and it is not the easiest project. Tools and supplies you will need (not listed in the bill of materials): a soldering iron large phillips screwdriver small slotted screwdriver pliers wire strippers helping hands (optional, and very helpful) windows PC (with optional bluetooth) USB cable (think the square style that usually goes in a printer) electrical tape Skills you will need (or learn as you go): wire stripping soldering TIP: Get a friend or SO to help!