

Using Kohana’s DB Config » Ygam Retuta. Kohana Tutorial: For the beginners. Kohana is the framework I liked best among other PHP framework.
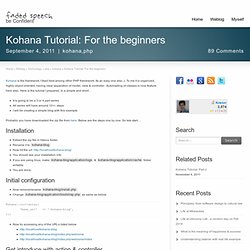
Its an easy one also ;). To me it is organized, highly object oriented, having clear separation of model, view & controller. Autoloading of classes is nice feature here also. Here is the tutorial I prepared. In a simple and short… It is going to be a 3 or 4 part seriesAll series will have around 10+/- stepsI will be creating a simple blog with this example Probably you have downloaded the zip file from here. Installation Extract the zip file in htdocs folderRename it to kohana-blogNow hit the url: should see your installation infoIf you are using linux, make kohana-blog/application/logs & kohana-blog/application/cache folder writableYou are done Initial configuration.
Tutorial : Simple ajax validation for Kohana. Kohana 3 i18n tutorial. Continuing my series on Kohana 3 (see Auth here and Validation here), I’m tackling Kohana 3 internationalization in this post.
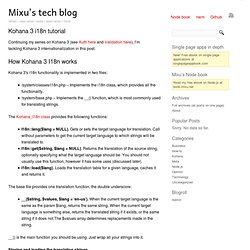
How Kohana 3 I18n works Kohana 3′s i18n functionality is implemented in two files: /system/classes/i18n.php – Implements the i18n class, which provides all the functionality. /system/base.php – Implements the __() function, which is most commonly used for translating strings. The Kohana_I18n class provides the following functions: I18n::lang($lang = NULL). The base file provides one translation function, the double underscore: __($string, $values, $lang = ‘en-us’). Kohana 3: AUTH, A2 & ACL. Some time ago I wrote a blog entry a modified demo of Wouter’s ACL & A2 using the AUTH module.
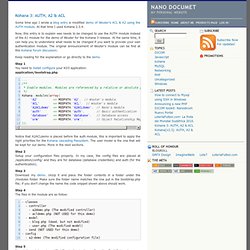
At that time I used Kohana 2.3.4. Now, this entry is to explain was needs to be changed to use the AUTH module instead of the A1 module for the demo of Wouter for the Kohana 3 release. At the same time, it can help you to understand what needs to be changed if you want to provide your own authentication module. The original announcement of Wouter’s module can be find at this Kohana forum discussion. Keep reading for the explanation or go directly to the demo. Step 1 You need to install configure your KO3 application:application/bootstrap.php. Pogopixels - Web application and widget developer. The documentation about the Auth module in Kohana 3.1 is severely lacking, and the module has changed sufficiently that existing tutorials and documentations are no longer relevant. So below is a quick tutorial on how to setup and use the module: 1) Enable the modules If not done already, enable the needed modules in bootstrap.php.
In particular, auth, database and ORM need to be enabled: <? Auth module for Kohana 3.1 using ORM Driver. One of the changes to the 3.1 release of Kohana has been the removal of the ORM driver as part of the official Auth module. To avoid the confusion that the Auth module required the ORM module, Auth now ships with only a file driver. This has left some people under the impression that in order to use the ORM, porting a driver is necessary. This is not the case, in fact, the ORM Auth driver is now living in the ORM module with all the database schema examples in MySQL and PostgreSQL.
To get started, you are first going to need to have Kohana 3.1 installed with the Auth, Database, and ORM modules enabled and configured. In your APP_PATH/config directory your auth.php configuration file needs to have the driver set to use the ORM, and a hash_key must be specified. Step-by-step guide to Kohana 3 auth. The Kohana 3 Auth model implements a set of basic functionality for authentication (login) and authorization (user rights based on roles).
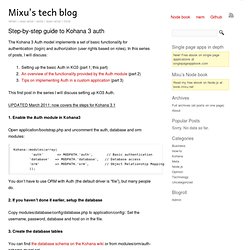
In this series of posts, I will discuss: This first post in the series I will discuss setting up KO3 Auth. Kohana Documentation. Scaling Web Applications with HMVC – techPortal. Resources for learning Kohana. Unofficial Kohana 3.0 Wiki >> start. MVC mit PHP - Das MVC-PAttern mit PHP implementieren und verwenden. Dieses Tutorial erklärt wie MVC mit PHP verwendet werden kann.
Es ist auf keinen Fall als fertiges Framework zu verwenden, es soll nur das Prinzip von Model, View & Controller erklären und eine Möglichkeit aufzeigen, wie es implementiert werden kann und dem Leser helfen, ein Gefühl dafür zu vermitteln, was MVC ist und wie es funktioniert. Eine Übersicht fertiger PHP MVC-Frameworks findet ihr hier oder hier oder hier. Trotzdem ist es natürlich nicht verboten, den Code hier auf seine eigenen Bedürfnisse anzupassen und zu verwenden. Grundlagen Was ist "MVC"? MVC steht für Model, View, Controller. Model: Das Model hat die Aufgabe, die Webanwendung mit Daten aus der Datenbank (oder von wo auch immer) zu versorgen und die Daten, wenn gewünscht, zu speichern. Nach oben Und warum "MVC"? Eine Typische PHP-Webanwendung, wie sie vor allem von Anfängern programmiert wird, besteht oft aus vielen einzelnen PHP-Dateien.
Hier kommt MVC ins Spiel. Das ganze Tutorial gibts natürlich auch zum Download. Model <?