
Create a Festive Cocktail Using Photoshop's 3D Capabilities. For many of our readers, this time of year is filled with family, friends, and celebration.

In this tutorial, we will explain how to create a festive cocktail using Photoshop's 3D capabilities just in time for your New Year's celebrations. Let's get started! The following assets were used during the production of this tutorial. Create a new document, the size is 768x1024px. Insert fabric image, we will use this texture to create background.
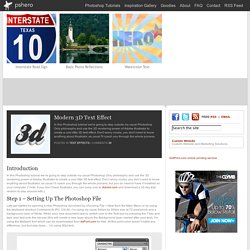
Select the bottom part of the red fabric just like on the example, use Rectangular Marquee Tool . You will get similar result. Create glass wall silhouette. In the Shape Layer Mode .The size is 145x359px. Open 3D Tools palette. You will see the 3D settings window. Click on right point to choose right spinning axis. Tilt down 3D perspective a bit. And adjust only "X" Orientation setting (-10). In order to set materials for the glass cup, make active "Materials" palette. Apply following settings for the Extrusion Material. And select 3D Axis. Modern 3D Text Effect. Introduction In this Photoshop tutorial we’re going to step outside my usual Photoshop Only philosophy and use the 3D rendering power of Adobe Illustrator to create a cool little 3D text effect.

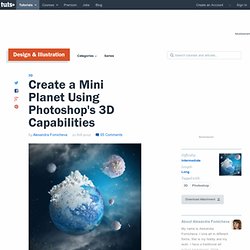
Don’t worry noobs, you don’t need to know anything about Illustrator, as usual I’ll coach you through the whole process, but you do need to have it installed on your computer. (*note: If you don’t have Illustrator, you can jump over to Adobe.com and download a 30 day trial version to play around with.) Step 1 – Setting Up The Photoshop File Lets get started by opening a new Photoshop document by choosing File > New from the Main Menu or by using the keyboard shortcut Command-N (PC: Ctrl-N). Step 2 – Convert Text To Paths With the Text tool still active, Command-Click (PC: Right-Click) on your text and choose Create Work Path. 3D Design for Table Ball & Vase. Create a Mini Planet Using Photoshop's 3D Capabilities. When most people think about Photoshop, they probably don't think about 3D.

What most people don't realize, however, is that Photoshop CS5 Extended includes some powerful tools to help you render your artwork in 3D. In this tutorial we will demonstrate how to create a mini planet using Photoshop's 3D capabilities. Let's get started! Tutorial Assets The following assets were used during the production of this tutorial. Step 1 Create a new document, the size is 1400 x 1400px, 96 pixels/inch. Step 2 Insert sky image. Step 3 Add Layer Mask to the sky layer (click Mask icon in the bottom of layers palette). Icon in the bottom menu of the Layers Palette. Step 4 Group and duplicate sky layers, move them up. Step 5 Insert stars photo. Step 6 Rotate it on 90° and apply Warp Arch transformation just like for the sky layer in previous steps.
Step 7 Duplicate stars layer, turn it on 180° and move it left and down. Step 8 Merge stars layers and apply Screen Blending Mode. Step 9 Step 10 Apply following filters.