
Free Resource for Designers - Vector graphics - Part 13. Logo Design: 40+ Must Have Tutorials. Logos a very important part of building your brand’s identity.

“Branding” yourself, is the best way to represent who you are and what you are all about. If designed properly, logos can have an enormous impact on your company’s success. The Ultimate Round-Up of Print Design Tutorials - Smashing Magazine. Advertisement Although web design is everywhere nowadays (even when we’re not at the computer it still manages to squeeze it’s way in to our everyday life), print design is still a huge part of the design industry and is everywhere we look: newspapers, posters, prints, manuals, restaurant menus, business cards – the list goes on and on.

So how do you make sure that you leave a good impression on people holding your piece of art in their hands? This is where experience and advanced print design skills come into play. Below we present 25 useful print design tutorials as well as a collection of inspirational links at the bottom of the post to improve your skills and get your imagination running wild.
These tutorials make use of Adobe Photoshop, Illustrator and InDesign, and even the experienced designers out there can give their skills a polish by taking the time to read through these tutorials to squeeze a few more tips, tricks, do’s and dont’s up their already stuffed sleeves. It's done. 40 Useful Photoshop Tutorials for Photo Manipulation. Since our last Photoshop tutorial, Photoshop Tutorials: Compilation of some stunning text effects, we got so much positive feedback that we decided to put together another collection of tutorials concentrating on photo manipulation.

In this post, you’ll find everything from Pencil Sketching Effect to Creating A Slow Motion Bullet Shot Effect in Photoshop. Now the hard part will be deciding which of these amazing tutorials you will use in your next creations. Hope you enjoy! Tutorial: Design A Killer Fashion Model Poster. Introduction: This tutorial will show you how to make a killer Fashion Model Poster using basic Photoshop functions like Layer Styles, Vector Masks and Filters like Motion Blur.
At a time when there’s more DOWNLOADING of source material than actually USING it, this tutorial will get you through the end with only three stock images—two if you have experience with Cinema 4D. Also, instead of the monotonous step-by-step form of tutorials you find all over the net, I’m using a different approach. Basically I’ll be explaining each effect separately so that you can use this elsewhere and not restrict yourself to the final image here. This tutorial has two main divisions. Part One – The backgroundPart Two – The model & effects. Each effect will be explained separately. The Secret. Preview of Final Results Step 1 Create a new document with a width of 600 and a height of 800 pixels.

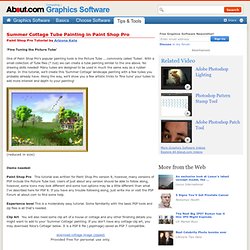
Step 2 (1)Click on the Paint Bucket tool, (2) Set the fill to pattern, (3) click the options arrow and (4)Choose Color Paper in the options window of the drop down box. Step 3. Tutorials, Design News, and Inspiration. Summer Cottage Tube Painting - Paint Shop Pro tutorial by Arizona Kate - Page 1. Paint Shop Pro Tutorial by Arizona Kate 'Fine Tuning the Picture Tube' One of Paint Shop Pro's popular painting tools is the Picture Tube ....commonly called 'Tubes'.

With a small collection of Tube files (*.tub) we can create a tube painting similar to the one above. No drawing skills needed! Many tubes are designed to be used in much the same way as a rubber stamp. Tutorials - Six Revisions. How to Make a Light Textured Web Design in Photoshop This web page design tutorial on Design Instruct (our other website) will show you how to create a beautiful, modern and subtly textured web page layout in Photoshop. continue reading »

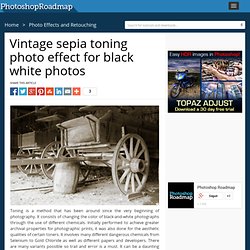
Photoshop Gradients. Andrew Jones Canson rendering in Photoshop. Vintage sepia toning photo effect for black white photos. Toning is a method that has been around since the very beginning of photography.

It consists of changing the color of black-and-white photographs through the use of different chemicals. Initially performed to achieve greater archival properties for photographic prints, it was also done for the aesthetic qualities of certain toners. It involves many different dangerous chemicals from Selenium to Gold Chloride as well as different papers and developers. There are many variants possible so trail and error is a must. It can be a daunting practice for most amateur photographers. The first thing we’re going to do is convert the color image to Black & White by using the Black & White layer adjustment found at the bottom of your layers palette.
Perhaps the earliest of toning techniques and the most common for its warm brown color is the sepia tone. In your Photo Filters window select Sepia from your dropdown menu and dial in the Density with the slider. Hope the tutorial has been helpful. Photoshop CMYK Tips. Hair painting tutorial by Diane. Making Complex Selections in Photoshop - DesignFestival » For Web Design Trends.
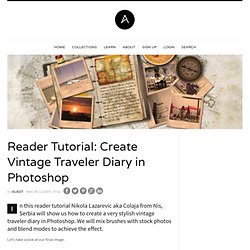
Fashion Retouching: Advanced Soft Focus. Photoshop Tutorials. E-Painting With The Art History Brush. Exclusive Photoshop Tutorials - Overview Page 1. Reader Tutorial: Create Vintage Traveler Diary in Photoshop. In this reader tutorial Nikola Lazarevic aka Colaja from Nis, Serbia will show us how to create a very stylish vintage traveler diary in Photoshop.

We will mix brushes with stock photos and blend modes to achieve the effect. Let's take a look at our final image. Let's start by creating new document in photoshop. Mine is 1680x1050 pixels. Name this file diary.psd. Download soft grunge texture from Bittbox. Now download Waterlogged Map Brushes by ~Arbenting. Select all three layers (background, background texture and map) by holding the command key (or control on PC) and left mouse click on every layer, then hit command + G (ctrl + G on PC), and group these layers in Group and named this Group "BACKGROUND". I found excellent picture of old Notebook. Now, we want to have same pictures between pages. Duplicate "notebook" layer (Command + J); Name this layer "notebook top"; Now pick up the Polygonal Lasso Tool (L) and start selecting around notebook pages.
Lower the opacity to 50%. Photoshop Tutorials. In this tutorial you will learn everything it takes to create totally belieavable rocks and stones in Photoshop. In this tutorial, we will exercise on drawing rocks, stones, cliffs or anything made of stone. There are many ways to achieve this… I will just show you my favorite one. depending on their structure, rocks look very different. For this tutorial I decided to make sharp reefs in the water … but you can use the same technique for anything stony! Step 1. Graphics Community with Photoshop Contests, Photography and Drawing Contests.
The Soft Sea Light. On 06.24.08, In Photo Effects, by sergio This lesson is about how to create by three pictures only a tender collage of sea-piece.

A peculiarity of this collage is that we will do the effect of soft light. For work I took pictures from the Internet, to the authors – thank you. Resources: Planet: Sky: Background: Step 1. Background. Photo Enhancement with Adjustment Layers - Page 1. Paint Shop Pro Tutorial By Ron Lacey Photographic Enhancement with Adjustment Layers Layers are analogous to the acetate sheets or cells used by animators to add elements onto a background.

You create, delete or adjust various layer attributes in the Layer Palette (F4) or the Layer menu. For straight photographic enhancement purposes the most useful layers are Adjustment layers. Think of an Adjustment layer as a filter that you view the image through not unlike a filter you might have on your camera lens. Adjustment layers come in a variety of flavors but the ones most commonly used for strait photography are Brightness/Contrast, Colour Balance, and Hue/Saturation/lightness. There are a couple of ways to create an adjustment layer. Create a Werewolf Warrior Wielding a Flaming Sword in Photoshop. Create a Werewolf Warrior Wielding a Flaming Sword in PhotoshopReviewed by Michael Vincent Manalo on Oct 3Rating: Preview of Final Results Download the PSD Werewolf Warrior.zip | 37.18 MB Download from Website.
Photoshop Tutorials Search Engine. Photoshop Tutorials. Simple steps to photo touch-up. Believable Water Reflection. Handy Tweaks To Make GIMP Replace Photoshop - Smashing Magazine. Advertisement Today, too many websites are still inaccessible. In our new book Inclusive Design Patterns, we explore how to craft flexible front-end design patterns and make future-proof and accessible interfaces without extra effort. Hardcover, 312 pages. Get the book now! GIMP1 is the favorite graphics editing program of many designers and graphic artists. GIMP was never designed to replace Photoshop, yet with every release, it comes a little closer to being able to do so. Graphic Reporter, photoshop tutorials, photoshop elements tutorials, digital photography, graphic design tutorials, lesa snider.
Deviant art.