
How to Create a Moving Image Optical Illusion. Ever notice how sometimes images can play tricks on you?
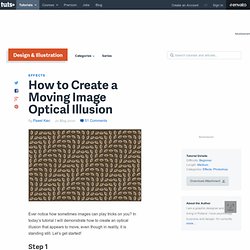
In today’s tutorial I will demonstrate how to create an optical illusion that appears to move, even though in reality, it is standing still. Let’s get started! Step 1 Create a new document with dimensions set to 1280px by 800px. Step 2 Hit CMD + R to enable rulers if you don't have them turned on by default. Step 3 Fill the background layer with #564734 using the Paint Bucket Tool (G). Step 4 Double-click on the thumbnail of your layer with ellipse and apply the following style. Step 5 Now grab the Ellipse Tool (U) again and create a new layer above your previous layer (hit CMD + Shift + N and Enter). Step 6 Group these two layers by selecting them and hitting CMD + G. Step 7 Move your first layer there where the two guidelines cross in the top left corner as shown below.
Step 8 Hit CMD + J or go to Layer > Duplicate Layer in order to duplicate this layer. Step 9 Step 10 Go to Layer > Duplicate Group and duplicate it. Step 11 Step 12. Illusions and aesthetics. Here’s a new item for our category of soap bubble pictures.
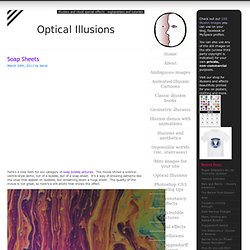
The movie shows a science-centre-style demo, not of a bubble, but of a soap sheet. It’s a way of showing patterns like the ones that appear on bubbles, but streaming down a huge sheet. The quality of the movie is not great, so here’s a still photo that shows the effect. I think this was originally a Victorian demonstration, but I don’t have chapter and verse for that. It’s a demo you sometimes see in hands-on Science Centres, but often it’s not set up so that you can really see the colours. I’m fascinated by patterns like these. Fancy trying to set up your own soap sheet? I think you’ll be able to see how it works by looking at the movie before examining the diagram.
Running up from the trough are two nylon threads, about a metre apart. It’s vital to be gentle, and especially not to drop the rod into the liquid so that it foams. How to Create a Vector Optical Illusion. In this tutorial we'll learn to create three types of optical illusions.
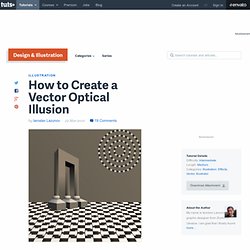
Learn how easy it is to fool our brains. You'll not believe there is no curved lines on the chessboard. Step 1 We will start by creating the Impossible 3D object. Let's open a new document in Illustrator (File > New) and enter the size 800 px by 800 px (but you can choose any size you want). Start by dragging a ruler line down from the top and placing it as your horizon line. Step 2 Create a new layer and name it "Columns. " Step 3 Create two ribs at the base of the left column. Step 4 Add the other ribs, connect the top of the base to the vanishing point. Step 5 Use the Scissors Tool (C) to cut and remove unnecessary segments. Step 6 Close the paths in such a way that we have three faces of the cube.
Step 7 Repeat the same technique with the other columns. Step 8 Create three columns by using the Rectangle Tool (M). Step 9 Create a new guide and rotate it using the Rotate Tool (R), as shown below. Optical illusion images, pictures, tutorials and information.