
TOOLS. Nodal Point. About Panography. Product Review: DJI Phantom Quadcopter for GoPro by Jeff Foster. Everyone is looking for that elusive aerial cam that's both affordable and easy to operate for the average videographer.

I'm setting out to see if the DJI Phantom Quadcopter combined with a GoPro Hero3 Black Edition is the answer, in this two-part review and workflow study. Ever since I got my first GoPro Hero, I've longed to find a way to get it airborne remotely and even tried makeshift setups with DIY kites and researched helicopters and drones - but those were always way out of my budget - not to mention the steep learning curve in flying most of them (read: NOT CRASHING!!) So you could imagine my enthusiasm in learning about the release of the DJI Phantom for GoPro. An entry-level quadcopter/drone that a beginner can setup and fly right out of the box. And when it comes to motorized RC aircraft, I'm truly a beginner! Initial Assembly & Setup When DJI claims that the Phantom is ready to fly out of the box, it pretty much is.
The kit comes complete and well-organized in the box. TUTORIALS ETC. Tips & Tricks FAQ. What kind of camera will I need? A digital SLR camera with interchangeable lenses is the ideal solution, but almost any camera will work if you can lock the aperture, lock the focus, and lock the white balance. Ultimately, you get what you pay for. Digital SLRs generally have more options for white balance, mirror lockup, etc… the more choices, the better! If you want a camera with the most convenient HDR shooting setup, choose a camera that has an auto-bracketing (AEB) option.
Click here for a good list of cameras that have auto-bracketing (3 shots are common, but 5 or 7 is better) It also depends on how many HDRs you will be shooting and for what purpose? Back to top 4 Rules of shooting HDRs Lock f-stop (aperture – which controls your depth of field) Lock focus Lock white balance Turn off any in camera "automatic" image enhancing (i.e.: auto-contrast or auto-saturation, including sharpening) You will be bracketing the exposure time for your various exposures.
How to... Андрей Зубец - цикл статей, панорамная фотография, навигатор по разделам. Spherical 3d panorama's nadir editing tutorial. How to retouch the VR 360 panorama's nadir. Редактирование надира сферической 3d панорамы. Существуют два способа обработки надира сферической панорамы, зависящие от того, каким способом он был снят: 1.
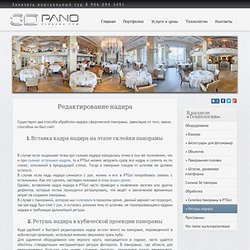
Вставка кадра надира на этапе склейки панорамы В случае если нодальная точка при съемке надира находилась точно в том же положении, что и при съемке остальных кадров, то в PTGui можно загрузить сразу все кадры и склеить их по схеме, описанной в предыдущей статье. Тогда в панораме следов от штатива не должно остаться.В случае если кадр надира снимался с рук, можно и его в PTGui попробовать связать с остальными. Как это сделать, наглядно показано в этом видео-уроке. 2. Куда удобней и быстрей редактировать надир (и/или зенит) на панораме, переведенной в кубическую проекцию, используя нижнюю (верхнюю) грань куба. Самый старый, можно даже сказать устаревший, метод – в Pano2VR или Pano2QTVR перевести панораму в 6 сторон куба, отретушировав нужные стороны. Плагин SuperCubic Надир до и после ретуши (наведите курсор мыши на картинки)