

Making of Little Bunny. Introduction This project started in a moment of free time at the studio where I’m working.
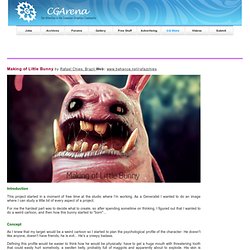
As a Generalist I wanted to do an image where I can study a little bit of every aspect of a project. For me the hardest part was to decide what to create, so after spending sometime on thinking, I figured out that I wanted to do a weird cartoon, and then how this bunny started to "born"... Concept As I knew that my target would be a weird cartoon so I started to plan the psychological profile of the character: He doesn't like anyone, doesn't have friends, he is evil...
Defining this profile would be easier to think how he would be physically: have to get a huge mouth with threatening tooth that could easily hurt somebody, a swollen belly, probably full of maggots and apparently about to explode. Making of 'The Cow Girl' - Samar Vijay. Making of PUNK by Vikram V. MEET MELINE : THE MAKING OF (Sebastien Laban and Virginie Goyons. Making of Anne - Joel Mongeon Portfolio. Making of Pink Assassin.
While all this work you should always have photo references in sight.
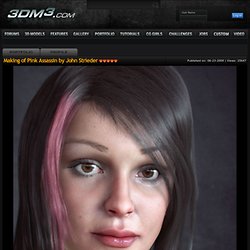
I like to use the freeware program “IrfanView" for viewing pictures. You can set it to “always on top" and place it over the GUI of the program you are currently working in. The next step was to create the textures for her face. I used ZBrush polypainting for this. First, I started with the colour map. Once I’m happy with my base, I export this as texture at maximum resolution. Making of Ingrid Bergman. About Ingrid Bergman - At the age of 17, Ingrid Bergman auditioned for and was accepted to the Royal Dramatic Theatre in Stockholm.
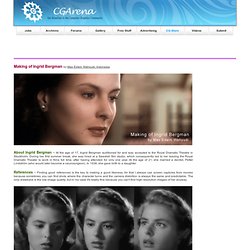
During her first summer break, she was hired at a Swedish film studio, which consequently led to her leaving the Royal Dramatic Theater to work in films full time, after having attended for only one year. At the age of 21, she married a dentist, Petter Lindström (who would later become a neurosurgeon). In 1938, she gave birth to a daughter. References - Finding good references is the key to making a good likeness, for that I always use screen captures from movies because sometimes you can find shots where the character turns and the camera distortion is always the same and predictable.
The only drawback is the low image quality, but in my case it's totally fine because you can't find high resolution images of her anyway. Modeling - I used an old base mesh and jump straight into ZBrush for tweaking. Making of Prince NyTael. Hi there, my name is Malanjo and I'm from Portugal (Trás-os-Montes e Alto Douro), and I want to thanks to Lynette Clee and the 3DTotal team for inviting me to create this making of.

This is the 1st of 6 characters that I'm creating to apply to Blur Studio (Venice, California). By the way, I wish to also give thanks to Laurent Pierlot and to Alessandro Baldessorini (from Blur Studio) for their personal opinions during the execution of this project. Thanks guys! Okay, let's go! Concept and Idea So, the goal was to create something like a fantasy monster or an alien - not an "ordinary" alien or monster but one with fur; something visually strong and demanding of respect, whilst at the same time giving the sensation of relaxation and security. Making-of 3d : Wolverine - Sébastien Graux. Introduction Ce document a pour but de faire la démonstration de mon pipeline de production dans la création d’un Character Low-poly.
Les sujets abordés seront la modélisation et sculpture 3D, retopologie et optimisation, dépliage UV et la génération des textures de Normal et d’Occlusion. Les softs utilisés : 3DS Max 9 / 2009 Z-Brush 3.1. Meet Meline' The character at that stage didn't even have a name, but soon enough, there were enough interesting actions for her to do, to fill a very full five minute short film.
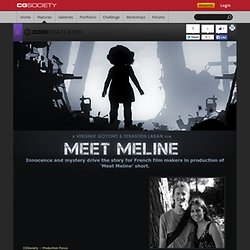
"We had already done some early character and set designs, the story was quite intense already; so we suggested something that would later take two whole years of our lives," says Sebastien. The couple had so many ideas. They started to write them on paper. "I remember one thing that I really enjoyed doing," explains Sebastien, "We started to mime the little girl in our bedroom. I was pitching 'She could look down for a second, then she looks up, freaks out and starts running! ' In no time at all, the collection of ideas were piling up. "The Dream" - MAKING OF. Greetings to everyone who are interested in the work called “Dream”.

For the next few minutes, I, Alexey Kashpersky (RIDDICK) will be with you to share some of the steps in the making of this image. Composition is a very important step that requires your full attention, if you do not want the visitor to forget your work and just turn the page. I have more to say about this process and how it parallels with the creation of the work. I constantly cleaned and refined the composition, making sure that those changes added something to the overall piece.
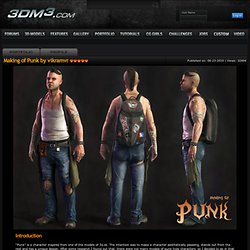
Here are examples of compositions in their various stages of work. Tdw72_t_zbrush.pdf (Objet application/pdf) FEMALE CHARACTER CREATION SCULPTURE // BATH. Making of Punk. Sculpting.
3D Total - The cg artists home page - 2D and 3D graphics reso. 3D Total - The cg artists home page. 3D Total - The cg artists home page. Introduction It's very crucial for a creator to foresee the image in his own mind and be able to know if it will make a good artwork, or not.

3D Total - The cg artists home page. Making of Hakara. Greetings, First thanks to CGArena for the opportunity to publish this making on your website.
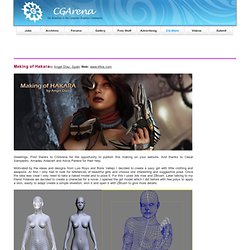
And thanks to Cesar Sampedro, Amadeu Aldavert and Alicia Pereira for their help. Motivated by the ideas and designs from Luis Royo and Boris Vallejo I decided to create a sexy girl with little clothing and weapons. Making of Classical Girl. Making of Classical Girlby Wang Shiyong, China Web: www.wangshiyong.com Introduction This model cost me a long time. Making of a Chinese Girl. Introduction - After seen a lot of nice girl renders on Internet, I decide to make a Chinese style girl. In the period of making this girl, I found that the most important thing to a character is the facial expression and posture, when considering the facial expression, I paid most attention on her eyes and mouth, coz these two areas are the key to the facial expression.
I believe there are lots of friends like me who’s learn by his/her self and not have an art background, if we want to make a veracious character model, I think the most important thing is not only to read the books about 3d skills ,but also to learn “anatomy of human” and books about art theory, it’s really helpful ! Because when you read those books, you’ll understand the human structure, when u know what it should be looked like, you’ll of course know how to make the model.
Ok, I think I’ve saying too much ,lol, now I’m gonna share with you my workflow and some experience. Making of the Young Girl. Introduction - Hi everybody! My name is Viki Yeo. I'm from Korea and I'm a character artist for games. I am going to show you how I created my image “Young girl”. I used 3ds Max 2008, ZBrush, Mental ray, Photoshop CS2 and reference images by www.3d.sk Concept - This model is a girl who is Petra.
Modeling - I created a base mesh in 3ds Max. Making of the Angelina Jolie. After having collected some pictures of the famous actress Angelina Jolie, I decided to use some of them for giving life to my homonymous creation Angelina Jolie. Before starting the phase of modeling it was important to take a moment to observe properly the features of this beautiful actress, above all of her cheekbones which are very particular and pronounced. Starting from the two references, front and lateral view, I modeled the lowpoly face, imported into ZBrush and increased the subdivision level by 2 steps. Then, I could concentrate on adding details to critical areas of morphology like mouth, nose, bowed eyebrows, eyes and ears.
Making of the Standing Beauty. Making of the Standing Beautyby Asan Umerov, Ukraine Inspiration - I really like the photography. In this work created for CGArena challenge themed beautiful and won the third prize, I tried to reproduce the style of classical black-and-white photographs. Slightly looking at the Google and I found a few suitable images. [Warning: this making contains the CG Nudity] Start - In this small project overview I will try to explain the steps taken to create this image. Making of the Korean Actress Song Hye Kyo. Hello, My name is Max Edwin Wahyudi, and here I will tell you about the making of 'Song Hye Kyo' the Korean actress in 3dsmax. Making of Meet You. Making of Meet Youby Zhang Sheng, China Web: blog.sina.com.cn/zszsart Hello everyone, I am Zhang Sheng from China.
‘Meet you’ is my latest work and glad that lots of friends like this. Making of the Warrior. Making of Manolia. Secrets of Swimsuit Babe. Secrets of Swimsuit Babeby Jimmy Chow, Hong Kong Introduction.