
Masking for enblend with SVG and Inkscape. Here is an incredibly simple two shot panorama: ..notice that there are people right in the middle where the shots overlap.
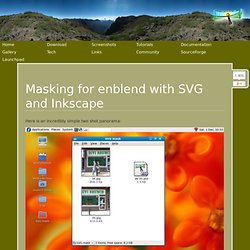
The Hugin 'Preview window' shows this quite well in 'difference' mode: ..where you can see the people and their shadow cover nearly the entire overlap area. I'll stitch this in Hugin using enblend (and I'll save the remapped images because we'll need them later): ..after rendering for some time, you can see that enblend has done a reasonable job by deciding to place the seam to include the people in the middle: ..though the seam cuts through their shadow in a strange way. Now lets try to change the blend using Inkscape. (this takes a while as it is tracing the alpha channel outlines and converting them to SVG clipping masks) ..once that is done, this SVG file can be opened in Inkscape. Layers can be turned on and off. ..note that the polygon is a series of spline curves and can be re-edited easily. Rune Spaans - Software - Super Cubic. Here's a brief description on how to use the filters.
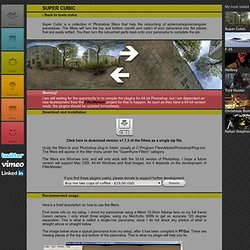
First some info on my setup. I shoot my panoramas using a Nikon 10.5mm fisheye lens on my full frame Canon camera. I only shoot three angles, using my Manfrotto 300N to get an accurate 120 degree separation. This is what is called a single-row panorama, since I do not shoot any photos of what is straight above or straight below. The image below show a typical panorama from my setup, after it has been compiled in PTGui. With the panorama loaded into Photoshop, the first thing to do is to duplicate the pano image onto a new layer. With this duplicate layer selected, go to the filter menu and select the '1: SuperCubic...' filter from the 'SuperRune Filters' category.
Note that there's also a filter called '1: SuperCubic Express...' which will use use your saved settings and apply the filter without any preview window. Above you see the filter preview window. Click 'OK' and the filter will start working. Panorama Tools. Jim Watters - PanoTools. <big><big><A href="..

/index.html">Home</A><A href=".. /photos.html">Photo</A><A href=".. /technical.html"> Technical</A><A href=".. /resume.html">Resume</A></big></big> The Panorama Tools, also known as The PanoTools is a free suite of programs and libraries originally written by the German physics and mathematics professor Helmut Dersch.
PanoTools provides a powerful framework for re-projecting and blending multiple source images into immersive panoramas of many types. For more on PanoTools library, related software, and tutorials see PanoTools WIKI at wiki.panotools.org PanoTools Distribution For your convenience I have created a Microsoft Software Installer(MSI) of PanoTools library that is available on SourceForge. I have compressed the installer using Zip compression. PanoTools12_2007Apr25.zip [Version: MinGW 2.8.6 Size: 894KB] If you encounter any problems with the installer or programs please send me an email.
Current known issue with the Installer: Older Versions Changes. Ultra high resolution Images.
Panoramic Field of View Calculator. FreeDEXpano. Просмотр кубических панорам с помощью Flash. Free Adobe Flash cubic panorama viewer. Панорама на флеш. Просмотр панорам. Quick Time VR. Виртуальные туры. Аналог QTVR. Панорамы 360 градусов. Tutorials - Garden Gnome Software. Below is a list of numerous video tutorials intended to help you get the most out of Pano2VR.

All tutorials are recorded on MacOSX but the functions work the same way on Windows and Linux. Only the interface looks a little bit different. [edit] The Basics [edit] Skin Editor Pano2VR versions 4.1.0 and below Object2VR versions 3.0 beta3 and below [edit] Skin Editor version 2 Pano2VR versions 4.5 beta 1 and up Object2VR versions 3.0 beta 4 and up [edit] Output [edit] Media Editor Pano2VR 4 [edit] Sound Editor Pano2VR 3 [edit] Additional Features [edit] External Tutorials Using Vray for Cinema 4D with Pano2VR.