
Pearls. Youtube. Polymer Tutorials. Polymer Clay European Pandora Style Bead Charms - Three Piece Set 1022. Featured here is a set of three one-of-a kind European "Pandora" style bead charms handcrafted by mixed-media artist Jenn Ross from polymer clay.
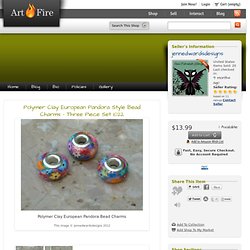
These pretty little bead charms have a metal core opening of about 4.5mm, and will fit the popular silver or metal bracelets and necklaces. These charms were formed by hand then cored with silver plated metal grommets. They were then cured to insure optimum strength and color, sanded smooth, buffed to a high shine and finished with several coats of a color enhancing protective polish. When finally finished, the polymer clay charms feel very smooth, much like glass or hard plastic and is very lightweight and durable. With proper care, they will never break, fade or chip!
Buyer will receive the exact charm set pictured in the first photograph. Because these polymer clay bead charms are hand formed and hand cored, they may not have a perfectly symmetrical shape, but this is a unique part of their characteristics. Polymer Clay Chameleon. Polymer Clay Mania. Moldmaking and Casting with BITY Mold Supply. Polymer Clay Artist (◕␣~) Hello and welcome to my ART channel!
Here I upload sculpting demonstrations in time lapse and save those videos to playlists for my viewers to watch. Nothing is rehearsed or planned, as times I'm not sure if I can even do what I'm doing, but somehow its been working so far. I even point out my mistakes! You could consider this channel a documentary of my progression with sculpting. I used to draw (for about 10 years or so) but one day I got a box of potting clay and made my first pieces of fragile art! 3 headed Dragon! I also do other things on occasion like drawing, filming my cat Gizmo, and I like to take advantage of this beautiful 1080p camcorder and film bugs lol.
Christmas Clay Projects - Nativity Plates. Grade One started these plates a month ago....Christmas is a busy time with the kiln.
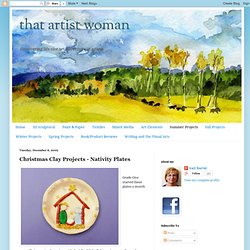
With all the projects needing to be completed I have to make sure I schedule it right. We start off rolling out a slice of clay...we want it to be about 1/2 inch thick. We place a lunch sized paper plate on the clay and using a skewer cut out our plate shape. You'll notice I covered the paper plate with plastic wrap....this just ensures it doesn't stick. Lift up your clay and place in the paper plate. The kid's wrote their names and the year along the rim of the plate. They then rolled a snake shape to create their manger. I always tell the kids "scratch, scratch..water, water" to get them to remember the have to score the surfaces they want to stick together as well as add a bit of water. Once the manger was created they worked on Mary and Joseph. I find skewers work the best for cutting shapes...the kids have more control than with plastic tools.
It should look like this when you're done. That's it.