
How to Create a Zodiac-Themed Portrait in Adobe Illustrator CS5 « Inside Adobe Illustrator. Introduction Hello fellow vector fanatics, my name is Sharon Milne and I sometimes go under the moniker ChewedKandi.
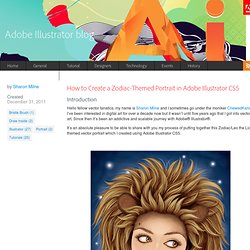
I’ve been interested in digital art for over a decade now but it wasn’t until five years ago that I got into vector art. Since then it’s been an addictive and scalable journey with Adobe® Illustrator®. It’s an absolute pleasure to be able to share with you my process of putting together this Zodiac/Leo the Lion themed vector portrait which I created using Adobe Illustrator CS5. This tutorial is full of helpful hints on using a variety of tools in Illustrator CS5 as well as some of the thought processes behind elements of the portrait. Create a Vector Cassette Tape Illustration. In the following tutorial you will learn to create a cassette tape illustration.
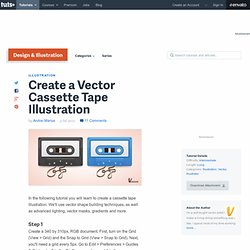
We'll use vector shape building techniques, as well as advanced lighting, vector masks, gradients and more. Step 1 Create a 340 by 310px, RGB document. First, turn on the Grid (View > Grid) and the Snap to Grid (View > Snap to Grid). Next, you'll need a grid every 5px. You can also open the Info panel (Window > Info) for a live preview with the size and position of your shapes. Step 2 Pick the Rectangle Tool (M), create a 275 by 175px shape and fill it with any color. Select this copy and make it invisible by clicking on the eye icon from the Layers panel. How to Create a Vector Snake Using Adobe Illustrator CS5 and Mesh Tormentor - vectorboom. Final Image Preview You can download the source vector file for this tutorial In this Adobe Illustrator Tutorial we will learn how to create a vector snake using the Mesh Tormentor - Free Gradient Mesh plug-in, which will make your work with the gradient mesh simple and enjoyable.

I was trying to describe the creation of a complex object in order to reveal more features of this wonderful plugin, but believe me, it can do much more than I managed to describe. The matter depends on your imagination. You can download Mesh Tormentor (Free Gradient Mesh plug-in) for Illustrator CS6 here. Tutorial Details Program: Adobe Illustrator CS5, Mesh Tormentor; Difficulty: Intermediate Estimated Completion Time: 2 Hours Step 1 Take the Pen Tool (P) and create a broken outline as it is shown in the figure below.
Select the anchor points of the outline with the Direct Selection Tool (A) and convert them from corner into smooth ones. Step 2 For further work we need to know the length of the created outline. YouTheDesigner.com (youthedesigner) no Twitter. How to make a realistic vintage typewriter in Illustrator « Design and Development tuts – TutorialShock. Hello friends, did you guys enjoyed our programming tutorial on how to make a nice typewriter contact form? , well if you nailed that one now you’re probably wondering about the design itself, because it’s useless to have the code if you can’t apply it to a truly brilliant design.
Don’t panic because now the second part of the tutorial has arrived and we’re about to show you how to make a great realistic typewriter with Adobe Illustrator, so fasten your seat belts and let’s go. Download Source Gather references Before we start to count step after step, there are certain phases that are very important inside any design process that should be always considered. Step 1: Make the document Once you have decided the look that your typewriter will have, open your Illustrator and create a new document with the following properties: Step 2: Place the typewriter’s shadow We’re going to start with the shadow in order to define the area that our illustration will occupy in terms of width. What’s up guys? Create a Burning, Vector Match Using Gradient Meshes. Create a Dirty Water Drop Character in Illustrator. Did you know that 3.575 million people die each year from water-related disease?
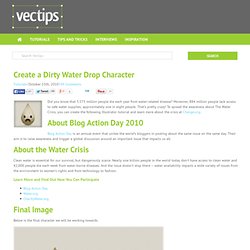
Moreover, 884 million people lack access to safe water supplies; approximately one in eight people. That’s pretty crazy! To spread the awareness about The Water Crisis, you can create the following Illustrator tutorial and learn more about the crisis at Change.org. About Blog Action Day 2010 Blog Action Day is an annual event that unites the world’s bloggers in posting about the same issue on the same day. About the Water Crisis Clean water is essential for our survival, but dangerously scarce. Learn More and Find Out How You Can Participate Final Image Below is the final character we will be working towards. Create Grainy Textures In Illustrator.
Creating grainy textures are great for retro illustrations, typography, and logos.
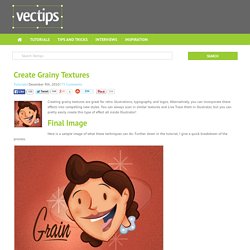
Alternatively, you can incorporate these effects into compelling new styles. You can always scan in similar textures and Live Trace them in Illustrator, but you can pretty easily create this type of effect all inside Illustrator! Final Image Here is a sample image of what these techniques can do. Further down in the tutorial, I give a quick breakdown of the process. Tutorial Details Program: Adobe Illustrator CS5 (You should be able to create this tutorial in CS4 and CS3 but some of the tutorial images might look different.)Difficulty: Beginner / IntermediateTopics Covered: Grain Effect, Gradient, Gradient Meshes, BlendsEstimated Completion Time: 15-20 minutes Grainy Textures.