

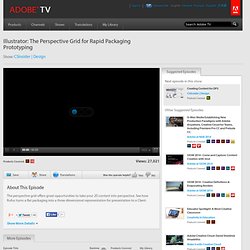
Combine Envelope Distort with Grids. Design - Illustrator: The Perspective Grid for Rapid Packaging Prototyping. Community Translation Your transcript request has been submitted.
Adobe TV does its best to accommodate transcript requests. It can take a few weeks for the transcript to become available in the Community Translation Project, so keep checking back. Join the Community Translation Project Thanks for your interest in translating this episode! Please Confirm Your Interest Thanks for your interest in adding translations to this episode! An error occurred while processing your request. Another translator has already started to translate this episode. How to Create a Splash of Colorful Paint Using Adobe Illustrator and Mesh Tormentor – Gradient Mesh Plugin (Preview) - Vectorboom - Vector Tutorials, Freebies, Plug-ins. Final Image Preview Today, I can assure you that Gradient Mesh has become absolutely manageable, it became possible thanks to Mesh Tormentor, which was developed by a great programmer Yemz.
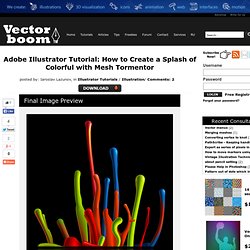
This plugin has features that make your work with Gradient Mesh enjoyable and save you much time. In this Adobe Illustrator tutorial we will look at its basic commands: removal of unnecessary knots of the gradient mesh, the creation of the Art Brush of the Gradient Mesh, joining of two or more Gradient Meshes, Gradient Mesh color cloning and master a lot of interesting techniques. It is quite a gift for those who work with Gradient Mesh, because Mesh Tormentor is an absolutely free plug-in. This Adobe Illustrator Tutorial will be published on Vectortuts+. You can download the plugin by clicking the Download button on this page. The roundup of the work of plug-in you can read here. Tutorial Details Program: Adobe Illustrator CS5; Difficulty: Intermediate Estimated Completion Time: 2 Hours. Working with shapes. While drawing a shape try these key shortcuts: Space bar: Allows you to reposition the object while creating it.
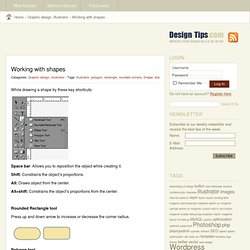
Shift: Constrains the object’s proportions. Alt: Draws object from the center. Alt+shift: Constrains the object’s proportions from the center. Rounded Rectangle tool Press up and down arrow to increase or decrease the corner radius. Polygon tool Press up or down arrow to increase or decrease the number of vertexes. Star tool Press up or down arrow to increase or decrease the number of vertexes. Mesh Tormentor Plugin - Complete Guide - vectorboom. Today I’m publishing a complete guide to Mesh Tormentor plugin which caused a burst of enthusiastic feedbacks of illustrators from all over the world.
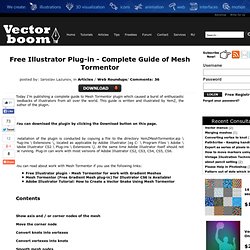
This guide is written and illustrated by YemZ, the author of the plugin. You can download the plugin by clicking the Download button on this page. Installation of the plugin is conducted by copying a file to the directory YemZMeshTormentor.aip \ Plug-ins \ Extensions \, located as applicable by Adobe Illustrator (eg C: \ Program Files \ Adobe \ Adobe Illustrator CS2 \ Plug-ins \ Extensions \). At the same time Adobe Illustrator itself should not be running. Plug-in can work with most versions of Adobe Illustrator CS2, CS3, CS4, CS5, CS6. 40 Awesome Illustrator Tutorials. In this roundup we have showcased some of the creative illustrator tutorials from 2011.
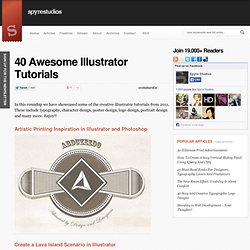
These include typography, character design, poster design, logo design, portrait design and many more. Enjoy!! Artistic Printing Inspiration in Illustrator and Photoshop Create a Lava Island Scenario in Illustrator Vintage Badge in Illustrator and Photoshop.
Text Fx. Effects. Illustration. Use Illustrator and Photoshop to Create a 3D String of Pills – Screencast. Creative Suite Podcast: Designers - 10 Random Illustrator CS5 Tips. Community Translation Your transcript request has been submitted.

Adobe TV does its best to accommodate transcript requests. It can take a few weeks for the transcript to become available in the Community Translation Project, so keep checking back. Join the Community Translation Project Thanks for your interest in translating this episode! Please Confirm Your Interest Thanks for your interest in adding translations to this episode! An error occurred while processing your request. Another translator has already started to translate this episode. Thanks for Participating! How to Create a Fancy Gift Bow using Adobe Illustrator. In this tutorial you will learn how to create a realistic image of a gift bow using the Mesh Tool.
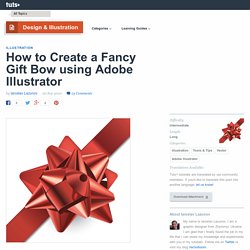
With many uses including greeting cards, designs and even web banners, I'm sure you'll find many uses for this fancy ribbon. You will also learn many helpful tips on how to use the gradient mesh to make conical gradients. Let's get started! First, determine the colors that you're going to use. All the colors will match the numbers, which I will use in screenshots and further description. Create a Smooth Satin Background Using Blends. Upon first seeing this shiny fabric background, you might think "Gradient Mesh.
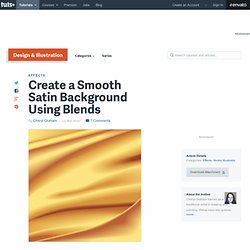
" And if Gradient Mesh intimidates you, you might just click to the next tutorial. In fact, achieving a rich, satin background is deceptively easy. Illustrator's Blends are the key. Let's get started! Step 1 Choose a color scheme. Note: For the rest of this tutorial, I will refer to the colors numerically, with the lightest being 1, and the darkest, 4. Step 2 Start at the top left of the artboard and draw a triangle, using the Pen tool (P). Step 3 Select both objects and go to Object > Blend > Make. Step 4 Draw a thin rectangular shape that aligns with the bottom of the blend.
Carefully position this second blend alongside the first one so that no white shows through. Step 5 Make another blend, this time with a larger, curved quasi-triangle as the base, and an amorphous ellipse for the highlight. Step 6.