
Mastering Illustrator Effects. Have you been missing out the Illustrator Effects?

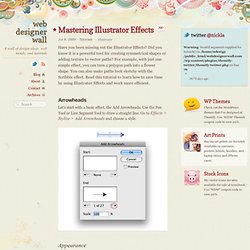
Did you know it is a powerful tool for creating symmetrical shapes or adding texture to vector paths? For example, with just one simple effect, you can turn a polygon path into a flower shape. You can also make paths look sketchy with the Scribble effect. Read this tutorial to learn how to save time by using Illustrator Effects and work more efficient. Arrowheads Let's start with a basic effect, the Add Arrowheads. Appearance The great thing about using Illustrator Effect is the ease of changing its appearance. Without The Effect? Without the effect, the arrow shape will get distorted when the line is stretched.
Round Corners Draw a rectangle shape, go to Effects > Stylize > Round Corners and enter a radius value. Without The Round Corners Effect? Round Corners is one of my favorite effects. Zig Zag Effect Draw a straight line, go to Effects > Distort & Transform > Zig Zag and enter a value for Size and Ridge Per Segment. 10 Minute Crystal Explosion. Illustrator, unlike Photoshop, does not have many functions allowing you to randomize elements of your design.

However, those that it has, can be just as powerful. We will use just these tools to create a simple, yet appealing, T-shirt or wallpaper design. Step 1 Let's start by launching Illustrator and creating a new document (Control +N). Input the dimensions of 1000px by 1000px, select RGB Color Mode and set the Raster Effect to 150 ppi. Note: You can follow my guidelines and set precisely the same dimensions and later use the same values that I will be using, but feel free to experiment and not stick precisely to all the values. Step 2 Let's go ahead and establish the center of our artwork first. Step 3 Create a new layer and call it "artwork. " Step 4 Copy the circle (Control + C), paste it in front (Control + F) and scale it down to 85%. Step 5 OK, the exterior ring is ready, now let's break it into pieces.
Step 6 Select your grid and go to Object menu > Path > Add Anchor Points. Astute Graphics Blog : Vector Halftone Week: introduction to vector halftones. Welcome to Astute Graphics’ Vector Halftone Week! Each day this week, we will be publishing a significant new vector halftone-based blog article allowing you to both explore the possibilities of using vector halftones in your designs as well as providing free material. Today, this article will introduce what both a Halftone and Vector Halftone is, as well as preview what’s coming… What is a Halftone?
The need for Halftones arose with printing. How was it possible to reproduce an image or photo using a mechanised print machine where tints of any color should be represented on the page? Through years of experimentation and fine tuning, printers developed several techniques, but the classic dot-type halftone became the common technology. Key to the art of reproducing artwork using dots is the ability to display a range of colors. To illustrate this, the image shown right is an original photo that we want to reproduce as a halftone. The Hidden Power of the Average Command: Creating Swirly Type. In this tutorial we will explore the "Average" command in Adobe Illustrator, and learn how to use it in rather unusual way.

In this case, we'll create abstract swirls using relatively simple methods and apply it to type. Let's get started! Want access to the full Vector Source files and downloadable copies of every tutorial, including this one? Join Vector Plus for just 9$ a month. 1. Most of you are probably familiar with the Average command in Adobe Illustrator. 2. Let's spend some time on the theoretical part first. Step 1 When do we usually use the Average command and what does it do? For example, I have few open paths that I want to unite in one single shape, but they don't exactly touch each other (for those who want to repeat the shape: create a rounded rectangle and delete the two bottom points. Creating Halftone Effects in Illustrator. It used to be a time consuming process to create a halftone.

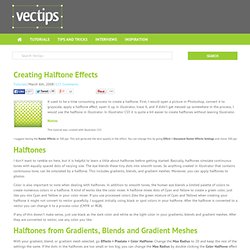
First, I would open a picture in Photoshop, convert it to grayscale, apply a halftone effect, open it up in illustrator, trace it, and if didn’t get messed up somewhere in the process, I would use the halftone in Illustrator. In Illustrator CS3 it is quite a bit easier to create halftones without leaving Illustrator. Notes This tutorial was created with Illustrator CS3. I suggest having the Raster Effects at 300 ppi. Halftones I don’t want to ramble on here, but it is helpful to learn a little about halftones before getting started. Color is also important to note when dealing with halftones. If any of this doesn’t make sense, just use black as the dark color and white as the light color in your gradients, blends and gradient meshes.
Halftones from Gradients, Blends and Gradient Meshes With your gradient, blend, or gradient mesh selected, go Effects > Pixelate > Color Halftone. Now you can trace the image to create vector art.