
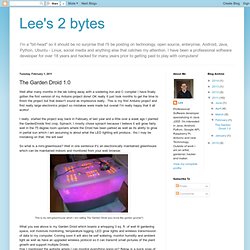
Practical Maker. Aquaponics Growroom Sketch Working. I only just finished writing & debugging my aquaponics system last week.

My system is running on an Attiny85, i only use 3 inputs & 3 outputs.I use 2x float switches to tell me when the nft's are full or when they are empty, there is a delay of 1 hour between refilling the nft's.I use an ldr to let me know when it is dark, i then check the level of water in the nft, & drain the system before going to sleep and waiting for morning. My growing medium is polystyrene beads, they have a porous surface areas & are chemically inert, so the worms are very happy @ the moment. I am not a big fish eater, so goldfish are in the tank When the nft's drain, the microbial fluid (Fish water) is collected in a shallow pond just below, it is filtered by various aquatic plants, that act as bio filters & double as fish/yabby food.
As the water rises in this pond, a raised centre outlet drains the excess into the tank below, where yabbies (Australian Freshwater Crayfish) gobble up any left over residues. Assembling The Electronics Hardware. The Garden Droid 1.0. Well after many months in the lab toiling away with a soldering iron and C compiler I have finally gotten the first version of my Arduino project done!
OK really It just took months to get the time to finish the project but that doesn't sound as impressive really.. This is my first Arduino project and first really large electronics project so mistakes were made but overall I'm really happy that it all works! I really started the project way back in February of last year and a little over a week ago I planted the GardenDroids first crop, Spinach. I mostly chose spinach because I believe it will grow fairly well in the 75 degree room upstairs where the Droid has been parked as well as its ability to grow in partial sun which I am assuming is about what the LED lighting will produce.. tho I may be mistaking on that. We will see!
So what is a mini-greenhouse? This is my mini-greenhouse which I am calling The Garden Droid (you know like garden gnome?) Plantduino Greenhouse. Introduction: This project is in the instructables microcontroller contest.
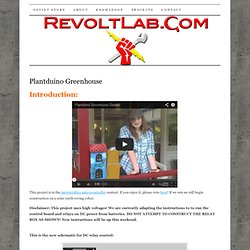
If you enjoy it, please vote here! If we win we will begin construction on a solar earth roving robot. Disclaimer: This project uses high voltages! Getting Started with nRF24L01+ on Arduino. Nordic’s nRF24L01+ 2.4GHz RF radios are a great way to communicate wirelessly between Arduino’s.
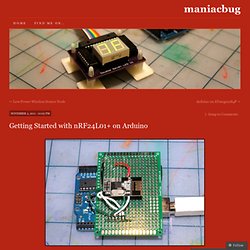
They’re cheap, and powerful. Unfortunately, they can be a little daunting to beginners to get started. Today, I want to make it easy for total beginners to get up and running on nRF24L01+ radios quickly and easily. Stuff we need First, we have to go shopping. Reasonable substitutes for this stuff can also be found at Sparkfun if you like spending a lot more money. Preparation We only need one of the 2×4 pin female headers. Here’s what it looks like all ready to go. Solder it up The 8-pin male header goes in position C09-16.The 6-pin male header goes in position V13-18.The 2×4-pin male header goes in position K16-N15.The wires are connected as follows: Here’s what it looks like with all the wires in place, up close and personal.
Software Get the RF24 library from github. From the File menu, select “Examples”, then “RF24″, and finally “GettingStarted”. Make another one From here… Leeclarke/TheGardenDroid.