

Vintage postcard calendar journal. Growing up, I kept a daily journal.
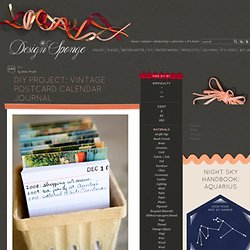
I always enjoyed looking back at previous entries to see what had changed over the course of a year. These days, I can’t seem to find the time to journal, but I do try to jot down a little note from each day on my perpetual calendar/journal. The idea is very simple — flip to the current date and at the end of the day, write down something that happened.
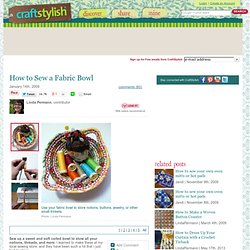
Some days it is big things like “Annie took her first steps.” Other days it is small, like “needed more than one cup of coffee this morning.” How to Sew a Fabric Bowl. January 14th, 2009 Email 566 users recommend Use your fabric bowl to store notions, buttons, jewelry, or other small trinkets.
Recycled Craft Ideas - Crafts from Recycled Materials. DIY Grocery Bag Easter Basket. What to do with all those grocery bags tucked under my sink?!
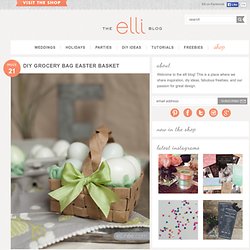
I find that there is something quite endearing about brown kraft grocery bags and the up-cycling piece of my brain has been dancing around ideas for a while. I have been seeing a few variations of woven paper baskets around the web, so weaving and Easter basket from recycled paper bags seem to be a perfect solution! Here is what I came up with. ~Lia (INSTRUCTIONS FOR GROCERY BAG EASTER BASKET) 1) Using full size paper grocery bag, remove handles (•note some do not come with handles) and cut down center seam. 2) Mark 1.75 inch strips (top to bottom) and trim. 3) Fold each strip lengthwise into thirds. DIY: Michigan string canvas. Depending on your canvas size (I used 8x10), print out an outline of your desired state.
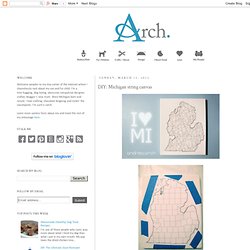
I love my Mitten and placed the heart over Holland... were I currently live. Sorry upper peninsula... you didn't make the cut. Tape the printout securely over the canvas. God bless West Michigan. Cold Porcelain Clay Recipe. Heating Pad Tutorial So this is a project that’s been in the back of my mind for months, but it took finding the perfect fabric to get motivated and get going on it. When I laid my eyes on Amy Butler’s LOVE flannels, I knew it was time.
I chose this vibrant, yet soothing flannel and got busy. See, there’s a particular day each month *ahem* that makes me yearn for a good, heavy heating pad, but by the time my body reminds me that I want it….well, I’m just too crabby to sew. ;) This month, though, I’m prepared. Gorgeous, right? If only you could feel, smell and pet it. Scripture Cover. Thesnuglet.pdf (application/pdf Object) T-Shirt Hand Warmers. London is cold this time of year, which means my kids are too.
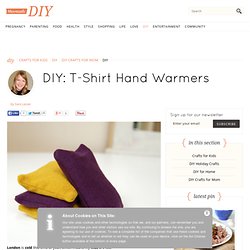
So when it takes me fifteen minutes to prep them for playing outside, I want them to play longer than I spent preparing them for the cold. Most often their gloves fall off or get wet, sending their freezing hands inside within five minutes of stepping out. A handful of hand warmers seem to hold the kids over for a while longer, and are inexpensive and easy to make when using items on hand. Scrap t-shirt material Needle and thread Rice or beans Cut scrap t-shirts into any shape. Decorative Thumb Tack Styrofoam Balls. One of the easiest ways to spruce up the decor in a room is by bringing in small details with interest and impact.
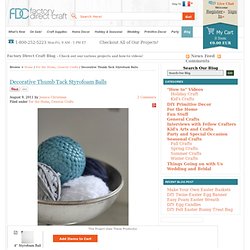
Decorative balls placed in a bowl or stacked in a large vase are an excellent choice for this and these thumbtack-covered balls are simple, inexpensive and visually striking. If you can’t find thumbtacks in a color you like, they can easily be painted, either before or after creating the ball. Things you’ll need:4-inch styrofoam balls Flat topped thumbtacks – about 500 per ball Spray paint (optional) Things to do: 1. Firmly push the thumbtacks into the ball, overlapping the edges slightly to create a fish scale texture. One Pretty Thing - DIY craft tutorials. Little guiding stars. Since the new year has started I’ve been trying to think of ways to be more kind to my self.
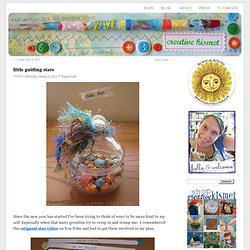
Especially when that nasty gremlins try to creep in and stump me. I remembered this origami star video on You Tube and had to get them involved in my plan. I thought it would be fun to make a whole bunch with kind words and “you are….” phrases inside. I made 60 of them, enough to last me the whole year if I open one a week, plus a few extra just in case. I used 12 x 12 inch scrapbook paper and cut 1/2 x 12″ strips, then followed the video HERE*. *UPDATE! Free Crochet Pattern L10644 Fiesta Dishcloths. Free Crochet Pattern L10740 Cool Graphic Dishcloths.
Free Knitting Pattern L10620 Bright Stripes Dishcloths. Crochet-Covered Easter Eggs –a DIY tutorial. After finally tackling how to crochet rocks from a pattern, I got it in my brain that I wanted to create my own crochet motif for a rock.
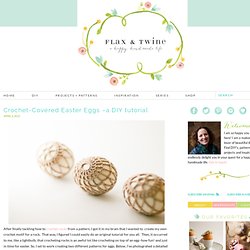
That way, I figured I could easily do an original tutorial for you all. Then, it occurred to me, like a lightbulb, that crocheting rocks is an awful lot like crocheting on top of an egg–how fun! And just in time for easter. So, I set to work creating two different patterns for eggs. Below, I’ve photograhed a detailed step-by-step tutorial for one of them and provided a written pattern for the other. Then she made...: Word Pendant Tutorial. This post is dedicated to my dearest, life-long friend, Judy, and my mother-in-law, Shirley.
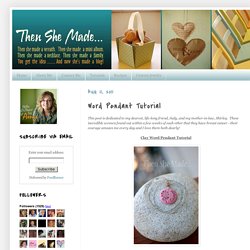
These incredible women found out within a few weeks of each other that they have breast cancer - their courage amazes me every day and I love them both dearly! Clay Word Pendant Tutorial. Split Chain - step by step instructions. Tat the first part of the chain in the normal way, to the point where you want the two shuttle threads to meet. Join the core thread to the base of the first ring with a lock join and leave enough thread to work the 5 stitches needed to complete the chain, back towards the last chain stitch worked. Always leave a little less thread, as this will stretch as you work the backward stitches.
Using the core thread shuttle, pull a loop of thread, from the back, to the front, taking great care not to twist the loop. Thread the shuttle through the loop from the back to the front. Gently pull the shuttle thread until the loop is much smaller and then push the loop under the chain towards the back. Pull the loop at the back, gently reducing the thread and you will see the first half of the stitch taking shape. Draw all the way until the first half of the stitch is tightly into position, taking great care not to twist the new loop that is forming. First double stitch completed. String Heart. 1,000 Hangers! How to Make Geode Easter Eggs: Make Fun and Unusual Crystal Eggs for Easter. The Prettiest Family Trees (And How to Make Them Happen) Here’s a post I worked on with Yahoo Mail!
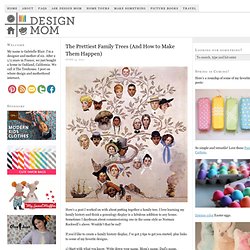
About putting together a family tree. Golden Horses: Photo Prop mini tutorial. I am so excited to show these off to you all… A golden (and a little spotting of silver) band of horses! Some of you may remember the Dino Pendant tutorial from the week before last, where I mentioned that horses were a great option for the project as well. Make a Yarn Voodoo Doll. Home » $1 and Free, cheap crafts, Headline, Tutorials 25 March 2011 38,194 views 26 Comments by rhonda The other day I was walking out of the grocery store when I happened to glance up at the gumball machines near the door.
I stopped dead in my tracks and stared slack-jawed for a moment before grabbing my wallet and madly digging for quarters. I mean, seriously, who can resist a gumball machine full of voodoo dolls??