
Drawing Shapes with Bezier Tool. Text and images Copyright (C) 2002 Tuomas Kuosmanen and may not be used without permission of the author.
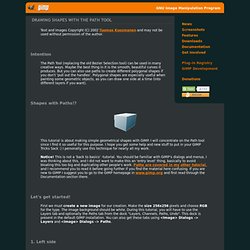
Intention The Path Tool (replacing the old Bezier Selection tool) can be used in many creative ways. Maybe the best thing in it is the smooth, beautiful curves it produces. But you can also use paths to create different polygonal shapes if you don't 'pull out the handles'. Polygonal shapes are especially useful when painting some geometric objects, as you can draw one side at a time (into different layers if you want). Shapes with Paths!? This tutorial is about making simple geometrical shapes with GIMP. Notice! Let's get started! First we must create a new image for our creation. 1. Now create a new transparent layer, and name it Left_side so you know what layer I'll talk about later on. Imagine the blue cube on the right side into your canvas, we'll be doing side #1 now. Anti-Aliased Threshold Tutorial. Text and images Copyright (C) 2002 Ville Pätsi and may not be used without permission of the author.
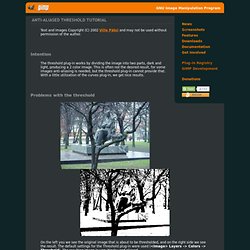
Intention The threshold plug-in works by dividing the image into two parts, dark and light, producing a 2 color image. This is often not the desired result, for some images anti-aliasing is needed, but the threshold plug-in cannot provide that. With a little utilization of the curves plug-in, we get nice results. Film Grain Tutorial. Text and images Copyright (C) 2002 Eric Kidd and may not be used without permission of the author.
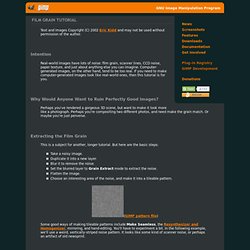
Intention Real-world images have lots of noise: film grain, scanner lines, CCD noise, paper texture, and just about anything else you can imagine. Computer-generated images, on the other hand, tend to be too real. If you need to make computer-generated images look like real-world ones, then this tutorial is for you. Why Would Anyone Want to Ruin Perfectly Good Images?
Perhaps you've rendered a gorgeous 3D scene, but want to make it look more like a photograph. Changing Background Color 1. Text and images Copyright (C) 2002 Seth Burgess and may not be used without permission of the author.
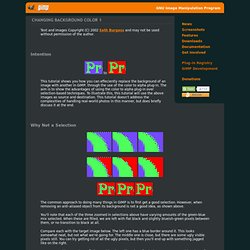
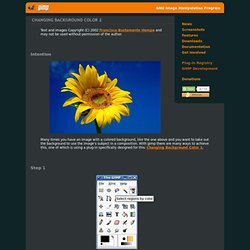
Intention to This tutorial shows you how you can effeciently replace the background of an image with another in GIMP, through the use of the color to alpha plug-in. The aim is to show the advantages of using the color to alpha plug-in over selection-based techniques. To illustrate this, this tutorial will use the above images as source and destination. Why Not a Selection The common approach to doing many things in GIMP is to first get a good selection. You'll note that each of the three zoomed in selections above have varying amounts of the green-blue mix selected. Compare each with the target image below.
You can spend hours trying to find something that will work perfectly, but you won't. Changing Background Color 2. Text and images Copyright (C) 2002 Francisco Bustamante Hempe and may not be used without permission of the author.
Intention Many times you have an image with a colored background, like the one above and you want to take out the background to use the image's subject in a composition. With gimp there are many ways to achieve this, one of which is using a plug-in specifically designed for this: Changing Background Color 1. Step 1. Coloring A BW Sketch. Text and images Copyright (C) 2002 Marco (LM) Lamberto and may not be used without permission of the author.
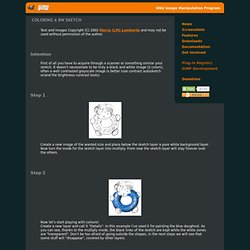
Intention First of all you have to acquire through a scanner or something similar your sketch. It doesn't necessitate to be truly a black and white image (2 colors), often a well contrasted grayscale image is better (use contrast autosketch or/and the brightness-contrast tools). Step 1 Create a new image of the wanted size and place below the sketch layer a pure white background layer.
Step 2 Now let's start playing with colours! Step 3. 3-D Floating Logo. Text and images Copyright (C) 2002 Mel Boyce and may not be used without permission of the author.
Intention This tutorial is aimed squarely at the novice GIMP user. The more experienced user may find some techniques here useful. This is the same procedure I used to create the logo on my homepage, albeit with slightly different settings. I'll point out the differences as I go along. Tileable Textures. Text and images Copyright (C) 2002 Adrian Likins and may not be used without permission of the author.
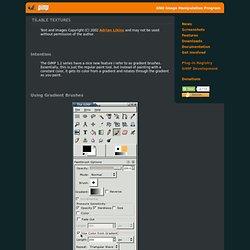
Intention The GIMP 1.2 series have a nice new feature I refer to as gradient brushes. Essentially, this is just the regular paint tool, but instead of painting with a constant color, it gets its color from a gradient and rotates through the gradient as you paint. Using Gradient Brushes Gradient brushes can be accessed from the standard paintbrush dialog. Just filling in an image with a gradient brush is a good start for interesting textures, and you can make some nice ones that way.
Simple Animations. Text and images Copyright (C) 2002 Jakub Steiner and may not be used without permission of the author.
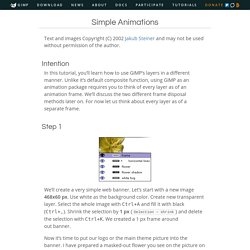
Intention In this tutorial, you’ll learn how to use GIMP’s layers in a different manner. Unlike it’s default composite function, using GIMP as an animation package requires you to think of every layer as of an animation frame. We’ll discuss the two different frame disposal methods later on. For now let us think about every layer as of a separate frame. Step 1 We’ll create a very simple web banner. Now it’s time to put our logo or the main theme picture into the banner. This part of the tutorial is not the key element, so feel free to experiment. Step 2 Now we’re ready for the actual animation work. Then we’ll use the standard text tool to put a small text note on every frame.
Step 3 In every GIF animation you are allowed to specify the delay between frames. Custom Brushes Tutorial. Text and images Copyright (C) 2002 Gautam N.
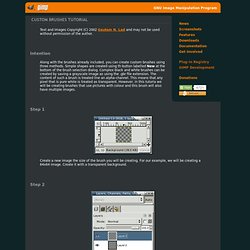
Lad and may not be used without permission of the author. Intention Along with the brushes already included, you can create custom brushes using three methods. Simple shapes are created using th button labelled New at the bottom of the brush selection dialog. Complex black and white brushes can be created by saving a grayscale image as using the .gbr file extension. Step 1.