
Webwinkel. Gebruiksaanwijzingen naaimachines HIJ, GRATIS een deel downloaden. Making a Jacket: Part II. Attach the back and front at the shoulder seam, taking care to align the princess seams.

Ann Steeves Reinforce the shoulder seam by sewing a selvage strip of silk organza or chiffon in the seam. The top seam allowance has been clipped and lies flat. while the seam allowance on the bottom has not, and makes ripples. Photo: Ann Steeves Now that the lining is assembled and ready to go, it's time to start on the shell of the jacket. Assembling the ShellI assemble the jacket in much the same manner as I did the lining: I make the back first, and then the front, then I attach them at the shoulder seams. Next I sew the back and front together at the side seams. Make your own DuhBe fabric roses.
I made up this method for making handmade fabric roses based on what I know of rolled fabric roses, and the organza flowers from Reese Dixon.

Rather than keep all my secrets to myself, I want to share this method with others. Some crafters will think I’m crazy for sharing my secrets for an item I sell in my Etsy shop, but I believe that sharing information contributes to the creativity of others and that is more important than me selling stuff. That’s just my own personal philosophy on creativity. Share it – don’t hoard it! Making roses in 5 simple steps – after the break… One note before I get started with the instructions…You must be able to follow instructions very well if you attempt to make these! OK, carry on then… Choosing fabric for the roses Big important point here – you must use synthetic fabric!!
Step 1 – Cut fabric into strips I fold the fabric by matching the selvedge edges, then folding again into quarters. For this sample I cut the fabric into 3″ strips. Finishing up. Jackets, coats, and suits from Threads. Wedding Dress Process – eggplant bride. Mouwen « Leidraad technieken bij het maken van kleding. Eén van de vele manieren om een mouwsplit in een blouse te maken. Dit is een meer klassieke mouwsplit, die je in overhemden vindt. De basis is een techniek uit mijn oude boek “Knippen en naaien met Burda”, aangevuld met methoden die ik ondertussen geleerd heb.
Zou het leuk vinden te horen of jullie dit soort uitleg handig vinden. Stap 1: stik het split met een kleine, rechte steek op de mouw, in de gewenste lengte. Dit bepaalt de lijnen en geeft de hoeken stevigheid. De split in mijn voorbeeld is 1,25 cm breed. Stap 2: knip de split in tot ongeveer 1 cm voor het eind, en knip vandaar tot de hoek zodat een driekhoekje ontstaat. Stap 3: Knip onder- en overslag.
Het onderslag is 4 breed (2x 1,25 cm + zoombreedte 1,75 cm) Het overslag is 6,75cm breed (2x 2,5 cm + zoombreedte 1,75cm) Stap 3: Naai de onder- en overslag met de goede kant op de verkeerde kant van de mouw, exact tot het einde van de split. Bag Your Jacket Lining. Lining a jacket makes it last longer and become easier to slip on and off.
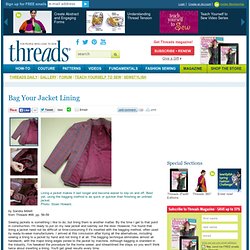
Best yet, using the bagging method is as quick or quicker than finishing an unlined jacket. Photo: Sloan Howard. by Sandra Millettfrom Threads #88, pp. 56-59 Sewing jackets is something I like to do, but lining them is another matter. By the time I get to that point in construction, I'm ready to put on my new jacket and sashay out the door. Prepare to bag All jackets benefit from having a lining; it lets the jacket slide easily over other clothes, drape correctly on the body, and stand up to wear and tear. Making a Jacket: Part II. Naaipatroon - Naaitips kleding naaien van klanten van Naaipatronen.nl, de leukste online zelfmaakmodewinkel met ruim 6000 patronen.