
Marvelous Designer - 3D Clothing Community and Marketplace. Tuto_CGITrainer_Rigging By Diezar. Tuto_Varga Hair. This tutorial is dedicated to Polycount community. 1.Hairstyles2.Game models approach3.Example of hairstyle 4.Varga You could also check the second part of this tutorial regarding normal mapping(workflow used for Varga ) This is not a step by step tutorial.I will nail down the main stages for creating hair for game characters using lots of images and some printscreens directly from the application used ( maya/photoshop etc ...).
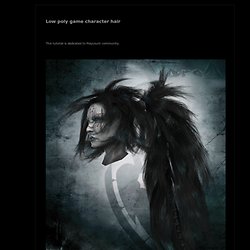
The idea for this tutorial came from the polycount forums ; for the Dominance War II contest i joined Polycount team and the folks there asked me if i can make a little tutorial about Varga's hair so here it is ... 1.Hairstyles This tutorial is about women's hair but the technique work for men as well ;is just that i like long hair for women and my Dominance War II entry happened to be a chick. Where do we find interesting hairsyles? Below there are a few variations for the hairstyle , some of them will be covered in this tutorial. Back to menu 2.Game models approach. Tuto_MAYA_How to make a realistic cable. How to make a realistic cable (Maya Dynamics Tutorial) In this tutorial i`ll try to explain how to make a simple NURBS cylinder to behave like a real cable with gravity, some elasticity and all that real stuff.
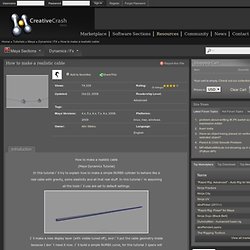
In this tutorial i`m assuming. Tuto_JOAN of ARC. Tree Modeling Using Custom Particle Syst. This method uses a particle system to generate foliage dynamically based on the geometry of the trunk.
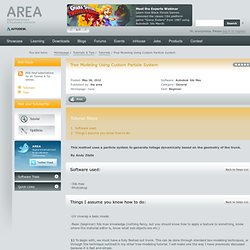
By Andy Zibits -UV Unwrap a basic model -Basic (beginner) 3ds max knowledge (nothing fancy, but you should know how to apply a texture to something, know where the material editor is, know what sub objects are etc.) 1) To begin with, we must have a fully fleshed out trunk. This can be done through standard box-modeling techniques, or through the technique outlined in my other tree-modeling tutorial. 2) Once the solid geometry trunk is done, add your secondary branch planes. 3) Now, since the particle system will generate leaf cluster placement based on polygonal density, we want to make sure that the 2D planes have similar polygon density to the trunk itself, so that an equal density of leaves will be placed on the upper thinner branches as the trunk area itself. 5) Next create a particle array and a plane (propped upright with it's Xform reset.) Tuto3ds_IKFKSolver&AnimatablePivot_Rigging.
IKFK Solver 3dsmax. Download File: IKFKsolver_v1.04_max_9-2008.zip IKFKsolver_v1.04_max_9-2008_x64.zip IKFKsolver_v1.04_max_2009.zip IKFKsolver_v1.04_max_2009_x64.zip IKFKsolver_v1.04_max_2010-2011.zip IKFKsolver_v1.04_max_2010-2011_x64.zip IKFKsolver_v1.04_max_2012.zip IKFKsolver_v1.04_max_2012_x64.zip Update News (May 28, 2010) Installation: Download the .zip file corresponding to the version of your 3ds max and extract the files in the plugins folder of your max root directory, restart max.
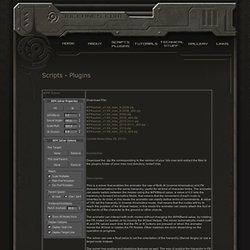
Description: This is a solver that enables the animator the use of Both IK (inverse kinematics) and FK (forward kinematics) in the same hierarchy, useful for all kind of character limbs. The animator can interact with both modes without changing the IKFKBlend value, by rotating the FK nodes (or bones) or by moving the IKGoal Helper.
ANIMATABLE PIVOT 3dsmax. Download File: AnimPivot_max_9-2008.zip AnimPivot_max_9-2008_x64.zip AnimPivot_max_2009.zip AnimPivot_max_2009_x64.zip AnimPivot_max_2010-2011.zip AnimPivot_max_2010-2011_x64.zip AnimPivot_max_2012.zip AnimPivot_max_2012_x64.zip Release Version 1.0.3 Update News (Apr 12, 2010) Installation: Download the .zip file corresponding to the version of your 3ds max and extract the AnimPivot.dlc file in the plugins folder of your max root directory, restart max.
This is a transform controller useful to animate objects around a specific pivot that can be animated, it can be used to animate the translation of objects that have to spin around their corners, for example a box rolling over the surface of the ground or a foot pivoting in the heel and later in the toes. Rigging - Hand/Fingers controls. Ello everyone.
I'm new to maxscript so for me it's really time consuming thing. Mayby some of u could help. Hole world would take advantage of it ;) All controls of fingers looks pretty the same. So AttributHolder and lots of spinners and sliders for every finger.. and every bone in it. Video Tutorials for Adobe Flash, Illu. Video Tutorials for Adobe Flash, Illu. Brad Noble - Rigging. 3DS Max Rigging Tutorials. Tuto_ZProject and Adjusting Photo Reference.
Tuto_Modeling a foot. I won't explain every detail in the beginning, you can get to the state in the next image several different ways.
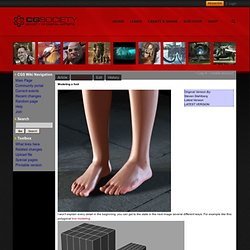
For example like this: polygonal box modeling. This is the model I started with for this session - a simple model several years old that I'd previously used as the 0-level of a hierarchical SubD surface. But I wanted to rebuild it without the hierarchy. The smoothed or Subdivided version: Say we're going for realism. The best reference is without a doubt the actual human body, and I did use my own foot to some extent, but good photographs do have certain advantages over the living body (like for instance, my foot is really ugly).
The most important preparation you can do is sketching. From here I started adding and deleting edges to the old model. A view showing some points being pulled to the left: More edge-insertions and deletion steps: At this stage I felt dissatisfied with the SubD version of the foot - it was still too smooth, and lacked detail. With those knobs added: Tuto_MR SSS. Tuto_Baking ZBrush Materials to a Texture Map. Tuto_ZB3_Projecting Color & Detail. Tuto_LIGHT_techniques d'éclairage classiques. La réalisation d'un personnage ou d'un buste est un exercice d'autant plus difficile que la modélisation et les textures sont loin d'être les seuls paramètres donnant vie au personnage.
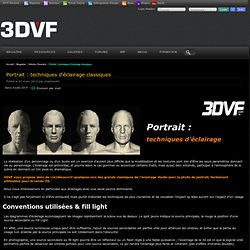
L'éclairage est primordial, et pourra selon le cas gommer ou accentuer certains traits, mais aussi, bien entendu, participer à l'atmosphère de la scène en donnant un ton posé ou dramatique. 3DVF vous propose donc de (re)découvrir quelques-uns des grands classiques de l'éclairage studio pour la photo de portrait, facilement utilisables pour le rendu 3D. Nous nous intéresserons en particulier aux éclairages avec une seule source dominante. Il ne s'agit pas forcément ici d'être exhaustif, mais plutôt d'aborder les techniques les plus courantes et de visualiser l'impact qu'elles auront sur l'aspect d'un visage.
Les diagrammes d'éclairage accompagnant les images représentent la scène vue de dessus. Eclairage large (broad lightning) Eclairage court (short lightning) Eclairage frontal (frontal lightning) Tuto_3DS_Viewport Canvas 2011 - CGItrainer. Tuto_3DS_Viewport Canvas 2011 - video01. Tuto_ParticleFlow For Packshots. Scripts_PEN_Production. We will start with the legs as they can be the toughest part and make the most trouble for you if you get them wrong.
I am going to assume that you answered "yes" to the question about having the feet lock to the ground or not. This is the most common way to rig a character. About the only time that I might not want to have the feet locking to a ground plane is if the character only swims or flies. Scale of the character and the scene is something that should be taken into consideration when working in any package. I have often heard from people working in Max that it isn't as much of a problem when working in Maya. Tripple IK Leg w/ Five Controls This is one of the infinit possible ways that you can rig a characters leg and foot so don't think that it is the only way. Tuto_Zbrush Retopology Workflow.
Stickman Animation Setup. In this tutorial, I will be demonstrating the use of Hypershade to do a simple setup of controlling the animation of a stickman based on its distance and an incoming sphere.
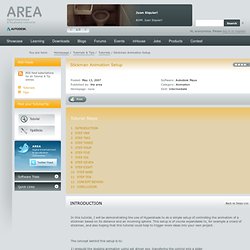
This setup is of course expandable to, for example a crowd of stickman, and also hoping that this tutorial could help to trigger more ideas into your own project. The concept behind this setup is to: 1) prebuild the dodging animation using set driven key, transfering the control into a slider 2) calculating the distance between the passive object (stickman) and active object (sphere) using distanceBetween node 3) using setRange node to convert the calculated distance into 0 and 1 which drives the stickman animation slide The first step is to create a simple stickman model, attached that to a simple joints setup like the image shown here.
Select the Stickman group node and add new atrribute "Scared" with following settings: Data type : float Min = 0. Create realistic glass material in 3DS MAX. In this tutorial you will learn how to create a realistic glass material and turn our chess pawn into a realistic glass object. Key terms include reflection, refraction, opacity, and fall-off. This tutorial is aimed at the beginner, but since there are several ways to create glass, it might be interesting for everyone else as well. Although this tutorial is based on 3D Studio Max, the same settings apply to many other 3D products. Note: Click on the thumbnail in each step for a larger screenshot that includes the viewports and the relevant portion of the user interface. Step 1 Because this tutorial covers only how to create the glass material you need to add an object to your scene yourself. Step 2 Press the M key to open the Material Editor (or select Material Editor from the Rendering menu) and rename the first material to Glass.
SneakPeek Xrayunwrap 1.5 Rc1. Pixologic Release: ZBrush Learning Series - Texturing with Photo. Pixologic Release: ZBrush Learning Series - Modeling With Your T. How to create blendshapes to animate faces in Zbrush. Dynamically drive a joint chain with Hair in Maya. Interactive Fracture System Tutorial.