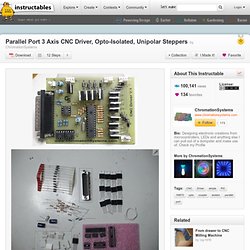

Stupid Simple Arduino LF RFID Tag Spoofer. Parallel Port 3 Axis CNC Driver, Opto-Isolated. Controls 3 Unipolar Stepper Motors, for use with CNC Machines.

Simple driver with automatic coil shutdown, to ensure efficient operation. Opto-isolated for protection of the P.C. Supports most parallel port based CNC software, such as KCAM. Supports up to 20 watts per Phase. Or 2 Amps per phase. Full Kits with all the parts needed to recreate this Instructable can be purchased on my Website Get a Full 3 Axis CNC Kit with Driver, Stepper Motors, Power Resistors, all the electronics and wire needed, excluding a PSU. 3 Axis CNC Driver Kit, Assembly and Testing can be added. Printed Circuit Boards are Available with Free Shipping and Programmed PIC Microcontrollers can be purchased or Grab the a combined PCB & programmed PIC Microcontroller Included in the ZIP below are the files for the Copper-side, the Top-Side layer, Datasheet and the drill files.
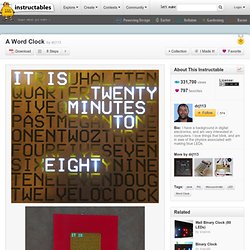
The source code is written in Assembly and can be purchased Here Those who purchase Kits or programmed PIC will receive the source code for Free. A Word Clock. Major updates - A much better enclosure for this clock has been designed, and a better controller using an AtMega controller now exists. check out This is a project to tell the time using words.

I saw a cool clock on the Make Blog the other day ( and thought 'Hey - I can make one of those', so here it is! There are two new photos of a completed clock kit, mounted in an enclosure, and hanging in my dining room. The clock module in the center is 150mm x 150mm, and the enclosure surround is 300mm x 300m craftwood, painted with automotive paint. I think that it looks really great! I am now able to sell all sorts of components, ranging from complete clocks, through to kits, through to individual modules and components. This version uses a PIC microcontroller. I am in Australia, where the mains frequency is 50 Hz (50 cycles per second). Yet another L298 based motor controller. Hi all, This came out as a sub project related to my DIY CNC machine "the Beast" because the outputs of the Arduino would not suffice to control the motors. So I chose to use I2C for this purpose and designed my own little guy. It is based on L298 and an Attiny 2313 to control it, pretty basic stuff.
It is designed to be as generic as possible, here are the current features: - control bipolar motors with full stepping (half stepping is possible but not implemented now due to code size) - the enable lines are linked to the pwm pins of the chip -> microstepping possible or dc motor control - the external interrupts of the attiny are available for usage together with 5v power for end stops or other sensors (not tested yet) - you can use this guy standalone or controlling other things trough i2c by modifying the software - power input is stabilized on both 5v and 12v rails.
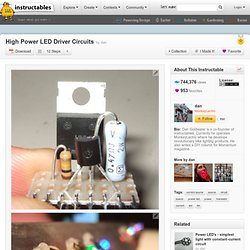
Circuits for using High Power LED's. High-power LED's: the future of lighting!

But... how do you use them? Where do you get them? 1-watt and 3-watt Power LED's are now widely available in the $3 to $5 range, so i've been working on a bunch of projects lately that use them. in the process it was bugging me that the only options anyone talks about for driving the LED's are: (1) a resistor, or (2) a really expensive electronic gizmo. now that the LED's cost $3, it feels wrong to be paying $20 for the device to drive them! So I went back to my "Analog Circuits 101" book, and figured out a couple of simple circuits for driving power LED's that only cost $1 or $2.
This instructable will give you a blow-by-blow of all the different types of circuits for powering Big LED's, everything from resistors to switching supplies, with some tips on all of them, and of course will give much detail on my new simple Power LED driver circuits and when/how to use them (and i've got 3 other instructables so far that use these circuits).