background preloader

Crafts

Facebook Twitter

Google. Rookie & RIT Dye Tutorial. It happens to me every year. The second spring hits, I’m standing in front of my closet going, I am so sick of all my clothes, if I see that shirt again I’ll throw up, but I don’t have any money for new stuff, I’M SO TIRED OF EVERYTHING I OWN. You know that feeling? Let’s kill it with instant-wardrobe-transformer (aka RIT dye). RIT is a brand of clothing dye that’s been around since the 1930s. It turns drab-colored clothes and accessories into bright works of art, and I am obsessed with it. You can go from these: to these! And it’s not even hard. Now, there are other kinds of clothing dye out there, but I chose RIT because it’s got simple instructions on the back of the package, it costs about $3 per box, and you can find it almost everywhere in the U.S. I’m gonna show you how to do a basic stovetop dye job.
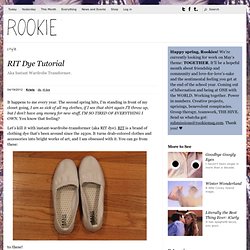
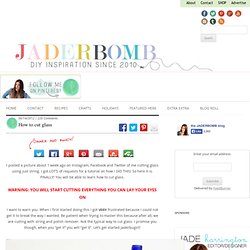
But! OK! You will need: So now that we have our materials, let’s dye this elegant-yet-boring purse I found at a garage sale for a dollar! Step One: Fill your pot ¾ full with water. How to cut glass. I posted a picture about 1 week ago on Instagram, Facebook and Twitter of me cutting glass using just string. I got LOT’S of requests for a tutorial on how I DID THIS! So here it is. FINALLY! You will be able to learn how to cut glass. I want to warn you. It’s best to triple your yarn because it will burn longer! Soak it GOOD! I like to tie my yarn where I want my glass to “cut” then quickly pour polish remover over the string again. Get a big bowl with ice and water ready. VERY IMPORTANT! Slowly turn your bottle. You can’t let the flame go OUT then dunk it in the ice water. YAY!!! I reallly hope you enjoyed this tutorial because I had ALOT of requests for it!
© Copyright jaderbombllc, All rights Reserved. Cheap Easy Craft Ideas, Tutorials, Free Crafts - Dollar Store Crafts. Geek Crafts&|&Where geek and crafts collide. December 28 This is the gingerbread Optimus Prime made by a friend of a friend of Redditor downvotedagain. Caroline Eriksson, the girl in the photo, made our favorite Autobot, and said it’s only made of gingerbread and melted sugar to hold it together.

December 27 Frivolite Handcrafts is at it again. This time with a Hobbit themed double knit scarf. There and Back Again Story Scarf, knits out the tale of The Hobbit. You read that right, Knits out the story of The Hobbit. Again this scarf, like the day of the doctor scarf is double knitted so you see the pattern on both sides as mirror images of each other.

December 22 It’s a little late for Halloween costumes, but it’s never too late for MINIONS! Kiddyfactory, over at Craftster, posted this minion costume that she worked on with a friend. This dining room appeared on Cheezburger without any information as to where it came from. Wouldn’t this be an awesome dining room to have your friends over for a dinner party? December 20 December 19. Reclaimed Cardboard Crafts. Instead of tossing your cardboard, you can reuse it to make fun cardboard crafts! Cardboard is pretty ubiquitous, isn't it? It seems like you can't buy many things without ending up with a bit of cardboard that's headed for the recycle bin. Paper recycling is pretty efficient, but it does take energy to send the cardboard away and to actually do the recycling part. If you do end up with some spare cardboard laying around, you can use your crafty skills to turn it into something usable again instead!

1. 2. 3. 4. 5. 6. 7. 8. 9. 10. Have you guys done any fun cardboard crafts lately? Resurrection fern: How to Make Ice Wreaths. Resurrection fern « Deck the Porch with Greens and Berries, FA LA LA LA LA | Main | How to Make Floating Flower Stones » November 24, 2008 How to Make Ice Wreaths I had so many lovely comments on the ice wreath hung on the garden gate yesterday that I decided to let anyone who doesn't already know in on how to make them.
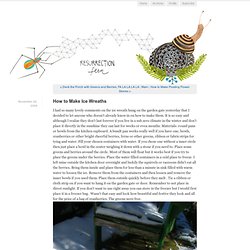
It is so easy and although I realize they don't last forever if you live in a sub zero climate in the winter and don't place it directly in the sunshine they can last for weeks or even months. Materials: round pans or bowls from the kitchen cupboard. Even the birds are getting ready for Christmas at my home. Posted at 12:01 AM in arts and crafts, christmas, family traditions and holidays, gardening, Nature and the environment | Permalink ShareThis | Reblog (0) TrackBack TrackBack URL for this entry: Listed below are links to weblogs that reference How to Make Ice Wreaths : Comments x Beautiful! Wow! DIY Paper Flower Corsages. I love Brittany’s work and love her blog House That Lars Built. You may remember her beautiful wedding on 100 Layer Cake with the amazing giant paper flowers. Well, I asled her if she would put together some DIY’s for us and was thrilled when she agreed. Hello from Copenhagen!
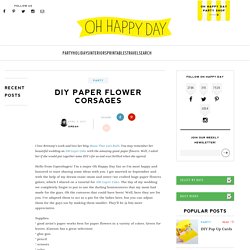
I’m a major Oh Happy Day fan so I’m most happy and honored to start sharing some ideas with you. I got married in September and with the help of my dream team–mom and sister–we crafted huge paper flowers galore, which I shared on a tutorial for 100 Layer Cake. Supplies: * good artist’s paper works best for paper flowers in a variety of colors. Poppy The base of the petal is 1/2″ and expands to 2 3/4″ tall and reaches to 2 1/4″ wide.

Rose Create a lemon looking shape about 2″ wide and 1 1/2″ tall. Photos by Brittany for Oh Happy Day. DIY Paper Flower Cone Bouquets. Mar 5 by Brittany Watson Jepsen Are you a cone or cup person? I was usually a cup type of girl myself (save a few calories? Why not!) But why eat them at all when you can use them as a vase and pass on feeling the guilt. Materials: ice cream cone (waffle or sugar), x-acto knife, glue gun, cutting board, scissors, skewers about 3-4″ long, garden pot 2″ in diamter(optional to be used as stand), bright colored paper for flowers, green paper for leaves, striped paper for cone covers (free download here) Click through for all the instructions! Step 1: Using Jordan’s party hat template, scale down the size to fit your cone and draw it diagonally on the striped paper.

Step 2: Cut around the template. Step 3: Wrap it around the cone and secure it with double-sided tape. Step 4: For the flowers, I created a rose from my tutorial here. Step 5: Glue gun the skewer to the inside of the flower and hold in place until dry. Step 6: Cut out leaves from the green paper. Step 9: Voila! To make a flower pot stand: Making a Valentine Paper Flower | Say Yes to Hoboken. Who wouldn’t love to be given this gigantic paper flower on Valentine’s Day this year? It’s incredible! Find the full tutorial here on Green Wedding Shoes. (images by Studio Castillero)A few other flower themed craft tutorials seen around the web:Hanging Heart Charms at MADEMini Crepe Paper Flower Favors at Oh Happy DayDIY Wedding Day Flower Wall at A Beautiful MessI feel like I’ve been out of the loop a bit with the redesign and the two weeks we were away.Any brilliant tutorials/craft projects out there I missed?
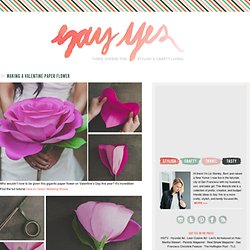
I’d love to hear your favorites! Natural Bean Jewelry. “Me, sexy? I’m just plain ol’ beans and rice.” — Pam Grier Once thought of as the seat of the soul, beans have been buried with the dead, deemed the seed of sin, grown for almost nine millennia, and eaten daily across the globe. With over 4,000 cultivar they come in coats of many colors: rich red and purple kidney, tawny intricate tans of cranberry, or the the simple stark contrast of the black eye.

I’m Lisa Kraushaar of radicals — by day a mild-mannered Etsy Admin — here to show you how to make beans into beads, and focus on the legume’s more decorative values. Supplies You’ll Need: Approximately 300 dry beans, any type (Pictured above are calypso beans, black eyed peas, red beans, and cranberry beans.)Waxed threadFlex shaft or dremel hand tool (or any tool that drills)1mm drill bitBench pin (or another wooden surface to drill into)4 mm spherical burrSuper glueScissors Directions: 1. Beans with drilled holes. 2. Hold your flex shaft firmly, but without a stiff wrist. 3. 4. 5. 6. Spring DiY - Recycle flower pots! You will need: Υλικά: 1 old flower pot παλιές γλάστρες 3 or 4 smaller ones 1 μεγάλη και 3-4 μικρές 1 old broom stick (or metallic pipe) 1 σκουπόξυλο (ή χαλκοσωλήνα) plants φυτά soil χώμα You need a way to make your broom stick stable inside the big pot, so as to hold the weight of the smaller pots later on.

Το βασικό στοιχείο στην κατασκευή είναι να σταθεροποιήσουμε το σωλήνα μέσα στην γλάστρα, για να κρατήσει το βάρος των μικρότερων αργότερα. Then put the big pot (upside -down) on top of your filled pot and then turn them both around (if you just turn the filled pot in the bigger one..you might end up spilling all the soil). Μετά γυρίστε την μεγάλη γλάστρα ανάποδα, σκεπάστε την μικρή (ακουμπώντας τον εσωτερικό πάτο της μεγάλης στα χείλη της μικρής για να κρατήσετε το χώμα) και αναποδογυρίστε τις μαζί.Γεμίστε την μεγάλη γλάστρα με χώμα.

Water the soil as to avoid any air between the small pot and the soil. Πoτίστε πολύ καλά το χώμα για να αποφύγετε κενά αέρα ανάμεσα στη βάση και το χώμα. BustedTees - Funny T-Shirts - New T-Shirt designs every week - Crazy Tees Hilarious Cool Shirts. Backlit Canvas Art. Do you have one project that you've been longing to do, but just haven't found the time yet? This is it for me. I call it my Backlit Canvas Art and the inspiration piece has been pinned in my "Crafts to try" Pinterest board for ages. My "pin"speration is an artist's piece made from metal that has hand cut flowers all over it. Its backlit by Christmas lights, and I pretty much love it! So I decided to give it a go and create my version.
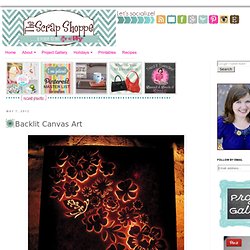
There are two main differences between the two: 1. 2. The idea of the canvas is that during the day (ie. with the Christmas light off) you have a beautiful sculpture while at night (you guessed it, with the Christmas lights on!) How about a tutorial? Supply list Mounted canvas (mine is 10"x10") cardstock to fit on your canvas (mine is 12"x12") stamps ink pad X-acto knife light source* *I wasn't sure if I wanted to use a single bulb or Christmas lights so that is why both are in the above picture.

I decided to go with the same flower theme as my inspiration piece. Waterproof Your Canvas Shoes | Ahoy! | Portland Maine DIY Blog. DIY Sharpie Tie Die. I love this Sharpie tie die DIY from The Art Girl Jackie blog! She did it with her adorable daughter and I think it’s a fun inspiration for this Spring and upcoming music festival season. Use this technique to spruce up your ratty t-shirts or maybe a pair of of cut off shorts. For another idea, check out how to spruce up your clothes with DIY leopard print here! What You Need: Pre-washed white or light colored t-shirtRubbing AlcoholLiquid dropper or medicine dropperSmall plastic cup(s)Rubber bandsVariety of colored Sharpies Do It!
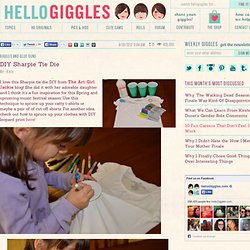
Choose a spot to start and put your cup in right side up and secure a rubber band around the cup rim holding the shirt tightly in place.Pick your colors and create a small design in the center of the stretched circle. Photos and DIY via The Art Girl Jackie. The Shabby Creek Cottage - interior design and home remodeling on a budget: 31 days: Book page garland. I think I’m gettin’ my creative mojo back! Today’s post isn’t technically Halloween, but it is part of my Halloween mantle (which you’ll see later this week), so I think it counts It’s all about the book page garland, baby! I love working with book pages. Maybe it’s because I’m a writer and I love being surrounded by words where ever I can squeeze them in, but I also love the look of the written word on a page.

For this project I used nearly an entire hard back book from the Dollar Tree, some left over coffee for staining the pages, and my trusty stapler. Oh and staples – lots and lots and LOT o’ staples. I coffee stained mine by crumpling them up, wetting them with coffee, then drying them in the oven. Once your pages are all dried & stuff, then crumple them long ways into somewhat of a fan shape and put a staple or two to keep them together. The more the merrier! Then staple them together in a line, layering them in front and behind of each other. Starburst Wrapper Bracelet Tutorial « « Fluffyland Craft & Sewing BlogFluffyland Craft & Sewing Blog.

Big news! The Starburst Wrapper Bracelet Tutorial is now available as an Amazon e-book It’s only $2.99 and with the e-book version, you can take this handy step-by-step guide wherever you’re going to be folding! Giving the e-book along with a pack of Starburst wrappers would be an excellent gift. The purchased book can be read on the iPad, Kindle, e-reader, or your computer screen so it’s portable and versatile. Thanks for your support of Fluffyland Craft & Sewing Blog, and enjoy crafting!
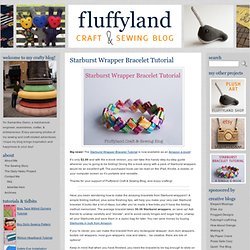
<A HREF=" Have you been wondering how to make the amazing bracelets from Starburst wrappers? If you’re clever, you can make this bracelet from any rectangular wrapper: dum dum wrappers, tootsie roll wrappers, most gum wrappers, now and laters… be creative, there are lots of options! Keep in mind that when you have finished, you need the bracelet to be big enough to slide on and off your wrist without too much trouble. Click on any of the photos for a larger view.

Dollar crafts

All Featured Projects | Cut Out. Great Ideas. Paper mache teacup pattern & ann wood. A paper mache teacup pattern to mark the 5 year anniversary of my blog, my experiment. A perfect time to say thank you and give you a present. There is a template you can download here. And lots and lots of photos and instructions. If you do make teacups I’d love to see and you can upload a photo here if you like or leave a link to your photo in the comment section below. What you need: Click here to download the templatepaste – I use golden harvest wheat paste ( wall paper paste)light cardboard – cereal or frozen pizza box is great and a bit of thicker cardboard for a basenewspaper – it’s nice to have different colorsscotch tape ( not the invisible gift wrap stuff- the shiny sticky stuff)glue – elmers, glue stick, hot glue - whatever you likepencil, scissors, exacto knife, and paint and brushes, glitter, fabric – whatever you’d like for decoration.

Click the photos for larger images. Cut out the templates for the teacup, handle and bottom and trace them onto your cardboard. The End! Art 1. Optical Design. How To Turn Old Books Into New Furniture | Slideshows. 25 Handmade Gifts Under $5.

Basic Flag Book.