
Phee's Coloring Pages. Projects and drawings to color for all ages. Most favorited last 7 days. Wall Flowers Week - Too Much Teal Tuesday! I bet you guys thought the color today was gonna be Tampico Punch Orange!
Creative Kismet & Blog Archive & little guiding stars. Since the new year has started I’ve been trying to think of ways to be more kind to my self.
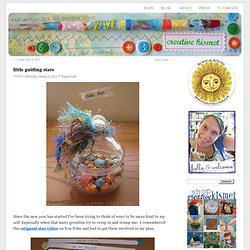
Especially when that nasty gremlins try to creep in and stump me. I remembered this origami star video on You Tube and had to get them involved in my plan. I thought it would be fun to make a whole bunch with kind words and “you are….” phrases inside. I made 60 of them, enough to last me the whole year if I open one a week, plus a few extra just in case. I used 12 x 12 inch scrapbook paper and cut 1/2 x 12″ strips, then followed the video HERE*. *UPDATE! Print Hula Hoop Rug Page.
Tutorial: How to Make a Pomander Flower Ball. Gift Box. Gift Box This box made from two bills. The bills/box can be the gift itself, but it is also just about the right size for a ring box. (Perhaps a dollar-bill ring?) Get yourself two fairly new, crisp bills. Glass Etching. Have you ever done any glass etching?
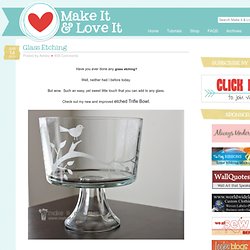
Well, neither had I before today. But wow. Such an easy, yet sweet little touch that you can add to any glass. Check out my new and improved etched Trifle Bowl. The perfect bowl for desserts of all kinds…..and even a great place for fresh fruit on the counter. Sugar Bee Crafts: sewing, recipes, crafts, photo tips, and more!: Craft Room... I don't think I've told you, but I'm working on vamping up my craft room.

It's in the works. But the chair is done, and I LOVE it!! I found the basic office chair at a thrift store and redid it: WOW, right?! What a difference paint and fabric can make!! How to make roses from maple leaves. DIY. More Design Please - MoreDesignPlease - DIY : Sailors Knot Bracelet& Paper Illustrations, Gift boxes,... - StumbleUpon. Make A Cheap &Easy Solar USB Charger With An Altoids Tin. Photos by Joshua Zimmerman The craftster behind the very popular $3 solar-powered emergency radio is back with a new awesome project: a cheap solar battery charger with a USB plug.
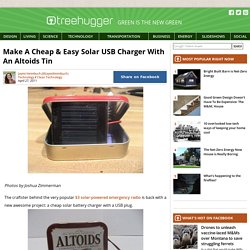
Zimmerman wrote, saying that he saw a lot of small solar powered chargers being talked about over Earth Day, but there was a big problem: "They're all quite nice, but also quite expensive. I don't think I've seen any for less than $60, and I've not seen one that really suits my style. " Stay-at-Home Artist: stencil with freezer paper (harry potter tee)... Yes, I am a nerd.

I came up with a brilliant idea for a Harry Potter t-shirt and I couldn't resist. "Expecto Patronum! " However, you can make whatever kind of design you want with a freezer paper stencil. It doesn't have to be Harry Potter related. How to Make Crayon Monogram. DIY of the Month: Braided T-shirt Bracelet - StumbleUpon. How To: Give your old t-shirts a second life.

Sorry dust rag pile! Photos: kirsten for we heart this I love using simple materials to make something fun and innovative. The Adventures of an Urban Socialite™ Top two images from Honestly… WTF (total cost about $5)/ Bottom image from Oak– retail $372.00 Love this clever project from Erica and Lauren of Honestly… WTF… so much so I might even attempt it– I love these bracelets!

The best part is, there are tons of options in terms of hex nuts (they have bronze, steel, etc.) and twine color, size, etc. and the project is super straight-forward. Have fun! Via MCSpice. Kool-Aid Dyed Playsilks - Tried and True. A couple months ago I came upon a tutorial on The Artful Parent for Kool-Aid Dyed Playsilks.
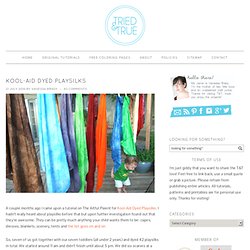
I hadn’t really heard about playsilks before that but upon further investigation found out that they’re awesome. They can be pretty much anything your child wants them to be: capes, dresses, blankets, scenery, tents and the list goes on and on. So, seven of us got together with our seven toddlers (all under 2 years) and dyed 42 playsilks in total. We started around 11 am and didn’t finish until about 5 pm. We did six scarves at a time, with the other mothers pitching in to watch the child of whoever was working on their playsilks. After we did the first batch of Kool-Aid packets, some of the mothers decided to get a bit creative with color combination and as a result we ended up with 14 different color at the end of the day.
Edit: Here are a few answers to some of the more popular questions posted in the comments. DIY Wrap Bracelet - Honestly WTF. You should all know by now that we are all about stacking bracelets on our wrists.

The more, the better. In fact . . . the most, the best! With that being said, we’ll show you how to master a version of the ever so popular wrap bracelet. It’s so simple and addicting, you’ll soon be churning out these wristlets with your eyes closed. Clearly this arm party train isn’t stopping and it’s about time you get on board! You’ll need (for a double wrapped bracelet) :* Lengths will vary depending on the size of your wrist (see comments for suggestions). Fold the length of leather cording in half to form a loop. Place the ball chain along the leather cording with the end of the chain meeting the end of the wrap. Continue wrapping while checking it for fit around the wrist.
When you have reached the end of the ball chain wrap the linen cording around the leather strands 2-3 more times. Thread the hex nut through the strands and tie a second knot. Trim with scissors and your wrap bracelet is finished!! The Shirt. As with all these designs, try to start with a relatively clean, crisp bill. It will make it much easier. All folds should be sharply creased. It helps to go over the fold with a fingernail on a flat, hard surface. Start by folding the bill precisely in half lengthwise. (I prefer to fold in toward the front of the bill. Fold the bill one quarter of the way in from each side lengthwise. Turn the bill over.
Turn the bill over again. Fold a little less than one third of the bill lengthwise from the opposite end as shown.