
CE V3.0 - Amazon EC2 Guide. This guide is applicable for Kaltura CE version 3.0.x based Amazon Machine Images (AMIs) The Kaltura Community Edition is a free, open-source, self-hosted video platform.

It is developed through the combined efforts of Kaltura and the community and is available under the GNU Affero General Public License v3 This installation guide helps you understand how to work with Kaltura's Amazon EC2 images so you can get up and running using Kaltura's Community Edition. Getting Your Amazon Credentials Kaltura offers pre-configured Amazon Machine Images (AMIs) of our Community Edition that can get you up and running in short order. After configuring your EC2 credentials, you can use the AWS Management Console, or your favorite tool, to create instances using our AMIs. If you'd like to learn more about Amazon EC2 and how to use it, refer to the Amazon EC2 Getting Started Guide.
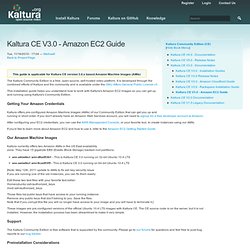
Our Amazon Machine Images Kaltura currently offers two Amazon AMIs in the US East availability zone. Support Installation Steps. CE V3.0 - Amazon EC2 Guide. Implementation › Drupal › NetDNA Support Wiki. The CDN module add-on for Drupal will alter URLs, so your static content will load from the CDN servers, as opposed to your origin server.

The module provides two modes: “Origin Pull” and “File Conveyor”. For setting up the site to use our CDN you need to only use “Origin Pull,” which is basically used as a domain name rewriting mode. Installing Drupal CDN Login to your Drupal admin panel, click “Modules”, then click “Install New Module”.In the “Install from a URL” box, enter the CDN Module URL: (check the official Drupal CDN Project Page for the newest stable version), and click “Install”.Now click on “Configuration”, then scroll down to click on “CDN”. In the “General” tab, tick the “Enabled” Radio Box then click “Save Configuration.”Click on “Details” then select “Origin Pull”. Your website should now be using CDN services, and you can confirm this by reloading your website and viewing the page source. Important note 1. 2. 3. Disable “Bundler is Active.” 4. 5.
Video Tutorial. Implementation › Wordpress › NetDNA Support Wiki. Implementation › Magento › NetDNA Support Wiki. Magento has the ability to utilize CDN Functionality without the need for a 3rd party plugin.

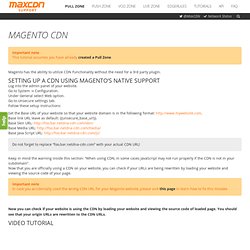
Setting up a CDN using Magento’s native support Log into the admin panel of your website.Go to System → Configuration.Under General select Web option.Go to Unsecure settings tab.Follow these setup instructions: Do not forget to replace “foo.bar.netdna-cdn.com” with your actual CDN URL! Keep in mind the warning inside this section: “When using CDN, in some cases JavaScript may not run properly if the CDN is not in your subdomain”.Now that you are officially using a CDN on your website, you can check if your URLs are being rewritten by loading your website and viewing the source code of your page. Important note In case you accidentally used the wrong CDN URL for your Magento website, please visit this page to learn how to fix this mistake. Now you can check if your website is using the CDN by loading your website and viewing the source code of loaded page. Video Tutorial. Implementation › Joomla › NetDNA Support Wiki.
Installing Joomla CDN For 2.5.6 or higher Download the “CDN For Joomla!”

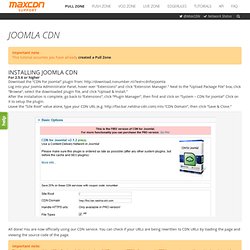
Plugin from: into your Joomla Administrator Panel, hover over “Extensions” and click “Extension Manager.” Next to the “Upload Package File” box, click “Browse”, select the downloaded plugin file, and click “Upload & Install.”After the installation is complete, go back to “Extensions”, click “Plugin Manager”, then find and click on “System – CDN for Joomla!” Click on it to setup the plugin.Leave the “Site Root” value alone, type your CDN URL (e.g. All done! Important note: The free version of the “CDN For Joomla!” Video Tutorial [videotutorial vid="joomla" vfile="cpn_joomla_cdn.mp4"]