
Context. Fritzing is an open-source initiative to support designers, artists, researchers and hobbyists to take the step from physical prototyping to actual product. We are creating this software in the spirit of Processing and Arduino, developing a tool that allows users to document their Arduino and other electronic-based prototypes, and to create a PCB layout for manufacturing. The complementing website helps users to share and discuss drafts and experiences as well as to reduce manufacturing costs. Fritzing is essentially an Electronic Design Automation software with a low entry barrier, suited for the needs of designers and artists. It uses the metaphor of the breadboard, so that it is easy to transfer your hardware sketch to the software. From there it is possible to create PCB layouts for turning it into a robust PCB yourself or by help of a manufacturer.
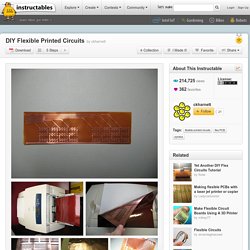
Why Fritzing is needed. DIY Flexible Printed Circuits. Get some thin sheets of polyimide which have copper on one or both sides.

Polyimide is a yellow polymer with a high melting temperature and is sometimes called Kapton. A common type of copper-coated polyimide is DuPont "Pyralux" material. Pyralux sheets come in many different varieties of polyimide thickness, copper thickness and adhesive thickness (the "adhesive" is between the copper and polyimide holding everything together.) Copper thickness is given in oz per square foot, while adhesive and Kapton thickness is given in mil (1 mil =0.001 inch).
Pyralux LF7062 (pictured) has 1/2 oz Cu, 1/2 mil adhesive and 1 mil Kapton. Other options are double sided copper ( a sandwich of Cu/Kapton/Cu held together with adhesive) and a roughened surface, denoted by R at the end of the part number. The roughened sheets and double sided sheet work OK. See if you can get a free sample from DuPont. Electronics. Build an Ardubot Skill Level: Beginner by Pete-O | April 16, 2009 | 18 comments Buildabot This tutorial is intended to show the reader how to build up an Ardubot platform.

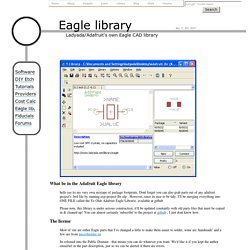
There are a few different ways that it can be done, so we? First, gather all the parts: Most of the guts of the Ardubot. A few remaining pieces. The list is: (1) ROB-09207, Ardubot PCB (1) DEV-00666, Arduino USB Board (1) ROB-08901, Wheels 32x7mm (1) ROB-08909, 3/8? (2) ROB-08911, Micro Metal Gearmotor 30:1 (1) COM-00315, H-Bridge Motor Driver (1) COM-00102, SPDT Mini Power Switch (2) PRT-00116, Break Away Headers - Straight (1) ROB-08898, Micro Metal Gearmotor Bracket You could also use the polarized battery connector we sell (sku: PRT-08233). Then, solder on the bridge driver, like so: The bridge driver soldered onto the Ardubot. Next, install the motors with their mounts. The Adafruit Eagle Library. What be in the Adafruit Eagle library hells yes its my very own mixtape of package footprints.

Dont forget you can also grab parts out of any adafruit project's .brd file by running exp-project-lbr.ulp . However, since its nice to be tidy, I'll be merging everything into ONE FILE called the Ye Olde Adafruit Eagle Librarie, available at github Please note, this library is under serious construction, it'll be updated constantly with old parts files that must be copied in & cleaned up! You can almost certainly 'subscribe' to the project at github , I just dont know how. The license Most of 'em are either Eagle parts that I've changed a little to make them easier to solder, some are 'handmade' and a few are from microbuilder.eu Its released into the Public Domain - that means you can do whatever you want. Enjoy! Whats innit? A plethora of tasty parts such as…. Mechanical 1x2 - a 2 pin 3.5mm header for a 2 pin terminal block FIDUCIAL - you know, a fiducial! Batteries Classic libs Crystals & such. Jonathan Ward - MIT - Machines That Make.
Online: Download. Linux Anwender von Linux bitten wir folgende Datei herunter zu laden und diese auszuführen:eagle-lin32-7.5.0.run für 32 Bit,eagle-lin64-7.5.0.run für 64 Bit.Dieses selbstextrahierende Shell-Skript führt Sie durch den Installationsvorgang.

Es kann sein, daß Sie obigen Link mit der rechten Maustaste anklicken und “Speichern unter…” auswählen müssen. Um diese Datei auszuführen klicken Sie auf “Ausführen” oder gebe Sie in einem Shell-Fenster den Befehl "sh eagle-lin32-7.5.0.run" (bzw.