
Wanna make a dress?? I am PUMPED today!
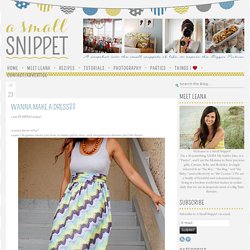
Wanna know why? Cause i’m gonna show you how to make quick, easy, and inexpensive dresses just like these! I know what y’all are thinking…no way that’s quick and easy. oh…you are SO wrong. it really is! I might even venture to say that its one of the easiest sewing projects i’ve ever done. go ahead…try it…and try to prove me wrong! I orginally found this brilliant idea here and was instantly motivated to try it. i did, however, change up some things along the way, such as making a long maxi dress, and one other thing in particular that will prevent a massive headache, so i’ll go ahead and post a tutorial here for you to see. i took the following pictures for the tutorial as i was sewing the long dress. i will make a note in each step where there is something different to do for the short dress. first things first…gather your supplies. all you need is a ribbed tank top and some coordinating fabric and thread. how cheap is that??
For the long dress: for the short dress: Patchy_Jeans. Tutorial: Adding an elastic neckline. Sometimes a wide neckline can be softened a little by adding an elastic gather.

I think it gives it a more playful finish to the garment. Great for casual tops. But as always, it's very important to do it correctly. It's quick and easy so here's how to do it. The casing for the elastic will be created by bias binding.Leave a long tail for joining your pieces and pin to the right side of your fabric.Sew around the entire neckline stopping one or two inches back to allow room for joining your bias.I have set my bias in a small margin from the edge to allow for the overlocked edges I did.
Press over your bias to the inner side of your garmentSew your second bias stitching row. How To Make An Easy and Cheap Shirt From Silk Scarves. Wanna learn how to make a super cute and breezy summer top?
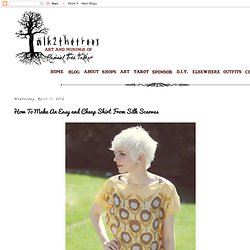
What if I told you it only cost me about 3.50? And what if I told you it took me about 5 minutes?! I thought so. Guys, this shirt is a dream. I've been wanting to wear it everyday... but since that isn't socially acceptable, I have not. It's super light weight and breezy. Here is how it works... You need: 2 silk scarves matching in size and color.
My studio was way too messy for any good pictures of the process, so I used photoshop. So, here is a representation of my two scarves. I got home and washed them on delicate, then hung them to dry. You then layer the scarves on top of each other, right sides facing in. Basically, sew where you see the dotted lines. (But probably a bit more even..) Leave a big enough space for your head, the shirt is meant to be a bit "boat necked. " Also, make sure you leave enough room for your arms, so it's loose and breezy. Sewing School. Welcome to the Sewing School!
I get a lot of emails and comments asking about how to do certain sewing related things and where to find old posts on my blog and so in an effort to consolidate the tutorials and sewing advice you find here on A Fashionable Stitch, I’ve made up this handy dandy Table of Contents page to navigate you through what’s available here. It’s due to be added to every now and then, so check back when you are searching for something and can’t find it. Happy Sewing Adventures! Xoxo, Sunni Making a muslin or a test garment (also known as a toile) is a great way to find out if certain alterations are needed for a particular pattern. Alterations for Pants/Trousers Getting a pair of pants or trousers to fit perfectly can be one of the hardest fittings we ever do as sewists.
Flat Pattern Adjustments Flat Pattern Adjustments are adjustments made to the pattern before you make a muslin. How to: Petersham Ribbon Waistband. It’s been crazy here Dearhearts – so please, if my posts are a bit scatter-brained, forgive me. Now that you know all the in’s and out’s of petersham ribbon (see last week’s post), you can start applying it in various ways to different sewing projects you may have. This is but one way, I have more still to come! As you can see, my blanket skirt is coming along quite nicely. Again this is the skirt section of Sewaholic’s Lonsdale Dress and its been a breeze to make.
Let me tell you where I’m at as far as skirt construction, so that if you decide to opt for a waistband like this you’ll know when to insert. Step 1 ✂ For the waistband, you will need two lengths of petersham that is your waist measurement + 1/2″ for wearing ease + seam allowances. Step 2 ✂ Next, stitch the petersham facing waistband to the skirt lining. Step 3 ✂ Now, its time to add your zipper to the lining. Step 4 ✂ Time to add the skirt lining with the zipper to the outer skirt. Happy 1st day of December! Xoxo, Sunni. The 30 Minute $6 Dress Tutorial. Guest post by Rachael at Talk 2 the Trees.
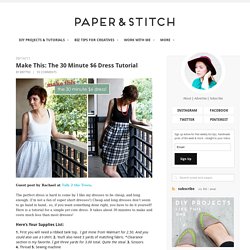
The perfect dress is hard to come by. I like my dresses to be cheap, and long enough. (I’m not a fan of super short dresses!) Cheap and long dresses don’t seem to go hand in hand.. so, if you want something done right, you have to do it yourself!