Interior rendering Vray For Sketchup Tutorial.mov. HDRI and Vray Sun for Lighting Interiors | Aleso3d | Just Premium Content – Vray Tutorials, 3ds Max, Free 3d Models, Textures, Photoshop, Zbrush and free stuff | 3d tutorials. Making Of 'Apartment' by LeFX. The purpose of this project was to show how we would approach the interior visualization of an apartment. To make the whole thing more challenging and interesting, we tried to show different periods of the day so that we could experiment with the reaction of the materials to the different lighting situations. The most time-consuming part was the post-production, because it was primarily in that time when we decided on the final style for the visualization. In the end we settled on yellow/orange colors for the lights and the ground as it contrasted well with the blue wall and green vegetation. Right from the beginning it was important to get a real sense of the layout and dimensions; therefore we remained in constant contact with a friendly architect, Bernhard Ortlieb, for the whole duration of the project.
This overview covers every stage in the process, including modeling, lighting setup, materials, rendering and post-production. Modeling - Apartment Details Fig. 01 Light Setup Fig. 02. Converting a Standard Camera to a VRay Camera by VRay Guide. Tutorials - Free Source of 3D Tutorials on 3DTotal.com Ltd. Tutorial :: VRay Render Settings for Interior Visualisation. An advanced guide to the interior rendering of still images within Chaos Group Vray and Autodesk 3ds Max. Most will argue that there are no “universal settings” for Vray and I tend to agree. But there are steps you can take in order to get close to what you need for the majority of interior visualisation. There are many other guides out there that offer similar and different approaches to Vray rendering but I have found some techniques to be somewhat confusing and hard to follow.
This guide is a summary of all those different techniques, and it will give you rendering settings that work well for interior visualisation as well as the reasons behind them. Before I start, I would like to point out that I will be using a linear workflow with a gamma 2.2 setup within 3ds Max and Vray. I strongly recommend setting this up as it will improve many areas within your workflow. You can find an easy to follow step by step guide here. You can also turn displacement off (Optional). Fixed Adaptive DMC. Tutorial :: Autodesk 3ds Max and Vray Camera Matching – Part Two.
In part two we will be looking at how to light the scene once you have camera matched it to a photo, commonly known as a back plate. In case you haven’t read the first part of the tutorial, you can view it here. Please note this tutorial will not cover materials. The materials have already been created and applied. To correctly illuminate the scene, a HDR image will be used as a light source as well as a reflection. A HDR image is made up of multiple exposures of the same image allowing a greater dynamic range of luminance between the lightest and darkest areas of an image.
On this occasion I have considered an alternative method for creating a HDR image. The purpose of the lens is to capture a full 360° spherical panoramic image that can be mapped as a spherical environment inside Autodesk 3ds Max. For best results you should mount the iPhone on to a tripod to keep the camera steady and in the same location. By default EXIF data is stored within a JPEG image. Img01.png = -2EV. Tutorial :: Autodesk 3ds Max and Vray Camera Matching – Part One.
Placing a 3d render within an existing photo is a process that I am frequently asked to do for clients. Usually this is referred to as camera matching or as an in situ render. If completed correctly, the end result can give a realistic interpretation of the project. This is the first of two tutorials, giving an in depth explanation of how to set up the viewport background and match the perspective of a photo.
The second part will explain the lighting techniques used to render the car as realistically as possible and match it to the environment of the photo. When taking the photo, you must include a reference object that you can refer to within 3ds Max. This object will be used to create reference points in two perspective planes. It is also important to know the size of the reference object because you will need to recreate this inside 3ds Max. The size of the box really depends on the scene you are creating.
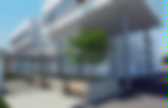
Finally turn on show safe frames by right clicking your viewport setup. Tutorial :: Making of a Retro Building at Dawn. 3D Max2010 SP1, Photoshop CS3 I wanted to portrait an observatory in the dawn time... This light is tricky and sometimes it could be dawn or dusk...it's like the twilight hour...The era is undefined... retro or future, like the 5th dimension TV Show mood... It’s the same way we look forward in the beginning of an incoming year. I looked in the Internet for references of the building and accessories I wanted for the scene. The modeling was made by the polygonal method. Extruding faces, cloning edges and all the tools that makes 3ds Max so versatile to work with.It took me 4 days to design and model the building.
The plants are from Internet sites. The material was the Arch&Design(mi). The renderer was the Mental Ray with Final Gather with a Medium preset and 4 bounces.The image above was the straight render from 3ds Max, but I wanted a more dramatic scene ... I liked the sun’s rays shinning through the building, so I placed the two images in Photoshop CS3 and composited them.
Tutorial :: Vray Animation Optimisation. Rendering animations using Vray can undoubtedly leave you in frustration when it comes to render times. The high gloss materials, reflections and displacements that you use for still images can make your total animation rendering time beyond manageable. Here is a compiled list of tips and tricks to help keep those render times down but still keep a high standard of quality and there will be more to add soon. If you think you have any useful suggestions that you wish to share, you can leave them in a comment below or email them to us. Using displacement in still images is a slow process. When it comes to animation this process becomes far more complex and usually involves careful planning, especially if you need to keep that carpet looking like carpet. For areas such as grass and carpet, use 3d mapping. In order to keep the render times low, you usually sacrifice the quality of your subdivisions for lights and materials which in turn introduces noise.
Lower your max depth values to 3 or 4. Tutorial :: Vray 2.0 Materials Guide. A more in depth look at each setting within a Vray material for version Vray 2.0. Diffuse This is the actual colour of the surface, reflection and refraction colours can affect the visual appearance of this colour. It is important to understand that no material in the real world is pure white RGB (25,255,255) nor pure black RGB (0,0,0).
When creating a white or black material, set the colour values to an off white RGB (245,245,245) / black RGB (2,2,2). If you render an object that is pure white or pure black you will notice that there is no contrast. Roughness Can be used to simulate dust on a surface by controlling the way the surface reflects direct light. Reflect Like diffuse it uses a colour value to determine the reflection strength. By default the reflection colour acts as a filter for the diffuse colour and the stronger the reflection colour the dimmer the diffuse colour.
Metals Composites Ceramics Finishes Diffuse colour also affects the reflection intensity. Fresnel reflections Subdivs. Tutorials. Vray Materials | VisCorbel. (3) TUTORIAL DE 3D STUDIO MAX + VRAY (ESCENA INTERIOR) TUTORIAL DE 3D STUDIO MAX + VRAY (ESCENA EXTERIOR)