
PS3 Eye 4-channel Audio Tests on Ubuntu Karmic. The PS3 Eye is a great USB camera for experimenting.

It can capture video at 320x240x120Hz, or 640x480x60Hz - much faster than the average webcam. The necessary drivers are built into the latest Ubuntu Karmic, allowing it to work straight out of the box. As an added bonus, the PS3 Eye has a built-in 4-channel microphone array. It is apparently used for adaptive noise cancelling. Out of curiousity I decided to see if the drivers would allow capturing 4-channel audio from the microphone array. I measured the distance between the outermost microphones to be about 62mm. Holding the PS3 Eye almost side-on and making a "tick" sound: The two middle channels were reversed, however after flipping them the waveforms clearly show a delay between successive channels, and also a reduction of amplitude to the most distance microphone. The highlighted selection above marks the zero-crossing for the second oscillation. At 44.1kHz, that is (8/44100) ~ 181.4μs or about 62.2mm separation.
HOWTO: Recording audio from the command line. Recording any sound that goes through your computer is a feature that you don’t have to miss out.

Mostly if this sound is music. There are lots of internet streaming mp3 sources that stream audio that you can listen with your computer and why not, you can record to mp3 and have an enormous mp3 library. In this howto I’m going to give you powerful tools to record sound directly to an mp3 file or ogg file from the command line. So, you will be able to record for hours and hours your favourite music without having to worry about your hard disk space. First of all you have to set up the recording channels by doing alsamixer Once there, select the capture view by typing the tab key.
With the arrow keys select the column Capture and set it to the CAPTUR mode with the space key as in the screenshot. Arecord Mini-Howto. The arecord/aplay Mini-Howto by Patrick Shirkey The ALSA arecord/aplay utility is a very simple and powerful tool for any musician.

It provides command line access to playing and recording a multitude of file formats and is very useful for testing the ALSA drivers to make sure they are working correctly. The basic rule is that if you cannot record/play using this utility then you need to do some system maintenance. Using multiple instances of arecord can allow you to do very simple multitrack recording (if your card supports it).
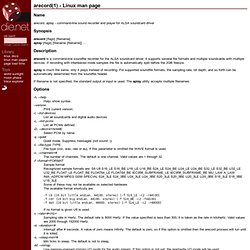
If you want to know more about using the arecord/aplay utility then type: arecord --help How to record using arecord 1: Open two shell environments (aka Consoles or Terminals) 2. Alsamixer. Arecord(1. Name arecord, aplay - command-line sound recorder and player for ALSA soundcard driver Synopsis arecord [flags] [filename]aplay [flags] [filename [filename]] ...

Description arecord is a command-line soundfile recorder for the ALSA soundcard driver. Aplay is much the same, only it plays instead of recording. If filename is not specified, the standard output or input is used. Options -h, --help Help: show syntax. --version Print current version. -l, --list-devices List all soundcards and digital audio devices -L, --list-pcms List all PCMs defined -D, --device=NAME Select PCM by name -q --quiet Quiet mode. -t, --file-type TYPE File type (voc, wav, raw or au). -c, --channels=# The number of channels. -f --format=FORMAT -f cd (16 bit little endian, 44100, stereo) [-f S16_LE -c2 -r44100] -f cdr (16 bit big endian, 44100, stereo) [-f S16_BE -c2 -f44100] -f dat (16 bit little endian, 48000, stereo) [-f S16_LE -c2 -r48000] If no format is given U8 is used. -r, --rate=#<Hz> Sampling rate in Hertz. -d, --duration=# Raspberry Pi into an audio spying device.
If you are a spy or work for the CIA or the FBI, this will come in handy in your knowledge.

Given the size and price of the Raspberry Pi, it occurred to me that using it as a spying device (which are actually really expensive) would be really appropriate. In this case, I’ll explain how to convert your Raspberry Pi into an audio streaming device, or audio spying device, however suits best to you. Use it under your own responsibility. Plugging the microphone and loading the module The Raspberry Pi has an audio output jack, but unfortunately there is no input port. (or plug a webcam with microphone). Once the microphone is plugged in, you might have to load the audio module by typing the following command if it isn’t. sudo modprobe snd_bcm2835 Recording and playing a test file Now we can try to record some audio into a file by running: arecord -D plughw:1,0 test.wav Just press CTRL+C once you think you’ve got enough recording.
Aplay test.wav Did you hear anything? Alsamixer Alsamixer.