
Un réseau sans-fil avec des XBee. Les modules XBee sont des circuits de communication sans-fil utilisant les protocoles 802.15.4 et Zigbee, permettant de réaliser différents montages, d’une liaison série RS232 classique à un réseau maillé (mesh) auto-configuré.
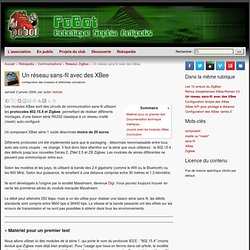
Un composant XBee série 1 coûte désormais moins de 20 euros. Différents protocoles ont été implémentés sans que le packaging - désormais reconnaissable entre tous avec ses coins coupés - ne change. Il faut donc faire attention sur la série que vous utiliserez : le 802.15.4 des débuts jusqu’aux nouvelles Séries 2, ZNet 2.5 et ZB Zigbee. Les modules de séries différentes ne peuvent pas communiquer entre eux. Selon les modèles et les pays, ils utilisent la bande des 2,4 gigahertz (comme le Wifi ou le Bluetooth) ou les 900 MHz. Ils sont développés à l’origine par la société Maxstream, devenue Digi. Le débit peut atteindre 250 kbps, mais si on les utilise pour réaliser une liaison série sans fil, les débits standards sont compris entre 9600 bps à 38400 bps. Modules XBee. OpenServo high quality open source digital servo. Arduino to Android IO on the cheap (aka Poor Man's NFC) Summary: This article describes how to implement a very low bandwidth one way communication channel between an Arduino (or any other microcontroller) and an Android device using nothing more than about a meter of magnet wire, a resistor and diode.
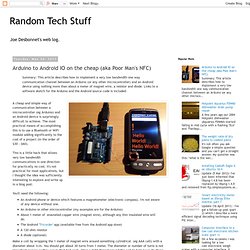
Links to a software sketch for the Arduino and the Android source code is included. A cheap and simple way of communication between a microcontroller (eg Arduino) and an Android device is surprisingly difficult to achieve. The most practical means of accomplishing this is to use a Bluetooth or WiFi module adding significantly to the cost of a project (in the order of $30 - $60). This is a little hack that allows very low bandwidth communications in one direction for practically no cost. It's not practical for most applications, but I thought the idea was sufficiently interesting to explore and write up in a blog post. You'll need the following: An Android phone or device which features a magnetometer (electronic compass). Potential improvements. Playground - SerialLCD. Serial LCD tutorial by djmatic With a simple four wire connection and the code below, the Arduino can drive serial LCD displays.
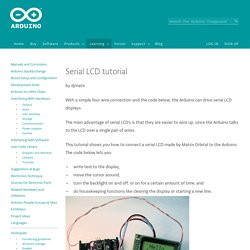
The main advantage of serial LCD's is that they are easier to wire up, since the Arduino talks to the LCD over a single pair of wires. This tutorial shows you how to connect a serial LCD made by Matrix Orbital to the Arduino. The code below lets you write text to the display, move the cursor around, turn the backlight on and off, or on for a certain amount of time, and do housekeeping functions like clearing the display or starting a new line.
Connecting the hardware. Arduino and Colour LCD. Learn how to use an inexpensive colour LCD shield with your Arduino.
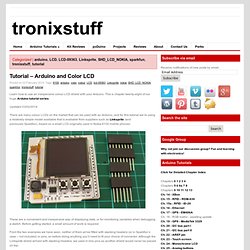
This is chapter twenty-eight of our huge Arduino tutorial series. Updated 03/02/2014 There are many colour LCDs on the market that can be used with an Arduino, and for this tutorial we’re using a relatively simple model available that is available from suppliers such as Linksprite (and previously Sparkfun), based on a small LCD originally used in Nokia 6100 mobile phones: These are a convenient and inexpensive way of displaying data, or for monitoring variables when debugging a sketch.
Before getting started, a small amount of work is required. From the two examples we have seen, neither of them arrive fitted with stacking headers (or in Sparkfun’s case – not included) or pins, so before doing anything you’ll need to fit your choice of connector. Capteurs domotiques en ligne. Il est désormais possible de publier des informations domotiques (météo, consommation électrique, chauffage...) sur Internet et de les consulter à distance voire de les mettre à disposition du plus grand nombre.

Voici le résultat embarqué : une page web dans un microcontrôleur affiche les valeurs en temps réel : (redirige sur un AVR connecté via Ethernet à une box ADSL). Voici le résultat intégré : des valeurs numériques en provenance d’équipements embarqués. Les explications sont données dans les pages suivantes. Nous allons voir deux aspects : le matériel côté maison et le logiciel côté Internet. Envoyer de l’information sur Internet Comme on est respectueux de l’environnement, on va oublier la solution consistant à laisser allumer son ordinateur de salon et on va chercher à consommer le moins possible.
Pour cela, nos petites cartes électroniques s’équipent de port Ethernet grâce à des puces capables de gérer la communication sur le réseau (IP, TCP, DNS, etc...). Solution myEthernet.