
DIY Inkjet Printer by nicholasclewis. Removing the Print Head Assembly. The next step is where you roll up your sleeves and start the cutting and modifying process.
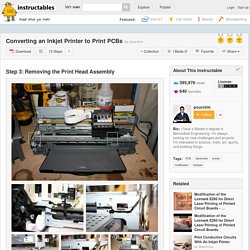
It's also the step where you need to pay attention to what you're doing as you could seriously injure yourself and/or ruin your printer modification completely. As such you should be wearing safety glasses or goggles during the cutting process and keep your hands away from the cutting disc. Also for those unfamiliar with using a Dremel tool when you cut through the metal sections of the printer body you will create a rain of sparks and small flakes of sharp metal. As I said before be careful and wear safety glasses, you don't want any of this stuff in your eyes. So on to the modification... Let's start with the easy areas first and work from there. Next you can focus on the two screws near the print head cleaning mechanism. This is where the Dremel tool enters the picture. If you've been careful and follow the directions thus far you should have three pieces laid out in front of you. Epson Stylus 760 - A home made continuous inking system (CIS,CFS)
February 2002, It beats me why CIS systems are so expensive, the ozi exchange doesn't help but even so....
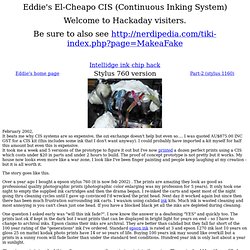
I was quoted AU$875.00 INC GST for a CIS kit (this includes some ink that I don't want anyway). I could probably have imported a kit myself for half this amount but even this is expensive. It took me a week and 5 versions of the prototype to figure it out but I've now printed a dozen perfect prints using a CIS which costs under $20 in parts and under 2 hours to build. The proof of concept prototype is not pretty but it works. My house now looks even more like a war zone, I look like I've been finger painting and people keep laughing at my creation - but it is all worth it. The story goes like this. Over a year ago I bought a epson stylus 760 (it is now feb 2002) . One question I asked early was "will this ink fade?
". Changing carts is to a bad thing. There is an obvious risk of killing the printer while trying to re-invent a CIS system but printers are cheap particularly old ones... Portfolio. Blinded by the Light I built a virtual retinal display using an off the shelf Microvision laser projector, low cost optics, and a 3D printed frame. The resulting direct image is bright but well within safe operating power.
Semi-Automatic Paintbrush Using an infrared camera, an InkShield, an ink cartridge with an infrared LED stuck to it, and your arm, you can copy great works of art, or just any old picture. The Semi-Automatic Paintbrush brings electronic automation to painting and organic style to printing. Augmented Reality for 3D Printing I wrote an augmented reality viewer to allow for previewing and handling of STL models of 3D printable objects without having to commit them to plastic. Thingidiff To enable easy visual comparison of derivative 3D objects on websites, I forked the WebGL based Thingiview.js.
Snow Globe Maker Ant Farm Physical Keygen Physical Keygen is a set of parametric CAD scripts to generate printable functioning models of household keys from key codes. Gestural Printing. Home built 1-pin dot matrix printer hack. One of the peripherals I didn't have for the longest time was a printer.
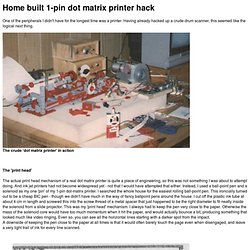
Having already hacked up a crude drum scanner, this seemed like the logical next thing. The crude 'dot matrix printer' in action The 'print head' The actual print head mechanism of a real dot matrix printer is quite a piece of engineering, so this was not something I was about to attempt doing. And ink jet printers had not become widespread yet - not that I would have attempted that either. Printer output - scanned at 300 DPI Horizontal carriage movement. Electronic Stamp - Construction, results. Page 1Intro, the big idea Page 2Finding the pinout Page 3Schematic Page 4Construction, results Page 5Possible improvements, final remarks (+ discussion / remarks) Do you like my hacking?
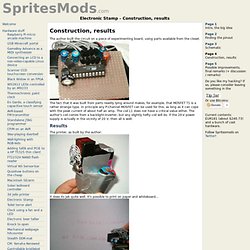
Or use Bitcoins: Donate6 Current contents: EUR181 (about $240.73) and a bunch of cool hardware. Follow Spritesmods on Twitter! The author built the circuit on a piece of experimenting board, using parts available from the closet. The fact that it was built from parts readily lying around makes, for example, that MOSFET T1 is a rather strange type. Inject water into your printer to get that page printed. I found an HP Deskjet D2460 that one of my neighbors threw out.
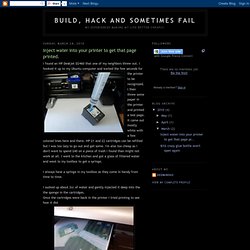
I hooked it up to my Ubuntu computer and waited the few seconds for the printer to be recognized. I then threw some paper in the printer and printed a test page. It came out mostly white with a few colored lines here and there. HP 21 and 22 cartridges can be refilled but I was too lazy to go out and get some. I always have a syringe in my toolbox as they come in handy from time to time. I sucked up about 2cc of water and gently injected it deep into the the sponge in the cartridges.Once the cartridges were back in the printer I tried printing to see how it did. Success!