
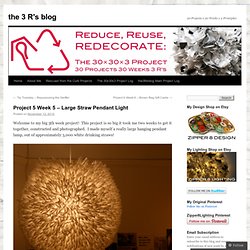
Woven rope pendant lamp. Not that long ago, I replaced a standard light fixture in my home with a custom pendant.

It wasn’t until that moment that I realized how significantly great light fixtures can change a room. The initial intimidation of working with electricity is starting to lessen with some great pointers from my dad, and now I am ready to tackle each room. My most recent replacement is a custom pendant made from a wire hanging planter and some sisal. Considering most pendants can average well over a hundred dollars, this version for around $30.00 is a steal! — Ashley As you consider adding more of a custom touch to your home with lighting, take a few minutes to look through the Sneak Peek Best Of: Pendant Fixtures and DIY Best Of: Lighting Projects for loads of inspiring ideas. Read the full how-to after the jump! Materials Instructions 1. 2. 3. 4. 5. You’re done!! Road Maps Run Rampant! (3 R’s of a different nature…)
Apologies for the long disappearance, life got a bit busy and I feel terrible but I just wasn’t able to find the time to write blog posts.
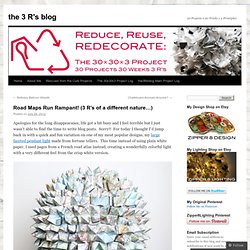
Sorry!! For today I thought I’d jump back in with a quick and fun variation on one of my most popular designs, my large faceted pendant light made from fortune tellers. This time instead of using plain white paper, I used pages from a French road atlas instead, creating a wonderfully colorful light with a very different feel from the crisp white version. Personally I am loving this updated version, it is also smaller than my previous light, this one measures approximately 14 inches across instead of 18.
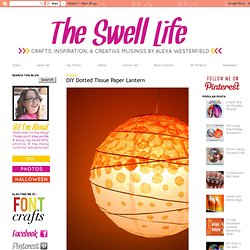
I think the colorful maps make for a really fun light, which would look awesome in a bedroom or den, especially in a kids bedroom. I used 4 inch squares of paper (if I remember correctly) and a 12 inch lantern, and approximately 125-150 fortune tellers, I can’t remember the exact number. One interesting difference is the look of the light when lit. Poppytalk - The beautiful, the decayed and the handmade: DIY With Bookhou: Woven Lamp. D.I.Y. by Arounna Khounnoraj of Bookhou what you need: -strips of wood veneer (you can also get 3/4 in. veneer at the hardware store that is for ironing on the edge of shelves - you can also use strips of paper) -white glue -large clips (or clothes pins) - I started with four and found I needed more as I went along -scissors -HEMMA ikea light -pen -small piece of cardstock safety alert * use a low watt bulb and ensure material chosen is not touching or close to the bulb. step 1-2 take the strip of wood veneer and make a circle shape to the desired size you want your lamp to be. place a small amount of glue to the attachment and hold with clip. step 3 proceed the same way as in step one - creating an overlap on the other strip of veneer. glue the attachment and secure with clip step 4-5 take smaller strips and weave through the lamp continuing in a circular manner. secure any overlaps with glue and clip - also allow the glue to dry - it will make it easier to work with the shape.
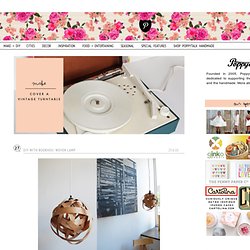
--Arounna. The Swell Life: DIY Dotted Tissue Paper Lantern. Looking for a fun way to jazz up regular paper lanterns?
Break out the Collage Pauge™ and some tissue paper and you have a totally new, fresh look for your room! Here's how you do it. It's soooo easy! Dotted Tissue Paper Lanterns Supplies:– White paper lantern– Collage Pauge™ Instant Decopauge (Matte Finish)– foam brush– scissors– several sheets of tissue paper in colors of your choice. Directions: 1. 2. 3.
Some things to note: 1. 2. 3. Hope you enjoyed this project! Until next time Swellions! Alexa. {DIY} Light Bulb Vases. Project 5 Week 5 – Large Straw Pendant Light. Welcome to my big 5th week project!
This project is so big it took me two weeks to get it together, constructed and photographed. Fourth of July Star Jars. These transformed mason jars are a fun way to both decorate an outdoor table for a 4th of July celebration or a safe way to entertain the kids during fireworks.

Red spray paint Mason Jars Star stickers Newspaper Scatter star stickers onto the mason jar, make sure they’re stuck on very tight Screw on the mason jar lid and cap and place on top of a table covered in newspaper in a well ventilated area Spray with the paint from a nice distance around the entire jar until it’s coated well but without drips. Wait at least a couple hours for the jar to dry and carefully peel off the star stickers Place 2-3 battery operated votive candles in each jar and enjoy your festive 4th of July evening!