
Craft-ideas-potted-plants-pictures.jpg (620×2668) Candles in Seashells.
Pictures. Clothesline baskets! This is a tutorial for an easy-to-make and extremely useful basket.
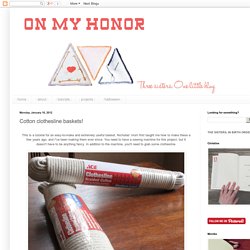
Nicholas' mom first taught me how to make these a few years ago, and I've been making them ever since. You need to have a sewing machine for this project, but it doesn't have to be anything fancy. In addition to the machine, you'll need to grab some clothesline. I got both of these at Ace Hardware. I think they run about $9.99 for the 100 feet package. Then you'll want to grab some thread. Get your bobbin and your machine all ready to go...and remember even if your bobbin isn't on your side, Ryan Gosling is. To start making the baskets, you first need to make a base. Then you're going to sew across the circle in a few different directions to hold it all together.
Make sure this little circle is nice and secure. Now you're ready to start expanding the base. This is what it looks like up close. Peanut is overseeing the whole operation. Peanut says it's just about there. This is me urging the walls to form. Diy roundup . cupcake stands - Shrimp Salad Circus. By Handmade Weddings via Craftzine (with free template download) I've gotten onto a bit of an obsessive baking kick lately, which got me thinking about the importance of good display.
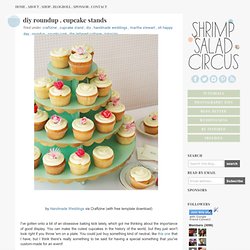
You can make the cutest cupcakes in the history of the world, but they just won't look right if you throw 'em on a plate. DIY Feather Tutorials. Good morning, The feather fest continues!
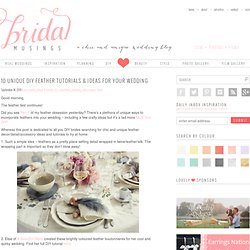
Did you see Part 1 of my feather obsession yesterday? There’s a plethora of unique ways to incorporate feathers into your wedding ~ including a few crafty ideas but it’s a tad more ‘BUY than DIY‘. Whereas this post is dedicated to all you DIY brides searching for chic and unique feather decor/detail/accessory ideas and tutorials to try at home. 1. 2. 3. Button Magnets. These cute little buttons may just be the easiest craft project ever.

They use minimal supplies and only take 5 minutes to make. I must say this is my kind of craft. Packaged nicely I think these button magnets would make an excellent stocking stuffer. You will need: Paper Holiday Garland. Curbly-Original When I first saw David Stark's holiday line for West Elm this year, it immediately put me into the holiday spirit.
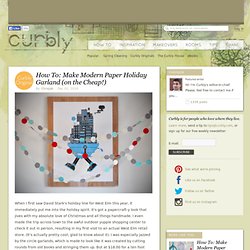
It's got a papercraft-y look that jives with my absolute love of Christmas and all things handmade. I even made the trip across town to the awful outdoor yuppie shopping center to check it out in person, resulting in my first visit to an actual West Elm retail store. The photo-to-wood transfer. This Christmas, I made most of my gifts.
The majority of the handmade items were photos transferred onto blocks of wood. Upolstry headboard. Quick Custom Wainscoting Add intricate architectural detailing with ease.

This elegant wainscoting looks like the result of hours of elaborate work, but it just calls for a visit to a home center. The ready-made PVC latticework panels are mounted on the wall above the baseboard and topped with a chair rail made from 1x4 and 1x2 boards. Screen molding is nailed in place to hide the joints where the panels meet. Paint the raw wood pieces with white paint color-matched to the PVC.
Find the Bright Side Don't let the inside of a wood-stained bookcase or hutch keep beautiful display pieces in the dark. Recycle Tutorial: Woven Rag Rug. Thank you for all the great feedback for liking my Braided Rag Rug.
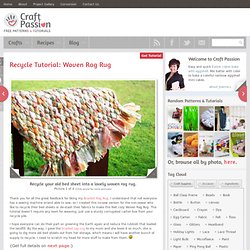
I understand that not everyone has a sewing machine or/and able to sew, so I created this no-sew version for the non-sewer who like to recycle their bed sheets or de-stash their fabrics to make this feet cozy Woven Rag Rug. This tutorial doesn’t require any loom for weaving; just use a sturdy corrugated carton box from your recycle pile. I hope everyone can do their part on greening the Earth again and reduce the rubbish that loaded the landfill. Amazing DIY Rope Rug Free People. Tutorials. Winners have been contacted for both the Fabric Destash Giveaway and the paper+palette giveaway!
Check your email! I recently shared my craft room makeover with you all, and one of my favorite parts of the space is my updated office chair in shades of pink, gray and white. I don’t know why, but I’ve been drawn to pink more lately, and I’ve especially been drawn to it in this space, that is all my own and can be as girly and fun as I’d like. Anyway, waaay back when on the blog, four years ago, to be exact, I shared this post when I turned a dated, standard office chair into this: I do still love the red and blue fabric I used, but, alas, it was time for something different. Materials:fabric (can be quilting or home décor weight)hot glue gun or upholstery stapler.
Wooden Welcome Mat. A better title for this post would be “Pinterest Challenge: Part II”, since Pinterest Challenge Part I was a big ‘ol flop.
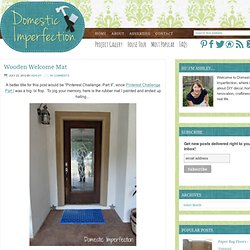
To jog your memory, here is the rubber mat I painted and ended up hating… and here is the mat (from marthastewart.com) that I should have made… Now if there is one thing I am good at, it’s perseverance. Fun Magnets & Tutorial (Kaisercraft) Hi Everyone The last of my Technologic posts today and a tutorial to share too! Please note that the contest previously detailed here has closed. You can see who won here. Magnets I LOVE these bright magnets! Magnets Tutorial Cut or punch circles of paper slightly smaller than the flat side of the glass dome Apply Mod Podge to the surface of the paper you want visible through the magnet and glue onto flat side of magnet When dry, apply a layer of Mod Podge to the other side o the paper (outside) Using a super-strong craft glue, stick a magnet to the underside and leave to dryMagnet Board This board was simply a cheap metal kitchen sign from the dollar store which I covered in paper and sealed with Mod-Podge.
DIY - Calendari setmanal. Últimament he anat una mica malament de memòria, se m'ha passat més d'una cosa i he acabat fent tard o saltant-m'ho directament... Sí, ja ho sé, existeixen agendes però jo necessito alguna cosa que em quedi més a la vista. Així que ja em veieu a mi anant a buscar unes pinces al "xinu" (80c.), un retolador permanent de punta fina (que segur en tens algun per casa) i recuperant un regle de quan era petita on hi ha la plantilla de totes les lletres. Així que res, amb 15 minuts les tenia llestes i col·locades. He anat pintant les primeres lletres dels dies de la setmana a la punta de la pinça amb el retolador permanent. Hanging String Balls. Whattya need? BalloonStringScissorsGlueJar How do I make glue string balls?
Step 1: Hang inflated balloon from ceiling. Step 2: Put string and glue in the jar with a hole in the lid. Next, pull string from hole while wrapping around the balloon. Home Decor.