
How To Style a Fishtail Braid. We love the look of fishtail braids!

This trend is incredibly easy to style, even on your own hair. Kinsey and I photographed the steps so you can try it out for yourself... Here's how to style a fishtail braid... 1. Part your hair into two even sections. 2. Take a small strand of hair (preferably from underneath so that it wraps around the entire seciton) from one section and bring it over to the other side. Next, we had a crazy idea... weave pieces of yarn into the braid? 1. Instructions To Apply Hair Tinsel. How to Grow Your Hair - hiphopsideproject. When I was little, maybe 5 years old, my mum took me to the hair dressers and told them to give me what can only be described as a boy haircut.

I’ve been scarred ever since. So I’ve been trying to grow my hair long for years now, I usually wuss out and end up getting a big chunk chopped off (never to the extent of the boy haircut that was surreptitiously thrust upon me!). Hair Archives - Kouturekiss - Your One Stop Everything Beauty Spot - kouturekiss.comKouturekiss – Your One Stop Everything Beauty Spot – kouturekiss.com.
The Ultimate Faux Hawk March 20, 2014 Disclaimer: This hairstyle is for the bold, brave and ultra glamorous!
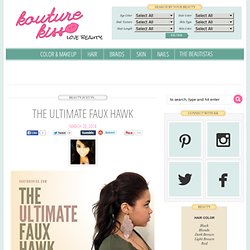
It also takes a tad bit longer than most tutorials I have posted. If you’re up for the challenge, check out the steps below for the Ultimate Faux Hawk! Step 1: Curl your hair. Step 2: Divide your hair into three sections: The top section needs to be clipped up out of the way, the Middle section needs to be a sleek, tightly secured ponytail, and the bottom section needs to be a low ponytail. Steps 3 & 4: Once the bottom section is secured into an elastic, take your middle section and make sure it is tight and sleek on both sides (this is the part of the hairstyle that gives the necessary ‘faux hawk’ impression!). Step 5: Here is the fun part! Steps 6, 7, and 8: Do a once over and secure any loose pieces in place, then spray with hairspray!
Nail Polish Bobby Pins. Ducks in a Row - All Things Parties + DIY: Hair Tutorial: Get Curly Hair Using an Old Pillowcase. If there's one thing I've gathered from my girlfriends when it comes to hair, it's that you always want what you don't have.
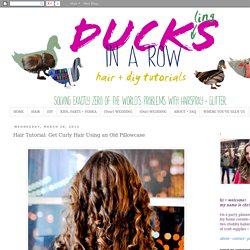
This rule of thumb also generally applies to boob size too, but that's a post for another day. Being one who falls squarely in the category of naturally wavy hair (in the ugly, frizzy way), I've always lusted after big, bouncy, bodacious curls. Funnily enough, my husband also lusts after big, bouncy and bodacious, but we're not talking about curls (wokka wokka). Shaggy Hair Bow. I have been so inspired by all the hair bows I've seen on the web lately, but I wanted to try to translate the hair bow into a do that someone around 30 or older could rock without looking like they're trying to be a teen...or Lady Gaga...or Minnie Mouse.

Not that there's anything wrong with that. Moving on! This is how I did a shaggy hair bow. First, I decided to pop a headband on in the front of my do, but you could do whatever you please. 1940s Hair Tutorial. Hello again, it’s Jessie from Sweet Thing!

40s hairstyles have been all over the fall runways and filling the pages of magazines, so I thought I would share an easy updated version of the 1940′s classic–the victory roll. Intricate, Edgy & Unique Fishtail Braids For Boho Brides. Hello again, I hope you’re having a wonderful weekend!
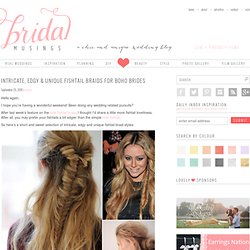
Been doing any wedding related pursuits? After last week’s feature on the side fishtail braid, I thought I’d share a little more fishtail loveliness. After all, you may prefer your fishtails a bit edgier than the simple side fishtail. So here’s a short and sweet selection of intricate, edgy and unique fishtail braid styles: Good Bad Times | 7 Beauty Tips | S Photos Fishtails can make boho chic additions to otherwise classic styles such as the half up half down do or messy bun. You could make a simple fishtail more fun by adding coloured extensions… See the full rainbow fishtail hair tutorial by Free People Or even yarn… See the full tutorial on A Beautiful Mess Alternatively, you could get creative with ribbons, lace or insert a few pretty little flowers haphazardly into the pleats! Photo by Badal Jain and Raja Jain via Unreal Bride. A Splendid Assemblage: DIY : Organic Hair Curls plus ... It's Alive!!!
Yes, by "it" I mean myself :p A move, an Oly accident that led us to the pet emergency clinic in the wee hours of the night (she really can't catch a break), lots of skips and hops later here I am!
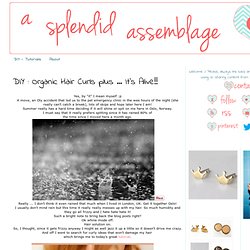
Summer really has a hard time deciding if it will shine or spit on me here in Oslo, Norway.