
First Kumihimo Braid. I had a go at using this Kumihimo plate the other night and found that the instructional pictographs were a bit difficult to understand.
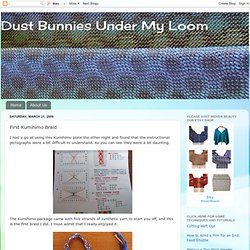
As you can see they were a bit daunting. The Kumihimo package came with five strands of synthetic yarn to start you off, and this is the first braid I did. I must admit that I really enjoyed it. I enjoyed it so much that I pulled 60” of gold ribbon, purple orlec and navy orlec to braid. The ribbon I used singly but the orlec was tripled to match the ribbons thickness.
This is a close up of the braid. Accepting this award means following some rules:1. And pass the awards on to: Lytha Studios KumiPlanner - Kumihimo Pattern Design Application. Design your own kongoh gumi friendship bracelet. Send us your design with or without a photo of your finished braid.
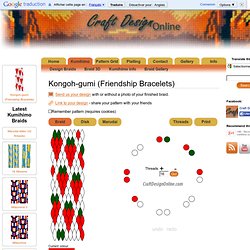
Link to your design - share your pattern with your friends Remember pattern (requires cookies) You should be seeing the kumihimo braid design tool here. If you are seeing this text after the page has finished loading, either javscript is disabled or your browser does not support some features required. Friendship Bracelets. Bracelets. Beaded Wrap Bracelet Video Tutorial. This is the single wrap bracelet I made while filming the wrap bracelet tutorial.
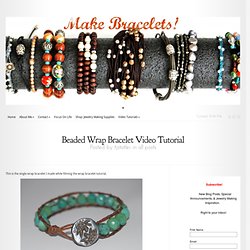
It has such a different look to it than the one I made this past weekend. It is amazing the different look and style you can create with the same basic pattern just by changing length of the bracelet and the type and size of the bead! Here is my attempt at a little video production for you. Warning: Video is 15 minutes long – Yikes – I feel like I over explain things. Grab a little cuppa’ something warm and cozy before you watch so you don’t get antsy.
Post production notes: I did go ahead and put a tiny dab of GS Hypo Cement on the nymo thread knots on either side of the bracelet – but just on the nymo. Pulseras de cuero e hilo de colores. Es uno de mis modelos de pulsera favorita porque te permite jugar con el color.
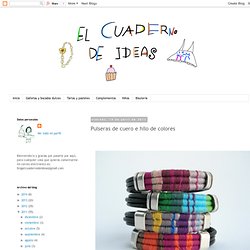
Es sencilla de realizar, combina cuero e hilos de colores, yo he usado hilo de bordar cuyos colores son luminosos y el colorido es muy variado. Inspirándonos en los cartoncillos de los hilos, los peques han hecho las etiquetas. Es para un regalo especial que vamos a hacer hoy, la destinataria tendrá que escoger una bolsita con la pista de la etiqueta. Están hechas con tres cordones de cuero de 2 mm entre los que se entrelaza hilo de bordar de colores. Son muy sencillas de realizar, el material que necesitas es: Missus D: Crochet Friendship Bracelet Tutorial. DIY: Bright Chain Bracelet. Yesterday my latest Marie Claire arrived and I was looking over this spread.
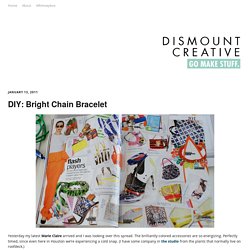
The brilliantly-colored accessories are so energizing. Perfectly timed, since even here in Houston we’re experiencing a cold snap. (I have some company in the studio from the plants that normally live on roofdeck.) Here’s how to make your own bright woven chain bracelet! - Chain – Use what you have, or what you can find. If you don’t want to run around collecting all the materials yourself, you can buy a kit with everything you need from me in my Etsy shop. 1. 2. 3. 4. DIY Beaded Bracelet « greeneyed.com. I’m super excited to share this project with you, as it has been over two weeks in the making.
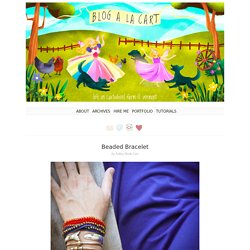
I fussed around with many a mini-crochet needle and embroidery thread, and my house is now littered with bitty seed beads, to arrive at what I think is my favorite and most unique tutorial yet! Woo hoo! Materials: Embroidery thread (I used 6 stranded thread) Crochet hook size 1 (2.75mm) Seed beads Jewelry clasps Needle Scissors Directions: Note: This pattern is for a bracelet that measures 6.5″ at completion. Friendship Bracelets. Macraméd friendship bracelets were all the rage when I was growing up in the eighties.
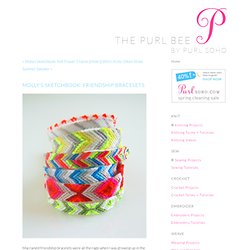
All the girls at my school would obsessively make them for one another in a dizzying variety of colors, widths, and patterns. It's amazing, thinking back, that such young girls could make such beautifully intricate accessories. I, of course, tried my hand at making them as well. I would ride my bike down to the five-and-dime store and pick out the most sophisticated color combinations of embroidery floss I could find, but when it came to the actual macramé I never got beyond plain stripes.
There was nothing wrong with plain stripes, except that the other girls seemed so much more advanced with their diamonds and chevrons. Fast forward 20 years: Purl Soho started carrying DMC Cotton Embroidery Floss in every conceivable color (including fluorescents! Making friendship bracelets is a surprisingly easy craft, and best of all, in the end you'll have a bunch of cute summer bracelets to give to your pals. Re-Vamp your Friendship Bracelets!
No, this tutorial does not have you making any type of designer DIY!
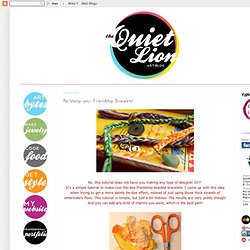
It's a simple tutorial to make cool the-dye friendship braided bracelets. I came up with this idea when trying to get a more dainty tie-dye effect, instead of just using those thick strands of embroidery floss. This tutorial is simple, but just a bit tedious. The results are very pretty though! And you can add any kind of charms you want, which is the best part! Step 1: Gather materials. Step 2: Cut your embroidery floss. How to make 5 bracelets in 10 minutes. Today I would like to show you 5 different techniques to make some nice and easy bracelets.

I wanted new bracelets and a lot of them so I made these very quickly. The best thing about these bracelets is that if you're crafty you'll make them for free because they can be made with what you have in your stash:left-over pieces from other DIY projects, little pieces of ropes, some yarn and so on. These bracelets are quick to make and you can have fun making them in every color! Let's start! DIY Shamballa style macrame bracelet tutorial « Rings and Things. Square knot macrame bracelets have been given new life due to the influence of high end designers.
I’ve got the “Circle of Life” from The Lion King playing in my head as I write this. How else to explain how a simple macrame bracelet design, which has spent years as a summer camp staple and a tourist shop standard, has been reborn as the chic “Shamballa” brand must-have look? I think it is a great example of how basic techniques can be adapted to suit nearly any style or budget. Hey! Look what I Made!: Neon and Metallic Bracelets. DIY Fashion-Forward Bracelets & Diy & Lifestyle & RTR On Campus - StumbleUpon.
When money is tight, but fabulous fashion is a necessity, try out your crafting skills to make something new and fantastic. Search results for Bracelet. Hello Made by Girl readers! It's Stephanie from Henry Happened back with another DIY project. If there's one thing I love, it's making bracelets. And these are so insanely easy you won't be able to make just one. DIY: Braided Bracelet. Learn how to make this awesome braided bracelet! Find detailed written instructions below the photos. Materials: - Embroidery Floss (3 different colors) - Scissors. DIY Braided Bracelet. Diamond Friendship Bracelets. The diamond friendship bracelet seems so much trickier than it actually is. I don’t know why I put off learning it for so long (last week,) but now I can’t stop making them.
As with everything, practice makes perfect, but if you spend an afternoon perfecting your craft, you’ll soon be making them with your eyes closed. And once you perfect the six strand bracelet, you can move along to thicker bracelets. (I made the pink + white one below using eight strands – 6 white and 2 pink!) Fake it: DIY Braided Bead Bracelet. If you are planning on doing a DIY wrist stack as per this post, a few of these are a must. There are just so many options with different beads and color of tread, as well as being easy and fast to make. *** Updated: Grace from the amazing blog Stripes and Sequins, alerted me to HonestlyWTF's post with the same braided bracelets! Check it out for other cool options*** All you need are thread and beads. I like using the waxed thread since it kind of sticks together, making it easy to braid tight.
The procedure is just like the hexagone bracelet made here, except I added beads to the end of the braiding before I tied them of. Braided Charm Bracelet. Braided wrap bracelet. There was a time my arms where filled with bracelets. 25+ Different Ways To Make Bracelets With String. Chunky Link Ball Chain Friendship Bracelets. Making Mementos and Jewelry With Coins. Fishtail Braided Anchor Bracelet. DIY Proenza Schouler Rope Necklace. Lauren and I have been waiting for an excuse to use colorful bungee cords for some time now. And after seeing this Proenza Schouler necklace from their Resort 2011 collection, we jumped at the opportunity to recreate our own version of this amazing piece of jewelry!
Start by cutting a 10″ and a 15″ piece of bungee (or climbing rope). Burn the ends with a lighter to prevent fraying. Then, wrap the middle sections with either twine or mason line using the friendship knot technique and use the hot glue gun to secure the ends to your bungee cord. (Click images to enlarge) DIY/ Crafts. DIY Proenza Schouler Rope Necklace. DIY Gucci Tassel Belt. When Erica and I spotted tassels, tassels, tassels and more tassels accessorizing the Spring 2011 collections, there was no doubt that we wanted to do a DIY incorporating this beloved fringe ornament. Inspired by the tassels seen in Sonia Rykiel and Gucci‘s Spring Collections, we’ll teach you how to make a tassel belt with leather and a few items from the hardware store.
You’ll start by first cutting fringe into the leather in order to make the tassels. Draw a line 1/4″ from the edge of the length of the leather, which will serve as a guideline. Using the ruler draw parallel lines about 1/8″ apart, along the width of the leather. Carefully cut along those lines, stopping at the guideline each time. Add any combination of beads and nuts to the end of the rope, making sure to string the large nut lastly with the opening facing out.
Close and secure the tassel with just a few drops of glue. Repeat on the other side of your rope and voila! (all images by HonestlyWTF)