
Coloriage géant à imprimer : l'arbre de Pâques. Avec un tout petit peu de retard, je vous propose un coloriage géant de Pâques à imprimer.

C’est un joli arbre décoré de 33 œufs de Pâques à colorier pour un petit moment de détente seul ou en famille. Une fois assemblé et colorié, vous pouvez afficher votre « œuvre » avec grand plaisir. Si vous avez besoin d’agrandir un coloriage pour réaliser une fresque en grand format, je vous conseille d’utiliser le logiciel PostRazor, j’en parle ICI. Ce coloriage géant de Pâques est composé de plusieurs feuilles A4 qui s’assemblent entre elles. Pour assembler la fresque imprimée (feuilles A4), vous devez procéder au découpage. Dans le commerce, vous pouvez trouver des coloriages vraiment géants qui vous permettront de passer de bons moments avec vos amis ou votre famille.
Déplié, le coloriage géant peut être posé sur une table ou au sol pour colorier tous ensemble. Format : 1,50 m x 60 cm à plat – 25 cm x 30 cm plié. Téléchargements mobiles - Anne-marie Tétreault. Un oeuf de Pâques géant ! 6 suggestions bricolage pour Pâques. Easy Origami Bunny. Poulette perchée pour Pâques. Dans la continuation de mon projet “Des amis de toutes les couleurs” mené en période 4 (je vous en reparle très bientôt !)
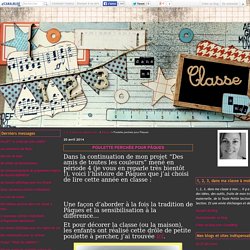
, voici l’histoire de Pâques que j’ai choisi de lire cette année en classe : Une façon d’aborder à la fois la tradition de Pâques et la sensibilisation à la différence… Et pour décorer la classe (ou la maison), les enfants ont réalisé cette drôle de petite poulette à percher, j’ai trouvée ici. Un petit bricolage tout simple, parfait quand on s’est (encore !) Laissé déborder et que le temps nous manque… Il suffit de tamponner un coeur et des points à la peinture blanche sur un cône découpé dans du papier jaune (ou à faire peindre en jaune au préalable, si vous vous débrouillez mieux que moi au niveau du timing…) et d’assembler tous les éléments pré-découpés. Voici le patron que j’ai réalisé pour les différentes découpes (format A4) : Pâques: Poule en 3D, collage. Pin by Jasmine Schmidt on kid crafts. Pom Pom Easter Egg Painting Craft for Kids - Crafty Morning. If your kids are bored of just painting with a paintbrush, consider trying pom poms with clothespins!
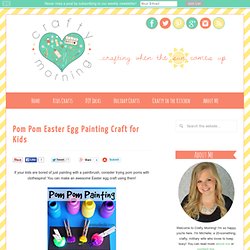
You can make an awesome Easter egg craft using them! You will need pom poms, clothespins, paint, a black marker, and a piece of paper. Start by drawing an egg shape with a black marker on a piece of paper. Grab each pom pom with a clothespin and dip them in paint. Have the kids press them on the paper making patterns with the colors. I think it made an awesome print on the Easter egg…kind of like a splatter effect! If you liked this one, check out my other Easter crafts for kids! This post may contain affiliate links, read our Disclosure Policy for more information.
Monde des Petits - Pâques. Yarn Easter Eggs. Bricolage poule. Introducing!!!
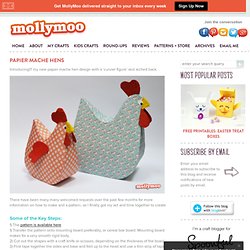
My new papier mache hen design with a ‘curvier figure’ and arched back. There have been many many welcomed requests over the past few months for more information on how to make and a pattern, so I finally got my act and time together to create- Some of the Key Steps: 1) The pattern is available here 1) Transfer the pattern onto mounting board preferably, or cereal box board.
Now it’s time to papier mache…. use this papier mache tutorial for tips on making the paste and the technique of applying papier mache Decorating Your Hen You can paint, paper or decopatch your hen. - For paints I recommend using chalky matt household paints – I LOVE tester pots of Farrow & Ball and Little Green. - For paper I use large scrapbooking paper or nice wrapping paper if I can find it- Tips on Papering - 3) glue and smooth down these little tabs - 4) for the beak and comb I use handmade paper for texture, just rip and glue with pva. Bricolage poule. Simple and sweet character rich chickens – humble paper plate crafts for kids.
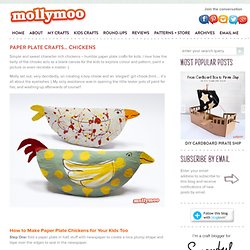
I love how the belly of the chooks acts as a blank canvas for the kids to explore colour and pattern, paint a picture or even recreate a master :) Molly set out, very decidedly, on creating a boy chook and an ‘elegant’ girl chook (hint…. it’s all about the eyelashes :) My only assistance was in opening the little tester pots of paint for her, and washing-up afterwards of course!! How to Make Paper Plate Chickens for Your Kids Too Step One: fold a paper plate in half, stuff with newspaper to create a nice plump shape and tape over the edges to seal in the newspaper. Step Two: tape on a cardboard triangle at one end for the beak and feather shaped cardboard at the other end. Step Three: papier mache over the entire chicken and leave to dry.
Step Four: time for the kids to get busy with the paint xx Step One.