
Easy as 1-2-3 Fabric Tissue Box Cover - J&O Fabrics Store Newsletter Blog. January 31st <div class="greet_block wpgb_cornered"><div class="greet_text"><div class="greet_image"><a href=" rel="nofollow"><img src=" alt="WP Greet Box icon"/></a></div>Hello there!
Ten minute no-sew recycled t-shirt bag! Tutorial time!

I got a gig teaching a recycled t-shirt project at the library a few months ago, with a request for a recycled tee bag – the only bags I’d made from tees in the past had required sturdy sewing, and I didn’t want hand-sewing to be the only thing holding the bottom closed in a class version of the bags, so I started brainstorming about some kind of hand-sewing-friendly or no-sew bag idea…. and here’s what I came up with! The simplest version of these bags is great for smaller tees, or the more light-weight kind of girl-tees – just turn the bottom of the shirt into a drawstring and tie it closed! As you can see, even with a not huge tee, this will still leave a significant hole in the bottom of your bag, but for purposes like grocery shopping, this size hole shouldn’t really matter… Paspop. When starting on the wonderful and exciting journey of making your own clothes or altering old ones there is one thing you will definitely need to make your job easier...that is a dress form.
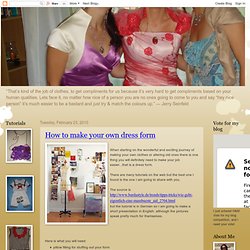
There are many tutorials on the web but the best one I found is the one I am going to share with you. The source is but the tutorial is in German so I am going to make a short presentation in English, although the pictures speak pretty much for themselves. Here is what you will need: pillow filling for stuffing out your formscissorsmetal base2-3 rolls of tapecardboardan old hip-length T-shirtfoil (for the neck) take on the T-shirt and wrap your neck in foil to protect it then take the following steps one by one in wrapping the tape. And the end result is pretty good! Cols, tours de cou et snoods. Shark Hoodie Towel. I have made the hoodie towels before, but I wanted to share this one with you as well.
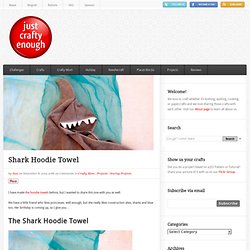
We have a little friend who likes princesses, well enough, but she really likes construction sites, sharks and blue too. Her birthday is coming up, so I give you… 1 bath towel steel gray1 hand towel steel graysmall amount of pellon VERY thin one-side fusible interfacingsmall amount of white terry cloth.thread (white and shark gray) Tools: craft scissorsfabric scissors The full tutorial for the towel is here. Here, I laid out a paper fin pattern on the top of the hood. (Note, the hood on this towel is rounded rather than being squared off. ) Next, cut the stabilizer for the fin slightly smaller than the terry cloth to allow for the seams. (I sewed this on the serger. For the teeth, I had strip of white terry.
Finish both of the bottom edges. (if you don’t have a serger – just zig zag the edges.) Sandpaper Printed T-shirt Kids Craft. This is a super simple sandpaper printing technique that will keep your kids busy and make one cute shirt!

The best part about this fun little craft is that the supplies were bought at the Dollar Store, even the T-shirt! Chaussons homme. Photographier mes chaussons fleuris lui a donné des idées, et dimanche, il m'a demandé de lui en confectionner une paire... sans fleur évidemment !
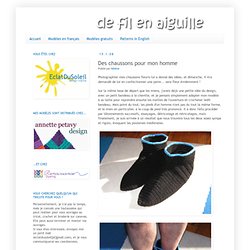
Sur la même base de départ que les miens, j'avais déjà une petite idée du design, avec un petit bandeau à la cheville, et je pensais simplement adapter mon modèle à sa taille pour reprendre ensuite les mailles de l'ouverture et crocheter ledit bandeau. Mais point du tout, les pieds d'un homme n'ont pas du tout la même forme, et le mien en particulier, a le coup de pied très prononcé.
Il a donc fallu procéder par tâtonnements successifs, essayages, détricotage et retricotages, mais finalement, je suis arrivée à un résultat que nous trouvons tous les deux assez sympa et rigolo, évoquant les poulaines médiévales. Fournitures : On commence par la pointe, crochetée en rond comme pour mes chaussons fleuris. Pour la tige, relever 57 brides dans l'ouverture du chausson, en démarrant sur le milieu devant. TuTo !!! 08 février 2013 TuTo !!!
Merci!!!! Ice Fabric Dyeing. Did you say you don’t have snow and want to do some dyeing?
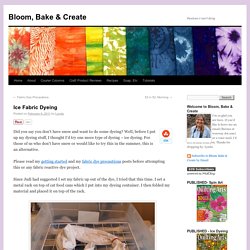
Well, before I put up my dyeing stuff, I thought I’d try one more type of dyeing – ice dyeing. For those of us who don’t have snow or would like to try this in the summer, this is an alternative. Please read my getting started and my fabric dye precautions posts before attempting this or any fabric reactive dye project. Bonnets, bérets, cagoules, casquettes, chapeaux. Hanging Chains Headband DIY « THE YESSTYLIST – Asian Fashion Blog – brought to you by YesStyle.com. While browsing Topshop last week, I came across this fun hanging chains headband and thought that with Coachella right around the corner, an easy DIY for something similar would be fun.

I used an old plastic zig zag stretch comb headband I’ve had for years because it was the most logical choice to hang chains from but you can use an elastic band in a similar way. The chains disappear a little in my blonde hair but they would stand out nicely against brunette locks {they would also look great on a shorter cut as well}. If you’re super crafty, add a feather or bead/charm to the bottom of a few chains. What You’ll Need… * Circular headband * Chains: fine, thick, gold, silver, rose gold… use a variety of colors and sizes or all the same… choose chains that are lighter in weight. * Jump rings {for small chains only} * Beading pliers Steps… * Prepare your chains.
. * Using the extra loose chain links or jump rings for small chains, attach one chain to each section of your plastic headband. Voila!