RAMPS + RJ. Nano cnc ethernet. 28BYJ-48. Calculs. Close Loop. Shop steppers. Adventures in DIY land. Well what do you know!
Dave Grant, one of my followers, was kind enough to take it upon himself and has created a forum for all of us. Thanks Dave! Dave and myself will figure out how this will unfold as we’ll go along, and we obviously welcome your input . Since I’m busy these days founding my studio “Lampa Filmz” with my friend and partner Anat Costi, it’s great Dave is into this project and community and it’s great you will have a place to more easily exchange ideas. Working on the eagle files. Once again, since no forum is available to me (yet), I’m creating this thread for the collection of your ideas and thoughts regarding the Open Source Wireless DSLR Follow Focus. Since some very interesting directions were raised in different comments, I think it is better to dedicate this post for the goal of discussing them and their hardware and code implications.
How’s that sound? Let your ideas start flowing - start commenting! Adi Thanks TC. EDIT: 2 notes 2. This is the remote part. What’s it for? 1. Macro Pi – Focus Stacking using Raspberry Pi. Here’s another in the series of articles of photographic uses for the Raspberry Pi SBC (Single Board Computer).
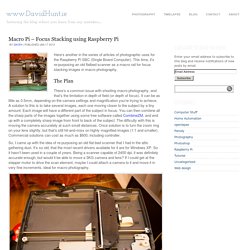
This time, it’s re-purposing an old flatbed scanner as a macro rail for focus stacking images in macro photography. The Plan There’s a common issue with shooting macro photography, and that’s the limitation in depth of field (or depth of focus). It can be as little as 0.5mm, depending on the camera settings and magnification you’re trying to achieve. A solution to this is to take several images, each one moving closer to the subject by a tiny amount. So, I came up with the idea of re-purposing an old flat-bed scanner that I had in the attic gathering dust. Once I took the cover and the glass off, I was left with a nice flat platform on which to place my camera, and a 4-wire connection to the stepper motor to drive the platform forward and back. Mounting the camera is simply a case of placing it on the platform.
The Circuits The Code The Results Next Steps Some of the specs: 15mm Rail Mount For NEMA 17 Follow Focus Stepper Motor by anewsome. I wasn't happy with the cost and limits of existing follow focus systems that are available, so I designed my own follow focus system as part of a larger motion control rig for my various camera systems.
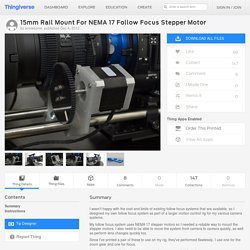
My follow focus system uses NEMA 17 stepper motors so I needed a reliable way to mount the stepper motors. I also need to be able to move the system from camera to camera quickly, as well as perform lens changes quickly too. Since I've printed a pair of these to use on my rig, they've performed flawlessly. I use one for the zoom gear and one for focus.
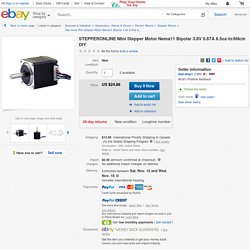
I'm pretty happy with them so I hope you get some use out of them too. I used 10% infill and it seems plenty strong to me. You'll need a 3/4 inch long 1/4"-20 screw and a hex nut to go along with it. Mount your stepper motor with 4 M-3 screws and you're all set. If you're looking for gears to mount on your stepper motors, I get all of mine from servocity. STEPPERONLINE Mini Stepper Motor Nema11 Bipolar 3.8V 0.67A 8.5oz-in/6Ncm DIY. Excludes: Alaska/Hawaii, US Protectorates, APO/FPO, PO Box.