
Untitled. A little cozy goes a long way (and a hand warmer DIY) - rae ann kelly. I’m not a super mom. in fact, i’m pretty sure it’s an oxymoron or the opposite of a double negative, or something that cancels itself out. most days i’m just doing what has to be done, making sure my babes have what they need and praying that everything else falls into place. but there is one other thing i take very seriously…. that my kids feel loved. everyday. it would be easy for this task to become overwhelming, but luckily my kids have taught me that it’s the little things that matter. just one act of love goes a looooong way. this winter my default has been just about anything warm and cozy. letting them eat breakfast by the fireplace, adding an extra blanket to their beds, a hot cup of cocoa after being outside, a warm towel to wrap up in after tubs, or…. … reheatable hand-warmers to pop in their pockets on the way to school. so cozy.
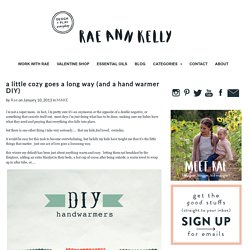
(continue reading for the DIY instructions) 3. fill 3/4 of the way up with rice. xo . rae Want to receive goodies like this in your inbox? Kimono DIY. I’ve been seeing kimonos everywhere, so I decided to try a Kimono DIY!
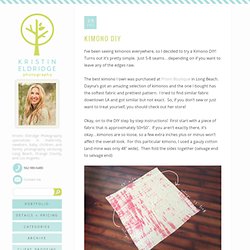
Turns out it’s pretty simple. Just 5-8 seams…depending on if you want to leave any of the edges raw. The best kimono I own was purchased at Prism Boutique in Long Beach. Dayna’s got an amazing selection of kimonos and the one I bought has the softest fabric and prettiest pattern. I tried to find similar fabric downtown LA and got similar but not exact.
Okay, on to the DIY step by step instructions! Cut the fabric in half lengthwise and the fold it in half. Pin the right sides together half way down and sew them together. I like to finish it with a french seam (which just means folding the edges in on each other so they don’t fray). Pin and hem both of the open sides. Fold your fabric in half (right sides together) with the seam in the middle. I decided to leave my arm holes raw since the selvage won’t fray, but you can sew a seam here if you want. You can also leave the hem around the bottom raw or finish with a trim. DIY Tutorial: Elastic Strappy Bra » Operation Overhaul. Here’s a really simple diy to convert your old/new bras into new elastic and fancy strappy ones!
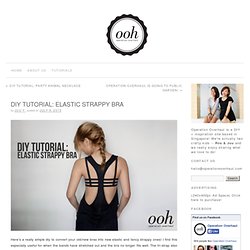
I find this especially useful for when the bands have stretched out and the bra no longer fits well. The tri-strap also looks great layered under loose tanks and low-back dresses! No more ugly bra straps peeking out! Materials you need for this tutorial:- Elastic (0.5″ Wide)An old bra with removable strapsScissorsSewing materials. Sugar Tart Crafts: My Little Pony Costume Sew-Along - Day 5: Ears. I absolutely adore these ears, and I'm sure you can tell from the picture that I'm not the only one either.
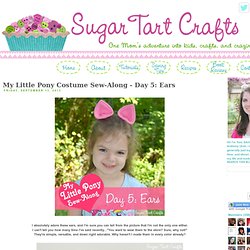
I can't tell you how many time I've said recently... "You want to wear them to the store? Sure, why not! " They're simple, versatile, and down right adorable. Why haven't I made them in every color already? Stuff you'll need: pins - a needle and thread - 4 ear pieces cut using this printable pattern(do not fit to page) 2 metal snap clips, preferably 50mm with a hole at the top (optional) I like to trace my pattern directly onto the fleece with a sharpie. Just make sure you allow the ink time to dry before cutting, or you'll have multicolored scissors.
You could also substitute felt if you are only planning to make ears, and not the entire costume. Place two ear pieces together, and stitch the sides and top. (A 1/4" seam allowance has already been added to the pattern.) Clip the corners. Fold the two layers in the opposite direction so that the side seam ends are now touching. Gathered Skirt + FREE Pattern Instructions. So my list of things to make is a bit like the music charts.
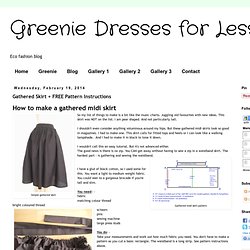
Juggling old favourites with new ideas. This skirt was NOT on the list. Zig Zag Pillow DIY. Eek!
I am so excited to kick off the 2014 Sewing Rabbit Team’s tutorials today, especially with such an awesome sewing tutorial by the fabulous Nicole! Her zig zag pillow tutorial absolutely blew me away, and I couldn’t be more thrilled to premier it. The perfect throw pillow for your home decor! So without further ado, I give you the zig zag pillow DIY… Hi Sewing Rabbit friends. MAKE IT YOURSELF. Home page. Toddler Backpack: Digital - Sewing pattern from designer Made by Rae - A 'print at home' PDF download.
Roxanne: Digital - Sewing pattern from designer Victory - A 'print at home' PDF download. Simone: Digital - Sewing pattern from designer Victory - A 'print at home' PDF download.