
Download Confluence. The recommended way of obtaining the plugin is via the Eclipse update site located at: A zipped archive of the update site is provided here for convenience.
The instructions for using the update site or archive can be found in the Clover Eclipse Plugin installation guide. Note: OS X is suitable for evaluation only, we do not support Confluence on OS X Looking for an older version? View the downloads archive. Want to stay ahead of the game? Download development releases from the Early Access Program. Database Setup For MySQL. Step 3.
Configure MySQL Server In this step, you will configure your MySQL database server. Note: If you intend to connect Confluence to an existing MySQL database server, we strongly recommend that you reconfigure this database server by running through the configuration steps in the MySQL installation wizard as described below . To configure MySQL Server: Initial Server Setup with Ubuntu 14.04. Introduction When you first create a new Ubuntu 14.04 server, there are a few configuration steps that you should take early on as part of the basic setup.
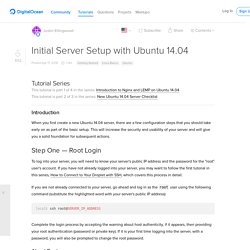
This will increase the security and usability of your server and will give you a solid foundation for subsequent actions. Step One — Root Login To log into your server, you will need to know your server's public IP address and the password for the "root" user's account. If you have not already logged into your server, you may want to follow the first tutorial in this series, How to Connect to Your Droplet with SSH, which covers this process in detail. If you are not already connected to your server, go ahead and log in as the root user using the following command (substitute the highlighted word with your server's public IP address): ssh root@SERVER_IP_ADDRESS Complete the login process by accepting the warning about host authenticity, if it appears, then providing your root authentication (password or private key).
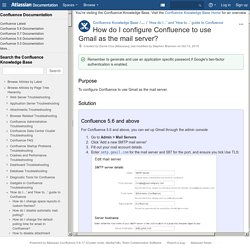
How do I configure Confluence to use Gmail as the mail server? - Confluence Knowledge Base. Remember to generate and use an application specific password if Google's two-factor authentication is enabled.
Purpose. Installing Confluence. Choose the type of Confluence installion you'd like from the table below and follow the link to the installation instructions.
When you have finished the installation phase, you will be prompted to start the setup phase. If you have not already done so, please verify that this version of the Confluence documentation matches that of the Confluence version you are installing. The Confluence documentation version you are currently viewing is indicated toward the top of the page tree on the left or in the 'breadcrumb trail' in the top banner of this page.
If you need to access a different version of the Confluence documentation, use the control at the top of the page tree on the left or you can access it from the documentation home page. Integrating JIRA and Confluence. Installing Confluence and JIRA Together. For information on Atlassian's recommendation on JIRA and Confluence installation, see Integrating JIRA and Confluence.
Do not deploy multiple Atlassian applications in a single Tomcat container — Deploying multiple Atlassian applications in a single Tomcat container is not supported. We do not test this configuration and upgrading any of the applications (even for point releases) is likely to break it. There are also a number of known issues with this configuration (see this FAQ for more information). There are also a number of practical reasons why we do not support deploying multiple Atlassian applications in a single Tomcat container. Firstly, you must shut down Tomcat to upgrade any application and secondly, if one application crashes, the other applications running in that Tomcat container will be inaccessible. Was this helpful? Hosted JIRA in 15 Minutes for $20 per month on Digital Ocean [Updated] Introduction ** Updated 9/17/2015 ** I develop a lot of internal and external web applications.
![Hosted JIRA in 15 Minutes for $20 per month on Digital Ocean [Updated]](http://cdn.pearltrees.com/s/pic/th/hosted-minutes-digital-updated-123421595)
Atlassian JIRA has become one of my favorite tools to track projects, issues, time spent, and so on. For small teams, the price point for a self-hosted version is fantastic - $10 for the core and $10 per add-on for a year of support and maintenance. For the ones I use, it puts my yearly cost for licensing at $50. Atlassian's hosted JIRA and add-ons are very easy, but they also cost $10 each per month. By buying self-hosted licenses and hosting on a DigitalOcean "Droplet" for $20 per month, I am saving over $300 per year. For anybody interested, this is how I created my own hosted version of JIRA and saved a bunch of money. * I bumped up my specs to a 2GB/2 CPU Droplet at DigitalOcean because of performance problems related to the latest release of Jira.
Conclusion Of course, the cost savings are realized when you use at least 2 add-ons. Starter. How to set up Atlassian JIRA on Amazon EC2 in 15 minutes. This post will take you through setting up JIRA on an AWS Linux instance, as part of setting up Atlassian’s Continuous Integration toolset.
There are 6 steps and the whole tutorial should take around 15 minutes to complete: 1. Setup LAMP on server;2. Create and Configure MySQL;3. Login to MySQL and setup JIRA DB;4. I was doing this out of interest and read individual articles, blogs and help pages, but was unable to find a single source to guide me through the full process. The only prerequisite is that you have an Amazon EC2 Instance is set up (see ‘Getting Started with Amazon EC2 Instances for Linux’). I’m far from an AWS expert, so if you have any technical questions it is unlikely I can help, but please feel free to leave feedback. 1. First step is to perform some basic setup on your AWS instance. 1.1 – Connect to your instance via Terminal or SSH application. 1.2 – Ensure your AWS server is fully updated with the latest patches and releases: sudo yum update sudo service httpd start 2.