
Raspberry Pi as low-cost HD surveillance camera. Introduction This article describes how to build a surveillance cam based on a Raspberry Pi micro-computer which records HD video when something moves in the monitored area.
Live picture can be viewed from any web browser, even from your mobile while you're on the road. What you will get: See live stream in any web browser from anywhere Record any motion into video file Usually, such a cam will cost you around US$1,000, but with the result from this article, you will get such a cam for only about US$120. Background. Créer un serveur Subversion. Installation Pour installer Subversion, rien de plus simple, vous savez sûrement comment procéder : aptitude !

Installing Kodi on Raspberry Pi 2 (Raspbian Wheezy) The time has come to test out Kodi on the Raspberry Pi 2 with the Raspbian Wheezy distribution.
I’ve been wanting a MediaCenter or HTPC with Kodi (formerly XBMC) for a while. I didn’t want the machine to make a lot of noise, since I’m going to use it in my bedroom. The Raspberry Pi 2 seems perfect for this job, with no fans or moving parts at all, this should be a completely silent system. Before I go on, I would like to thank Michael Gorven at for providing some of the instructions I used to achieve this. I took the liberty of copying some of Mr. Installing The easiest way to install the package is to add Michaels archive to your system. Sudo nano /etc/apt/sources.list.d/mene.list then paste the following into the file mene.list: deb wheezy contrib then import the archive signing key by issuing the following command: sudo apt-key adv --keyserver keyserver.ubuntu.com --recv-key 5243CDED Then update the package lists:
View topic - WiFi nearly working , now have wpa_supplicant fail problem. Networking - Wifi drops on raspberry PI. Current community your communities Sign up or log in to customize your list. more stack exchange communities.
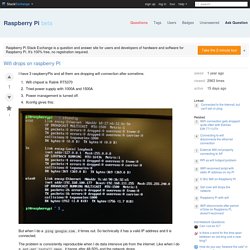
Wireless - Connected to the Internet, but can't ssh or ping. Current community your communities Sign up or log in to customize your list.
Getting Started. Edit on GitHub JSFiddle # The easiest way to start hacking on React is using the following JSFiddle Hello World examples: Create React App # Create React App is a new officially supported way to create single-page React applications.
Configuring WPA2 using wpa_supplicant on the Raspberry Pi. To use WPA2 pre-shared key on the Raspberry Pi, you will first need to add a network configuration to “/etc/wpa_supplicant/wpa_supplicant.conf”.
Note the lack of space in “network={“. ctrl_interface=DIR=/var/run/wpa_supplicant GROUP=netdev update_config=1 network={ ssid="Your SSID Here" proto=RSN key_mgmt=WPA-PSK pairwise=CCMP TKIP group=CCMP TKIP psk="YourPresharedKeyHere" } After you have modified wpa_supplicant.conf, you will need to change the “wlan0″ section of “/etc/network/interfaces”.
For a static IP, it will look like this: Tutorial - How to give your Raspberry Pi a Static IP Address. To log in to your Raspberry Pi remotely, you'll need the IP of the Raspberry Pi – this is basically like your house address and tells the host computer where to look for it on the network.
By default, the Raspberry Pi will be given an IP automatically by the router (called Dynamic IP and denoted by DHCP) when you connect to a network. However, this can change whenever you remove the Pi from the network e.g. turn it off. Having a static IP isn't essential, however it will make repeated access to the Raspberry Pi via SSH much simpler, as you'll always know that the Raspberry Pi has the same address. Imagine how much trouble your postman would have if your house constantly changed location :) Can't set guest read/write samba share.
Linux pour débutant: Serveur Samba. Ch09. The rest of this section is about using the PAM module provided in the Samba distribution to enable Windows domain users to authenticate on the Linux system hosting Samba.
Depending on which services you choose to configure, this allows Windows domain users to log in on a local console (or through telnet), log in to a GUI desktop on the Linux system, authenticate with an FTP server running on the Linux system, or use other services normally limited to users who have an account on the Linux system.
The PAM module authenticates Windows domain users by querying winbind, which passes the authentication off to a Windows NT domain controller. How to Create a Network Share Via Samba Via CLI (Command-line interface/Linux Terminal) - Uncomplicated, Simple and Brief Way! In this text, I teach how to create a network share via Samba using the CLI (Command-line interface/Linux Terminal) in an uncomplicated, simple and brief way targeting Windows users.
All commands must be done as root (precede each command with 'sudo' or use 'sudo su'). Install Samba sudo apt-get update sudo apt-get install sambaSet a password for your user in Samba sudo smbpasswd -a <user_name>Note: Samba uses a separate set of passwords than the standard Linux system accounts (stored in /etc/samba/smbpasswd), so you'll need to create a Samba password for yourself.
Quick and dirty Samba setup. Most current Linux distributions, including Slackware 11, have Samba already installed and running after the system boots. This article assumes that Samba has been installed. The commands work for Slackware version 11 and 10.2, and likely many other Linux distros. The first step is to create a share folder on your hard drive; for instance, /disk2/data. Donnez de l’espace à votre framboise314 : Un disque dur pour le Raspberry Pi. Arc Software Consultancy using the Raspberry Pi. The goal of this article is to configure the Raspberry Pi so that it can integrate into an existing Windows Networking environment without needing to make changes to any of the other, perhaps numerous, Windows PCs.
I know that there are numerous other ways to achieve networking like this though so please don’t feel the need to tell me about them in the comments below. Please note that I will be doing a version of this article for the Apple Macintosh too. Turn an Old PC Into a NAS, VPN, Media Streamer, and More with Amahi. Adafruits-raspberry-pi-lesson-3-network-setup.pdf. Raspberry Pi Static IP Address & how to configure course Tutorial. The Raspberry Pi is automatically set to obtain an IP address from your wired or wireless network. Why does the Raspberry Pi need an IP address? This address is needed so that any traffic destined for your Raspberry Pi will be able to find it on the network. This is method of obtaining an IP address is called DHCP or Dynamic Host Configuration Protocol.
It is sometimes referred to as a dynamic IP. Your router will normally distribute these IP addresses but it isn’t guaranteed that it will get the same IP address every time. Seafile Server Manual. Configurer le réseau du Raspberry-Pi. Contrôlez votre Raspberry Pi depuis un smartphone Android. Release seafile server 4.2.2 for raspberry pi · haiwen/seafile-rpi. Pitié pour la carte SD de votre framboise314 : Bootez sur un disque dur USB. Using Network Storage on the Raspberry Pi. It is highly likely that you are using an 8GB SD or Micro SD card with your Raspberry Pi. This is adequate for many purposes, but if you fully load your Pi with additional applications (see my tutorial on installing more applications on your Pi), you may find yourself running short on space. Of course, you can use a larger SD card, but if you have a Network Attached Storage (NAS) at home, you can access and store files on the NAS.
In this tutorial you will learn how to access that external device. Note, however, that there may be differences depending on what device you are using. Raspberry Pi, Arduino, Accessories & More. Raspberry Pi et DLNA grâce à minidlna. Linux Commands In Structured Order. Raspberry PI 2 B first time Setup (1/2 Hr Process to full GUI and WIFI) + FREE PI 2 Model B's. Getting started with NOOBS. Hébergement de fichiers avec Seafile pour Raspberry Pi. Hébergement de fichiers avec Seafile pour Raspberry Pi. Amazon. Tests vitesse accès disque RaspberryPi. Pitié pour la carte SD de votre framboise314 : Bootez sur un disque dur USB. Releases · haiwen/seafile-rpi. Amazon. RaspberryPi.fr - Liens. Bien choisir les accessoires de votre Raspberry Pi 2. La Raspberry Pi 2 est sortie et elle est absolument géniale. Plus rapide, plus puissante, toujours aussi abordable, et supportant désormais Windows 10. Lors de la sortie de la Raspberry Pi 2 nous vous avions dit que nous sortirions un guide pour vous aider à choisir les accessoires de votre Raspberry Pi 2, le voici.
Nous allons découper ce tutoriel en trois parties, les accessoires obligatoires, ceux utiles, et ceux qui vous serviront dans des cas un peu spécifiques. Nous essaierons d’être aussi clairs, et surtout concis, que possible. Les accessoires présentés dans cet article sont également utilisables pour la Raspberry Pi B+. Les accessoires obligatoires La Raspberry Pi est livrée nue, sans clavier, sans alimentation, bref toute seule. Sans les accessoires que nous vous présentons ici, vous ne pourrez pas démarrer la Raspberry Pi. Raspberry pi & Raspbian - Premier site de tutoriels en France.