
Single-Board Computers. As I expected, the BBB SDR road test would lead me down an exciting road to discovery.

I have not been disappointed. The 1st step was of course to unpack all of the components of the road test package. I was impressed by the small size of the SDR USB dongle. I have had previous experience with the BeagleBone Black, having purchased one in late 2013. I admit to requiring a moment to figure out exactly how the LCD display mounts on top of the BeagleBone Black, since there wasn't any documentation specifically explaining which direction it was to be mounted. Orientation. For your own reference, the LCD display mounts with the left side of the display above the 5 V power connector and ethernet connector of the BeagleBone Black. Right side of the LCD display, which contains the 5 pushbuttons for controlling the display, hangs over the right side of the BeagleBone Black above the USB connector. The display is easy to mount into the 2 sets of header sockets on the top of the BeagleBone Black.
CUBIEBOARD2. Par X.
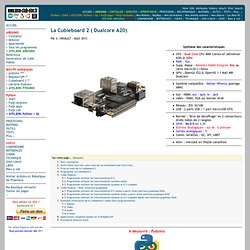
HINAULT - Août 2013 A découvrir : Pyduino la librairie qui vous permet de programmer votre miniPC comme une carte Arduino... et bien plus encore ! Vous en avez rêvé ? Www.mon-club-elec.fr l'a fait ! 1. 2. 3. Vous avez mis à jour le système, votre Cubieboard 2 démarre sans problème et vous vous êtes familiarisé avec Gnu/Linux ? Personnaliser le système de base Manip' simples : personnaliser le système, activer l'accès distant, tester la vidéo]] PDFmanip' plus avancées : mise en place d'un partage de fichier NFS, activation et paramétrage du wifi, Utiliser la Cubieboard 2 Apprendre à utiliser la Cubieboard 2 en accès distant par le réseau éthernet ou wifi]] PDF 4.
Programmer le Cubieboard 2 aussi facilement qu'Arduino, çà vous tente ?
CubieBoard: le Raspberry surboosté. Il y a quelques mois j’avais commencé par vous parler de la carte Arduino, une petite carte peu couteuse permettant de réaliser de nombreuses choses: robots, drones, systèmes domotiques, etc… Ensuite est venue la Raspberry Pi, une carte plus évoluée, plus proche de l’ordinateur, toujours à un prix très attractif (30$), permettant de réaliser des robots, mais également des systèmes plus gourmands, comme on a pu le voir dans la réalisation d’un boitier Media Center.
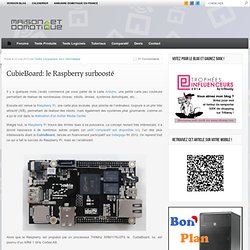
Malgré tout, le Raspberry Pi trouve des limites dues à sa puissance. Le concept restant très intéressant, il a donné naissance à de nombreux autres projets (un petit comparatif est disponible ici), l’un des plus intéressants étant la CubieBoard, lancée en financement participatif sur Indiegogo fin 2012. On reprend tout ce qui a fait le succès du Raspberry Pi, mais en l’améliorant. Alors que le Raspberry est propulsé par un processeur 700Mhz ARM1176JZFS le CubieBoard, lui, est pourvu d’un ARM 1 GHz Cortex-A8. Installing Ubuntu on the Cubieboard with Berryboot.