
Vintage Analogue. Skill Level: Intermediate In this tutorial I’ll show you how you can achieve an old analogue camera style effect with washed out colours and light leaks, all in Photoshop.

First open up your photo in Photoshop. Click on the adjustment layer button at the bottom of the layers panel, and choose Curves. Choose Green form the dropdown box, and move the green line to a horizontal position as shown above. Then choose Blue, and move the blue line to a diagonal position as shown above (the red line can stay as it is). Now change this layer’s blending mode to Soft Light. Next add a Solid Color adjustment layer, and set the colour to 927cff. Double Exposures - Simple Steps — Brandon Kidwell. So much of my process depends on the original photo so I'm going to spend some time describing how I found success with this process and it all started in November, 2013 with the photo above.
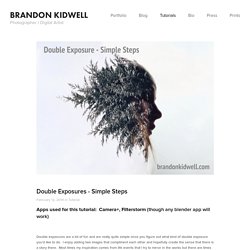
The above photo is unedited and taken with my iPhone5 and the Camera+ app (great for it's superb exposure control). Notice there are no distracting elements in the background, the subject is approximately 80% silhouetted with light highlighting her facial features. This setting is key in creating interesting double exposures without complicated editing (we'll get to that in later tutorials). I have found that foggy or rainy days are best as the natural light is not too harsh and any distracting elements in the background such as colors and clouds are usually obscured.
Choose a spot such as a window or front porch at a location with nothing in the background. Below is another example of a photo I have used before you might recognize if you're familiar with my work. Browsing Photoshop Actions on DeviantArt. The Best Ways To Make Your Photos Black & White. If you have an interest in Photography chances are one day you’ll want to convert one of your images to black and white to achieve that atmospheric and intense look.

The actual process can be as easy as clicking a button, but what are the best ways to make your photos black and white in Photoshop? In this post I’ll cover some of the popular techniques and describe which methods give the best results. First, let’s take a look at some of the common mistakes people make when trying to turn their photos to black and white. Beginners to Photoshop: Photo Editing is Easier Than You Think! 500+ Free Professional Photoshop Actions. Photoshop Actions are recorded series of tasks in Photoshop, such as filters, adjustments and more.
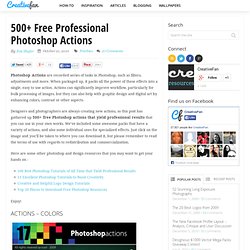
When packaged up, it packs all the power of these effects into a single, easy to use action. Actions can significantly improve workflow, particularly for bulk processing of images, but they can also help with graphic design and digital art by enhancing colors, contrast or other aspects. CoffeeShop Actions and Presets! If you would like to help support this blog and get all of my favorite Photoshop/PSE actions and LR presets in one convenient download (over 170 actions and now even my favorite Lightroom presets!)

, please click here to read all about it. Post any questions or broken link reports to the CoffeeShop Facebook Page.ACTION/PRESET TERMS OF USE: 1. Do not redistribute, repackage, post for download, or sell "as is" anything on this blog.2. Do not link directly to any of my downloads on this site. Retouching: These are all of my retouching actions, including PowderRoom and Perfect Portrait. How To Give Your Photos a Cool Retro Analog Effect. Back in the days of analog photography imperfections were part of the job.

Colour washes, light leaks, vignettes and blurs were all common problems that appeared during the processing of your film, particularly from cheap cameras such as the Holga, or simply down to human error. While these problems don’t affect digital cameras, we can recreate the cool effects in Photoshop to give our shots that cool lo-fi retro effect. View large scale photograph You don’t have to look far before finding quality examples of old style analog photography.
Curvy Cross Processing in Photoshop CS3 - Layers Magazine. This tutorial describes one of my favorite techniques for ‘spicing’ up a photograph. This method is adapted from the color darkroom of old. In those days, innovative photographers often processed film in a chemical solution intended for another type of film. For instance, they might process color slide film in C-41 chemicals. The result yielded a most unusual shift in color, which created a very retro look. To recreate this technique using the computer is both easy and fun. Begin with a processed image that has high contrast. Repeat this process by adding yet another curves adjustment layer, this layer will be used to create the cross processed look. The basic rule of thumb is to raise the red and green in the highlights, and to drop the red and green in the shadows. Drop the blue in the highlights and raise the blue in the shadows. Note as you work through the previous steps that much of the adjusting is based on your own personal preference.
Photoshop Tutorial: Getting that great X-PRO LOMO look. Browsing deviantART. 45 Photoshop Actions To Enhance Your Photos And Stand Out. Google Traduire. Google Traduire. Google Traduction. Google Traduire.