
Canon EF Lens adapter for Raspberry Pi by charmlee. Pi Moon Camera - The MagPi MagazineThe MagPi Magazine. Shooting the moon has been an obsession of James Mitchell’s for a very long time.

After several failed attempts to get a clear photo from various cameras and lenses over the years, he decided “on a bit of a whim” to give it a go with a Raspberry Pi Camera Module. The full article can be found in The MagPi 45 and was written by Lucy Hattersley “I have been working on pushing the limits of the Pi camera for a while,” James tells us. One of his first pictures was a long exposure of a Lego figure, which won him the runner-up prize in an Adafruit competition. “I wanted to use my lenses to improve on that.” The lens adapter is 3D printed and allows you to use DSLR lenses with the Pi camera After discovering a design for a Canon lens adapter for the Pi by Charmlee, James got a 3D print made at his local Berlin printing cafe and was impressed: “Everything simply slots together. All the kit necessary to take some moon photos.
DSJTAG - 2 in 1 USB JTAG cable for FPGA/CPLD. DSJTAG is a 2in1 USB JTAG cable for Xilinx or Altera FPGA/CPLD.The function of DSJTAG can be toggled by a switch.When switch down, DSJTAG act as a Xilinx FPGA JTAG, and compatible with Xilinx Platform Cable USB I.
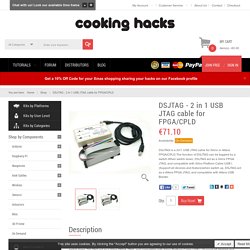
(Support all devices and feature)when switch up, DSJTAG act as a Altera FPGA JTAG, and compatible with Altera USB Blaster. (Support all devices and feature)DSJTAG will become your friend when you work with FPGA.DSJTAG will let you never worry about which FPGA should be selected.You can use DSJTAG with ISE or Quartus, whatever you want. Features Function1: Xilinx Platform USB Cable I Function2: Altera USB Blaster Compatible with Altera USB Blaster, support Quartus II/SignalTap IISupport all the altera device, include Cyclone III and Stratix II, .etcSupport AS/PS/JTAG modeSupport communication with Nios II and in-system debugBi-color status LED.
Virtex II-Pro Programming from Raspberry Pi - Community Forums. CPLD Development Boards - Mike Richards g4wnc. I’ve been spending a lot of time recently playing with CPLDs (Complex Programmable Logic Devices).

These are wonderful devices for the logic experimenter as you can build your own dedicated logic chips! I started by getting the excellent Guzunty Pi which is an excellent value board complete with software that allows you to load different cores onto the CPLD that forms the heart of the Guzunty Pi. Buy XC9572XL CPLD development board v1b [102990001] Ever get stuck choosing the right logic chip combination or voltage level translator?
![Buy XC9572XL CPLD development board v1b [102990001]](http://cdn.pearltrees.com/s/pic/th/xc9572xl-development-102990001-121768512)
Buy XC2C64A CoolRunner-II CPLD development board [102990004] Ever get stuck choosing the right logic chip combination or voltage level translator?
![Buy XC2C64A CoolRunner-II CPLD development board [102990004]](http://cdn.pearltrees.com/s/pic/th/coolrunner-development-121768450)
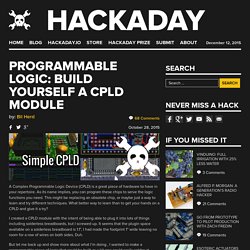
Give up the hunt and create your own custom logic chip. CPLDs can give you the logic you need, with the pinout you want, while saving board space and board revisions. The CoolRunner-II XC2C CPLD has two separate banks of pins that can operate at different voltages, internal pull-up resistors, and pin keepers. This development board from Dangerous Prototypes will help you build your first custom logic chip using simple schematic entry, Verilog, or VHDL. Programmable Logic: Build Yourself a CPLD Module. A Complex Programmable Logic Device (CPLD) is a great piece of hardware to have in your repertoire.
CPLD Programming over GPIO. Guzunty Pi. New users start here. Here is a question that came on the Guzunty wiki, but which is of general interest: Thanks for asking this, Toshi.
Well Toshi, you are almost on the right track. We really have two separate things here, reading input pins and reading the state set on an output pin. First of all, the inputs. You mentioned that you have not yet tried driving the input pins yet. The Pi4J Project - Home. Interfacing5v. Assume you have some nice 5V only chip you want to use with the Raspberry Pi.
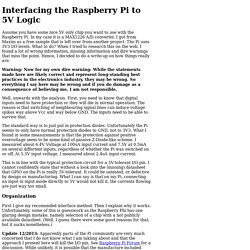
In my case it is a MAX1226 A/D converter, I got from Maxim as a free sample that is left over from another project. The Pi uses 3V3 I/O levels. What to do? When I tried to research this on the web, I found a lot of wrong information, missing information and dire warnings that miss the point. Hence, I decided to do a write-up on how things really are. Warning: Now for my own dire warning: While the statements made here are likely correct and represent long-standing best practices in the electronics industry, they may be wrong. Well, onwards with the analysis. The standard way is to just put in protection diodes. Detailed Description of the RHT03 / DHT22 / AM2302 sensors. Hello Everybody Again, I apologize for not being clear.

The question which I am trying to address is how to connect the sensor to raspberry pi using about 3-5m cable (10-15ft) with minimum amount of additional hardware. Learn.adafruit. RFduino expands Raspberry Pi capabilities with Bluetooth® Smart. Los Angeles, CA – May 11, 2015 – RF Digital, the makers of the RFduino, the massively successful miniature wireless Arduino compatible module, are at it again: developers can now develop and program the RFduino directly from the Raspberry Pi, no PC needed.
Developers can use the RFduino to easily connect Raspberry Pi to smartphones and tablets. Additionally, RFduino now supports several new Linux builds, such as Ubuntu, Fedora, OpenSUSE, Mint and, of course, Rasbian, further empowering developers on their platform of choice. “We continue to evolve the RFduino – it’s the most friendly and powerful Bluetooth® Smart module and ecosystem out there,” said Armen Kazanchian, CEO, RF Digital. “Raspberry Pi and Linux users can now join in with Windows and Mac users, and easily add Bluetooth® Smart to their projects.
This speeds up design cycles and makes it easy and cost efficient to develop with Bluetooth® Smart, and will certainly bring more Internet of Things applications to life.”
Oscilloscope Specializing in Arduino compatible development boards and modules, oscilloscopes and other Electronics.