
Connect Raspberry Pi to QNAP NAS via QIoT Suite Lite - QNAP QIoT. Get started with Raspberry Pi (Nodejs) In this tutorial, you begin by learning the basics of working with Raspberry Pi that’s running Raspbian which is a free operating system based on Debian optimized for the Raspberry Pi.
Connect Raspberry Pi to QNAP NAS – Lesson 4 - QNAP QIoT. There are four parts:
Connect Raspberry Pi to QNAP NAS - Lesson 3 - QNAP QIoT. Connect Raspberry Pi to QNAP NAS – Lesson 2 - QNAP QIoT. In this lesson, you provision your QNAP QIoT Suite Lite software, and create your first device in QIoT Suite Lite.
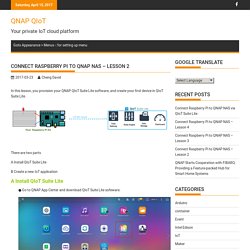
There are two parts A Install QIoT Suite Lite B Create a new IoT application A Install QIoT Suite Lite ● Go to QNAP App Center and download QIoT Suite Lite sofeware. ● Launch and log in QIoT Suite Lite software. B Create a new IoT application IoT Application is a combination of multiple Things, Rule, and Dashboard. The Rule makes it possible to build IoT applications that gather, process, analyze and act on data generated by connected devices based on business rules you define.
With Dashboard, you can turn your data processing efforts into analytics and reports that provide real-time insights into your business. All these elements provide user a complete IoT Application environment. Connect Raspberry Pi to QNAP NAS - Lesson 1 - QNAP QIoT. In this lesson, you configure your Raspberry Pi device with an operating system, set up your development environment, and deploy an application to Raspberry Pi.

There are three parts: A What will you need B Set up Raspbian C Install Nodejs and required libraries A What will you need ● A Raspberry Pi ● SD card : an 8GB class 4 SD card is recommended, ideally preinstalled with NOOBS. ● A HDMI television or monitor : You will need to connect your Raspberry Pi to a display, which means you’ll need an HDMI-enabled screen of some kind. ● Keyboard and mouse : Any standard USB and mouse will work with your Raspberry Pi. ● Power Supply : The Pi is powered by a USB Micro power supply (like most standard mobile phone charger). B Set up Raspbian ● Put the SD card containing extracted NOOBS files into Raspberry Pi ● Connect keyboard, mouse, and HDMI monitor to the Raspberry Pi, then plug in your power adapter. . ● Now, let NOOBS run the installation process, which may take 10 or 20 minutes. Connect Raspberry Pi to QNAP NAS – Lesson 2 - QNAP QIoT. How to connect NAS and Raspberry pi via Container Station - QNAP QIoT.
Today, will sharing own private cloud with Raspberry Pi and Container in IoT application.
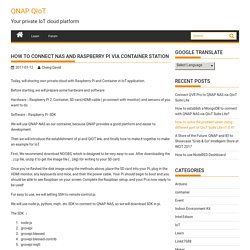
Before starting, we will prepare some hardware and software Hardware:Raspberry Pi 2, Container, SD card,HDMI-cable ( pi connect with monitor) and sensors of you want to do. Software:Raspberry Pi -SDK We will use QNAP-NAS as our container, because QNAP provides a good platform and easier to development. Then we will introduce the establishment of pi and QIOT link, and finally how to make it together to make an example for IoT.
First, We recommend download NOOBS, which is designed to be very easy to use. Once you’ve flashed the disk image using the methods above, place the SD card into your Pi, plug in the HDMI monitor, any keyboards and mice, and then the power cable. For easy to use, we will setting SSH to remote control pi. We will use node-js, python, mqtt..etc SDK to connect to QNAP-NAS, so we will download SDK in pi. The SDK : ControlEverything.com. Plans and features — Blynk. Blynk. IoT Cloud Platform Landscape. Developing for the Internet of Things is a complex endeavor, and nobody wants to do it from scratch.
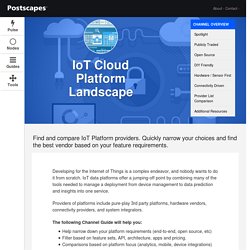
IoT data platforms offer a jumping-off point by combining many of the tools needed to manage a deployment from device management to data prediction and insights into one service. Providers of platforms include pure-play 3rd party platforms, hardware vendors, connectivity providers, and system integrators. The following Channel Guide will help you: Help narrow down your platform requirements (end-to-end, open source, etc)Filter based on feature sets, API, architecture, apps and pricing.Comparisons based on platform focus (analytics, mobile, device integrations) Spotlight Featured IoT Cloud Solution "Ayla's Enterprise Software Solutions Provide the Powerful Tools Needed to Deploy Connected Products Globally" Publicly Traded IoT Cloud Platform solutions backed by large publicly traded companies "Reliably scale to billions of devices and trillions of messages. " Highlights More.
Visualize (and push) your IOT data - Application Development - The Things Network. Building a cellular tracker: Part4 – Which cloud-service to chose for storing the data. As described earlier, i want to create a cellular tracker – below i am going to describe where to store the data… Tracking sensor-data only makes sense if the data is being stored in a central place for further action.
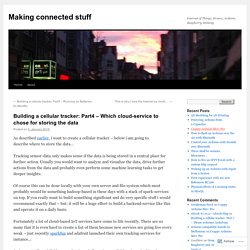
Usually you would want to analyze and visualize the data, drive further actions from the data and probably even perform some machine learning tasks to get deeper insights. Of course this can be done locally with your own server and file-system which most probably would be something hadoop-based in these days with a stack of spark-services on top. If you really want to build something significant and do very specific stuff i would recommend exactly that – but: it will be a huge effort to build a backend-service like this and operate it on a daily basis. Fortunately a lot of cloud-based IoT services have come to life recently. I tried to use xively, but after weeks i still seem to be on a waiting list to get an account. Like this: Like Loading... 9 of the most popular cloud platform for IOT developers. - Seeed.cc. IoT Cloud Platform Landscape. Visualize (and push) your IOT data - Application Development - The Things Network.
Which is better for doing projects based on IoT, Thingspeak API or Webiopi API on raspberry pi 2 for beginners? - Quora. 9 of the most popular cloud platform for IOT developers. - Seeed.cc. Pricing Tropo. Contents - HomoFaciens. Internet Of Things - HomoFaciens. Start The Project Technology RoboSpatium Contribute Subject index News Download Responses Games Links Contact <<< Physical computing Stationary engines >>> The video Remote control At the previous chapter about Physical computing we have learned how to connect peripherals to GPIOs.
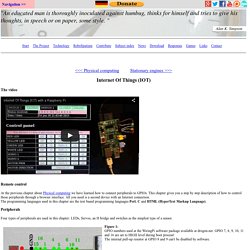
This chapter gives you a step by step description of how to control those peripherals through a browser interface. Peripherals Four types of peripherals are used in this chapter: LEDs, Servos, an H bridge and switches as the simplest type of a sensor. Figure 1: GPIO numbers used at the WiringPi software package available at drogon.net. Figure 2: The LEDs are connected through a 2kΩ serial resistor between GPIO and ground. Figure 3: The control lines (usually orange or white cable) of the servos are connected directly to the GPIOs.
Figure 4: An H bridge is used to feed an electric motor with changing polarity. Figure 5: The switches are connected to the GPIOs through 16kΩ resistors (R2 and R4). Warning! Sudo . Internet Of Things (IOT) with a Raspberry Pi. Jumpstart Projects with Cayenne - myDevices Cayenne.