
Untitled. Sometimes it's useful to automatically run a script on a Pi when it boots up.

You might want to start a script that monitors sensors, a Bittorrent client, or a program to back up your Pi to the internet. There are several ways of doing this, and each one has it's benefits. In the following examples I'm going to start a program called servod which manages a servo. The program runs in the background and uses the Pi's GPIO pins to set the position of a servo. /etc/rc.local The simplest method is to put a command in /etc/rc.local. When rc.local executes, the path environmanet variable (or any other environment variable) may not have been set up so it's important to use the program or script's full path. Similar problems can occur with programs that aren't meant to complete like servod, which runs continuously as a service or daemon.
/home/pi/servoblaster/PiBits/ServoBlaster/user/servod & Crontab The cron daemon is a Linux thread that runs once a minute. Sudo crontab -e. GPIO. GPIO pins can be used to connect devices to a computer so that it can control and monitor them.

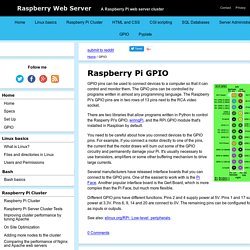
The GPIO pins can be controlled by programs written in almost any programming language. The Raspberry Pi's GPIO pins are in two rows of 13 pins next to the RCA video socket. There are two libraries that allow programs written in Python to control the Rasperry Pi's GPIO, wiringPi, and the RPi.GPIO module that's installed in Raspbian by default.
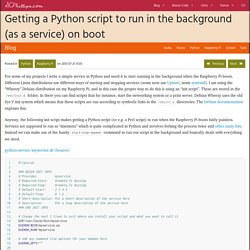
You need to be careful about how you connect devices to the GPIO pins. For example, if you connect a motor directly to one of the pins, the current that the motor draws will burn out some of the GPIO circuitry and permanently damage your Pi. Several manufacturers have released interface boards that you can connect to the GPIO pins. Different GPIO pins have different functions. See also: elinux.org/RPi_Low-level_peripherals. 0 Comments. Getting a Python script to run in the background (as a service) on boot. For some of my projects I write a simple service in Python and need it to start running in the background when the Raspberry Pi boots.

Different Linux distributions use different ways of starting and stopping services (some now use Upstart, some systemd). I am using the “Wheezy” Debian distribution on my Raspberry Pi, and in this case the proper way to do this is using an “init script”. These are stored in the /etc/init.d folder. In there you can find scripts that for instance, start the networking system or a print server. Debian Wheezy uses the old Sys V init system which means that these scripts are run according to symbolic links in the /etc/rc.x directories.
Google API. How to post data to Google sheets using ESP8266 - Embedded Lab. In the past couple years, the ESP8266 platform has flourished dramatically and emerged as one of the most popular hardware tools among electronics hobbyists and IoT enthusiasts.

Packed with a 32-bit RISC CPU running at 80 MHz, a fully integrated WiFi radio with TCP/IP protocol stack, serial peripherals (I2C, SPI, and UART), an ADC channel, and general purpose I/O pins, the ESP8266 is the most integrated and affordable WiFi solution available in the current IoT market space. An ESP8266 hardware, like NodeMCU and ESP-01, can directly interface with sensors using its peripherals and upload the sensor measurements to a local or a remote web server via internet. Right now, there are already quite a bit of cloud IoT platforms (ThingSpeak, thinger.io, TESPA.io, Xively, … the list is getting bigger everyday) that provides APIs and tools to allow the ESP8266 users to directly upload their sensor readings online for real-time visualization and global access. Hardware setup Software Output. Dht humidity sensing on raspberry pi with gdocs logging.
Better PWM on the Raspberry Pi. [Thomas] wanted to play around with a few high-power LEDs and a RaspberryPi.

LED controllers usually require some form of PWM to change the brightness of a LED, and unfortunately the Pi only has one PWM pin. [Thomas] could have gotten around this with a custom chip or even an Arduino hanging off the Pi’s USB port. He opted to go with software-based PWM, and did so in a way that is far superior to bit banging a pin.
Conventional wisdom says PWM without a real-time operating system is dumb – right up there with starting a land war in Asia. Turning a pin on and off in a while loop will eat up all the processor power in the Pi, so [Thomas] looked for a better way to do things. For [Thomas], though, [Richard]’s project wasn’t enough. [Thomas] now has a 40 Watt RGB LED powered by a Raspberry Pi burned into his retina, and the satisfaction of a really clever way of giving the Pi more PWM pins.