
Shiny Calligraphy Text Effect in Photoshop. Last week I posted some articles about typography and received quite a few emails asking me to create a tutorial on text effects. So I decided to play a bit with Photoshop to create a nice sort of 3D effect using a calligraphy font and a lot of Layer Styles. The effect is really simple and we will take a look at how to create patterns and light effects with Blend Modes. Step 1 Open Photoshop and create a new document, I used 1920x1200 pixels for the Size. Then fill the background with a very dark color #1f1e1e.
Step 2 With the Background layer selected go to Layer>Layer Style>Gradient Overlay. Step 3 Now go to Filter>Noise>Add Noise. Step 4 Let's add the text. Step 5 Now right below the "Abducted" line type "by". Step 6 Type the word "Design". Step 7 To make the effect more attractive let's add some swirls.
Polices à télécharger. Making of the Imaginary Paint Dancers. Grunge Stone Woman Photo Manipulation in Photoshop. In this design tutorial, we are going to perform a photo manipulation of a beautiful woman breaking free from the confines of her stone prison.
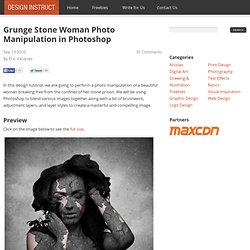
We will be using Photoshop to blend various images together along with a bit of brushwork, adjustment layers, and layer styles to create a masterful and compelling image. Preview Click on the image below to see the full size. Tutorial Resources Stock image: Makeup & Fashion on iStockphotoTextures: Texture Pack 04 (Paper texture pack) by AnOrderOfFishSticksTexture: rock texture 1 by MardukexBrushes: Crack Brushes i by HawksmontTexture: Free Nebula Dust Texture by Zerofiction Step 1: Isolate the Subject from the Background First, pick a stock photo of the model you want to feature.
I used the Makeup & Fashion stock photo from iStockphoto. If you happen to be fortunate enough to have a tablet, then that will make the job much easier. Step 2: Create a New Photoshop Document Once you have selected the color, click OK to accept the changes. Tutorial Summary. Simple Roy Lichtenstein Style in Illustrator and Photoshop. I have been playing with the Halftone filter in Photoshop for the past few weeks and trying different things we can do with it.
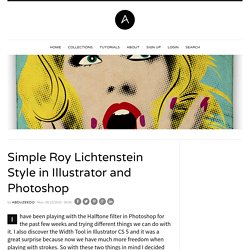
I also discover the Width Tool in Illustrator CS 5 and it was a great surprise because now we have much more freedom when playing with strokes. So with these two things in mind I decided that I had to create an image using them, and then the idea of a design inspired in Roy Lichtenstein. There are quite a few tutorials showing how to create this type of image, but I decided to try it myself. I haven't checked any tutorial because I wanted to play with the tools, so the technique might be the same as other tutorials but I really don't know. Create a Vibrant Colorful Alcohol Product Ad in Photoshop. Alcohol is one of the most commonly advertised products on the planet.

During major sporting events such as the Superbowl, the World Cup and the Olympics, companies spend millions on TV advertisements, and also product advertisements in banner and billboard format at the sporting venue itself. However, because alcohol is a liquid, it can be very difficult to design around since liquid stock images require significant more attention during isolation and blending in order to appear realistic. In this tutorial, you’ll learn how to create a vibrant, colorful alcoholic product advertisement in Adobe Photoshop, using some easy techniques and quality stock images. The creation of “A Life Of Aquatic Sounds” In this tutorial I will show you how I created “A Life Of Aquatic Sounds”.
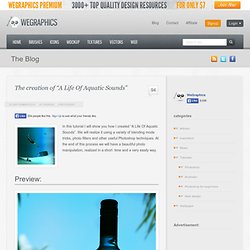
We will realize it using a variety of blending mode tricks, photo filters and other useful Photoshop techniques. At the end of this process we will have a beautiful photo manipulation, realized in a short time and a very easily way. Preview: Become a Premium Member and get unlimited access to source files and premium resources for only 7$/month. Click here to learn more. Step 1 In this step we will cover the beginning of our manipulation, simple document creation and placement of the base stock image as well as the hue change. Once you have your stock, go ahead and place it into your document as I have done below. We will change the hue of the liquid from red to blue.
Our image now looks like the this one: Creating a Shoe Advertisement Poster Using Floral Elements. Minimalistic Poster Design in Photoshop. Awesome Colorful Poster Tutorial. Hey guys this tuto is showing you how to use really cool colors on your images, in my case I created a poster with a good mix of typo and very strong colors.
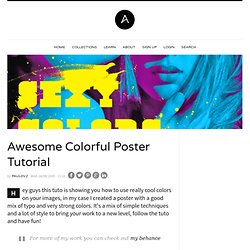
It's a mix of simple techniques and a lot of style to bring your work to a new level, follow the tuto and have fun! For more of my work you can check out my behance Yesterday while creating the post Amazing Ad Campaigns that was one ad campaign that really caught my attention, and it was the Ray-ban Colorize, the images used were so colorful and have so much live to it that amazed me.
So I decided to try to reproduce this effect and teach you guys how to do it.