
Make a clutch News, Video and Gossip - Jezebel. Jenna!
Kudos to you for keeping the awesome art of leather work alive! One tip on refining the raw edge laid against the zipper: - Use a superfine grit sandpaper to gently sand down the rawness of the cut edge of the leather - gently! - and kind of round out the straight edge cut by the rotary wheel. - Ink the edge with your sharpie. - Polish the edge using your beeswax, in either of 2 ways: buff using a piece of cotton muslin impregnated with beeswax (you'll have to melt the wax and soak the muslin which can be incredibly messy, but makes the buffing step easier); or carefully and lightly rub a little of the hard wax against the edge, then buff with a plain piece of muslin.
The sanding and beeswax not only spramp up that raw edge and gives an amazing artisan finish, it seals the raw edge of the leather, which protects and adds life to your piece. If you can't find bookbinding needles, most brick and mortar sewing stores carry tapestry needles in stock, in varying lengths and sizes. Make your own 6-pocket mini pocketbook and stay organized — insatiable need. I’m sure that many of you, like me, are on an eternal quest for organization.

I know I’m not alone in finding the Container Store’s promise of a perfect, organized life utterly seductive. But here’s the thing…I don’t really like purging, I love my stuff. Therefore I also love pretty things in which to stash my stuff, so I get to enjoy my fantasy of being organized and contained. This tutorial is about helping you stay organized, in a quick, easy, and super-cute way. It is a distilled version of the Holland Cox pocketbook, and is a breeze to make. The pattern …is only four rectangles. The body is 7.25″ tall.the large pocket is 5.5″ tallthe medium pocket is 4.25″ tallthe small pocket is 3″ tall materials needed I chose a vintage cotton canvas for the body in a bright retro floral, and quilting weight cotton in a matching color for the interior. You’ll also need a button and a bit of elastic for the closure, and a bit of ribbon for the pen. Start with the pockets 1. 2. The closure 3. 4. 6.
With Heart and Hands: Search results for japanese knot bag. My sewing room includes many accessories that I have designed and created, myself.
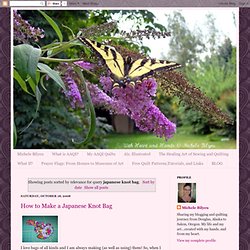
I love general sewing as much as I love quilting. So, whether I am sewing with my bigger Viking Sapphire 870 Quilt... or my much tinier ...Singer Featherweight...every one in our family gets new 'clothes', accessories, and fun craft and quilting supplies! Singer Featherweight: Sewing Accessories (small mat and a snippets bag) Tutorial I've made my own sewing machine pocket mats, magnetic wrist pincushions and wrist protectors, pincushions, pattern weights, snippets threadcatchers, roll-up scissors holders and many different sized tote bags for quilting supplies.
I love collecting, sharing, and using so many fun patterns that I am sharing my collection with you as my 'Frugal Friday' exchange. Like my 2,500 Free Quilt Patterns links, you must come back often, as the list will be continually updated! Free Pincushion, Pincushion/Thread Catcher,Armrest Pincushion Caddy Patterns: Make these pincushions: from BHG. Blog Archive » How to make men’s ties. Posted by Kathleen Fasanella on Jun 5, 2008 at 3:20 pm / Patterns, Process Reviews, Sewing, Tutorial / Trackback As I mentioned before, I visited my ex-step-mother last weekend and ended up picking through some clothes she was discarding.
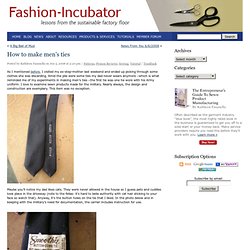
Amid the pile were some ties my dad never wears anymore –which is what reminded me of my experiments in making men’s ties –the first tie was one he wore with his Army uniform. I love to examine sewn products made for the military. Nearly always, the design and construction are exemplary. This item was no exception. Maybe you’ll notice my dad likes cats. You put the tie on, feed the underside through the carrier and then attach the underside to a shirt button and presto, no more recalcitrant flapping ties. As with any product, there’s varying ways to get the job done. Still, the websites are useful, there’s not much to it -with one exception related to padding below- the real trick being cutting them out. Mine were all made via reverse engineering. Sewing tutorials. Sewing.